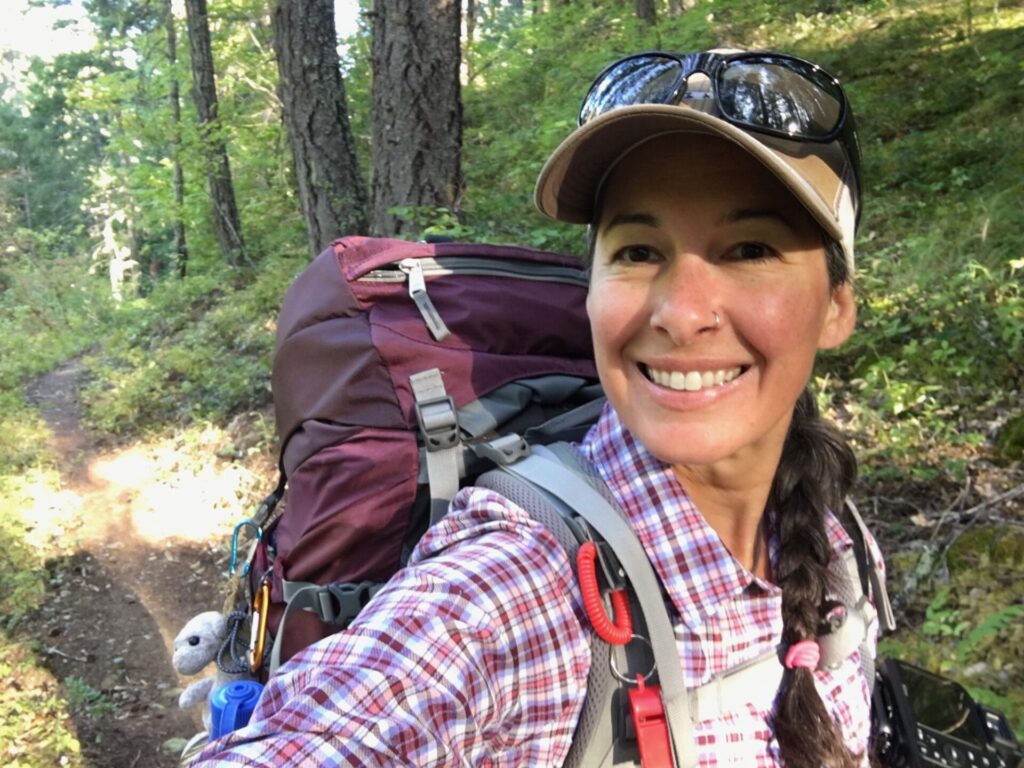
With extended time off work this past week, I decided to tackle my debt list, which is what I call my ever growing list of adventures to complete.
This summer and fall I’m focusing on a lot of backpacking loops in the North Cascades and Pasayten Wilderness, two of my favorite places to explore. The magic of the sprawling, lonely, fantastically wild Pasayten was imprinted on me a long time ago and I couldn’t wait to get back within its borders.
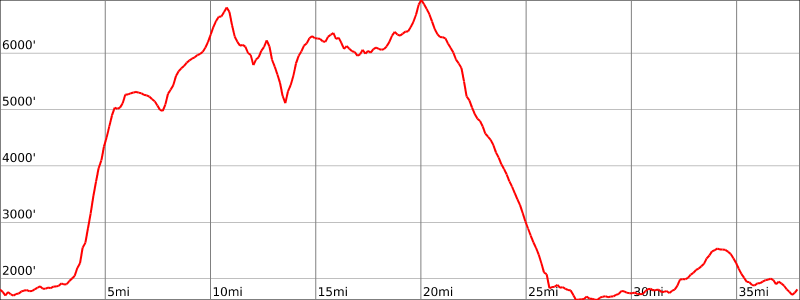
I kicked off my vacation with a 3-day/2-night solo backpack of the Devils Dome Loop, a 40ish mile loop known for its stout 11,000’ of climbing. Yep, it was a quad buster for sure, but it was also one of the most divine backpacking experiences I’ve ever had with surprising solitude, crimson sunsets, and those awesome North Cascades views. It may be called Devils Dome, but this loop is darn near a staircase to heaven.

The Devils Dome Loop.
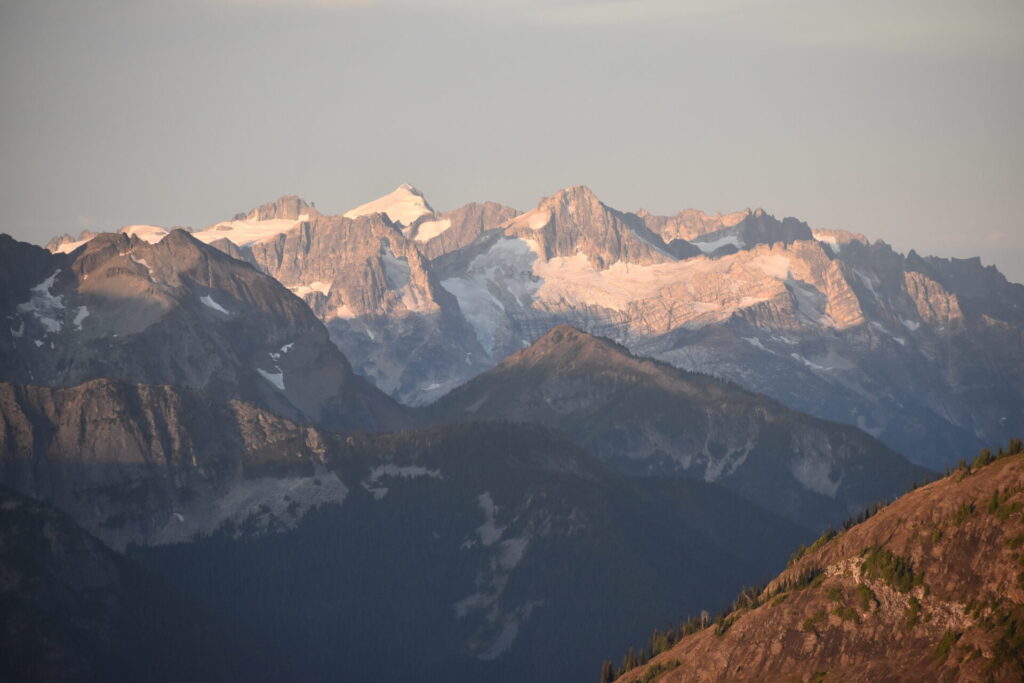
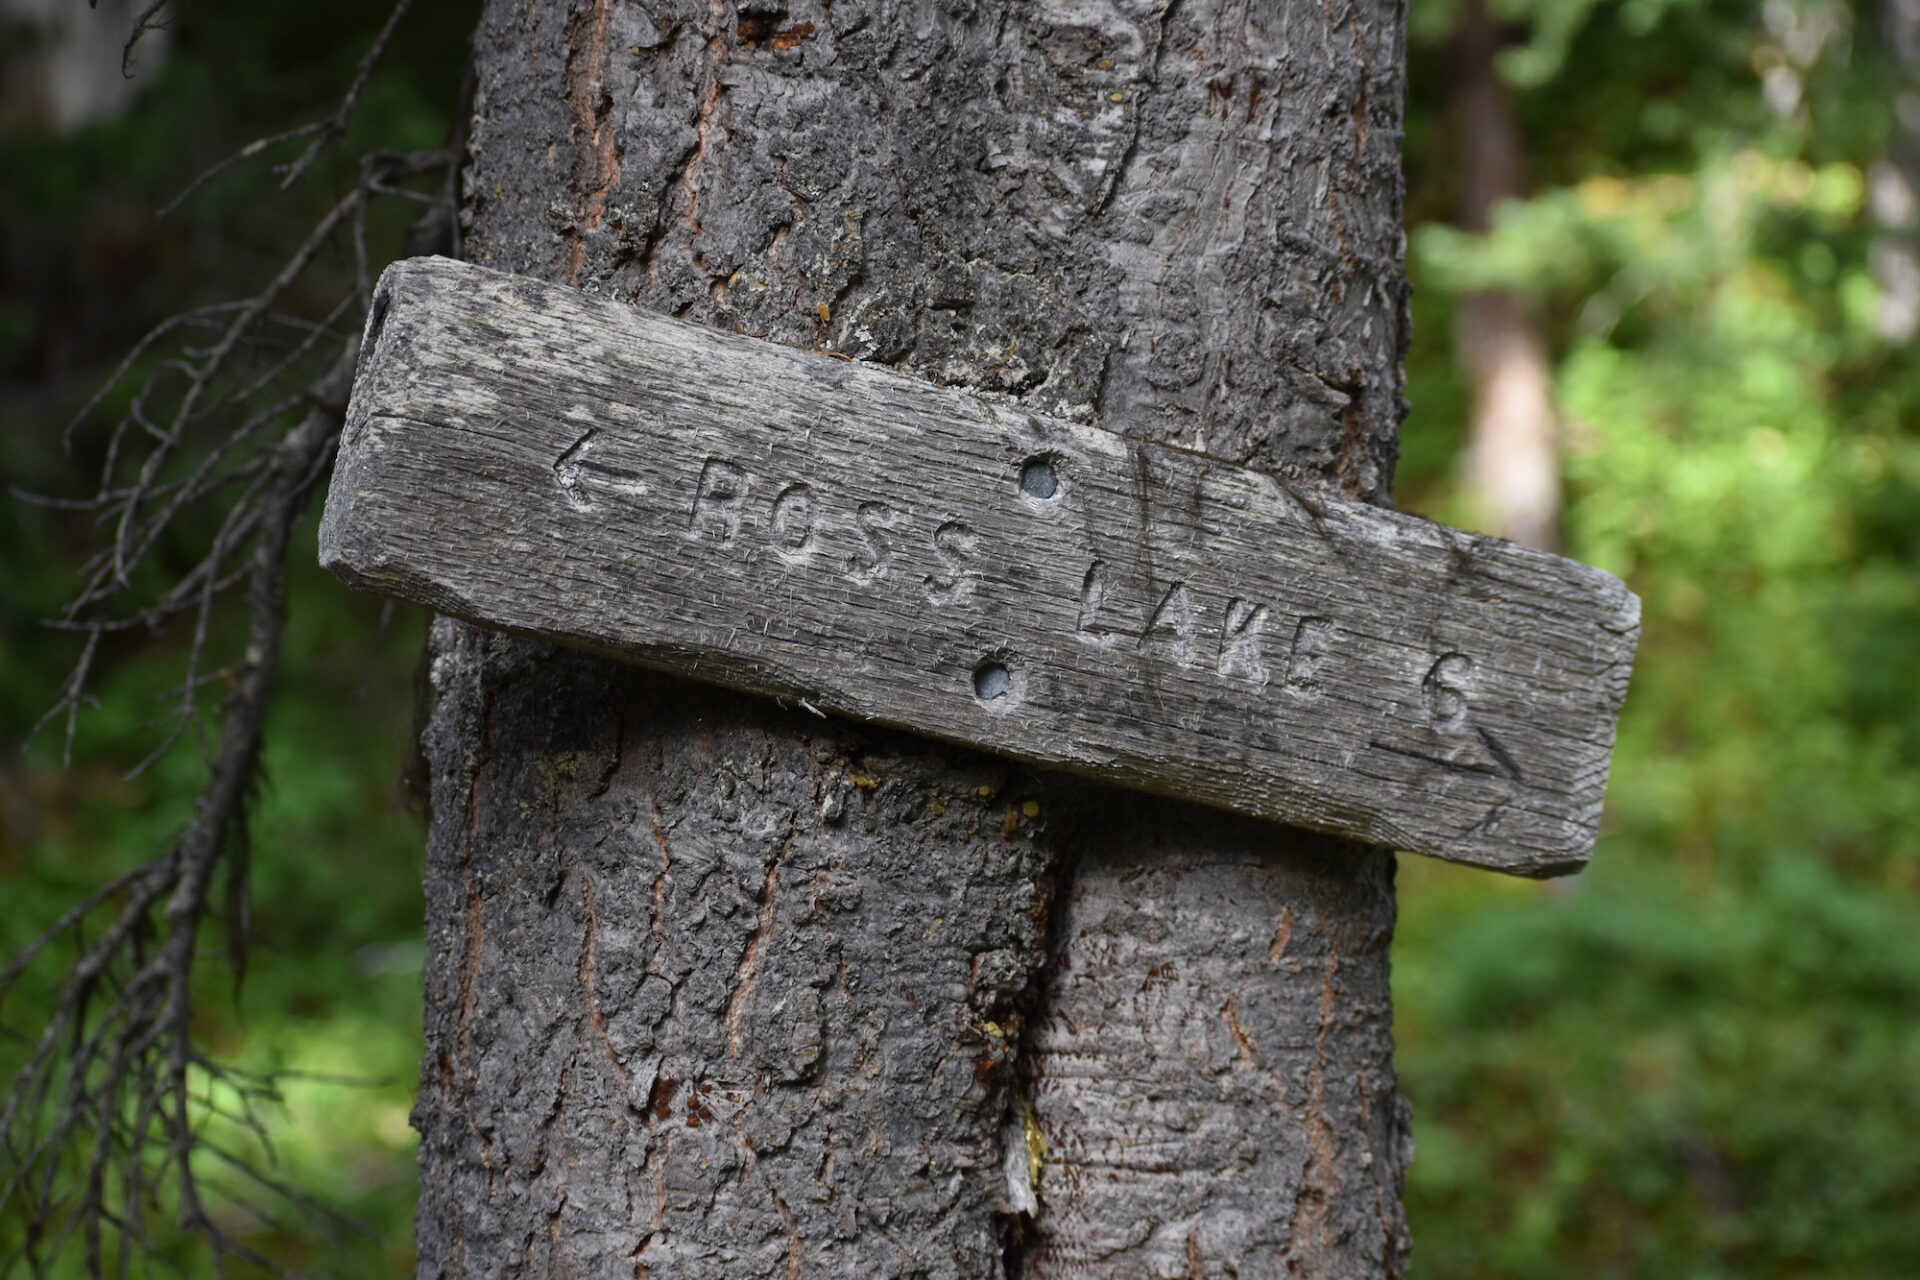
The Devils Dome loop lies almost entirely inside the western edge of the Pasayten Wilderness, weaving up and down high ridges and traversing subalpine meadows while circumnavigating 9,066’ Jack Mountain, the Pasayten’s tallest peak. The very western section of the loop travels along the eastern shore of Ross Lake, entering the Ross Lake National Recreation Area of the North Cascades National Park Complex. Camping anywhere along this section requires a backcountry overnight permit but the rest of the loop does not.
For my trip, I chose to complete the loop counterclockwise over 3 days, starting and ending at the East Bank trailhead off Highway 20 with my 3rd and last day being a long 18 mile hike out from Devils Dome, the high point of the loop and former fire lookout location. I picked counterclockwise as I figured that gave me a favorable elevation profile for that long, last day and it also eliminated the need for a backcountry overnight permit in the North Cascades NP section.
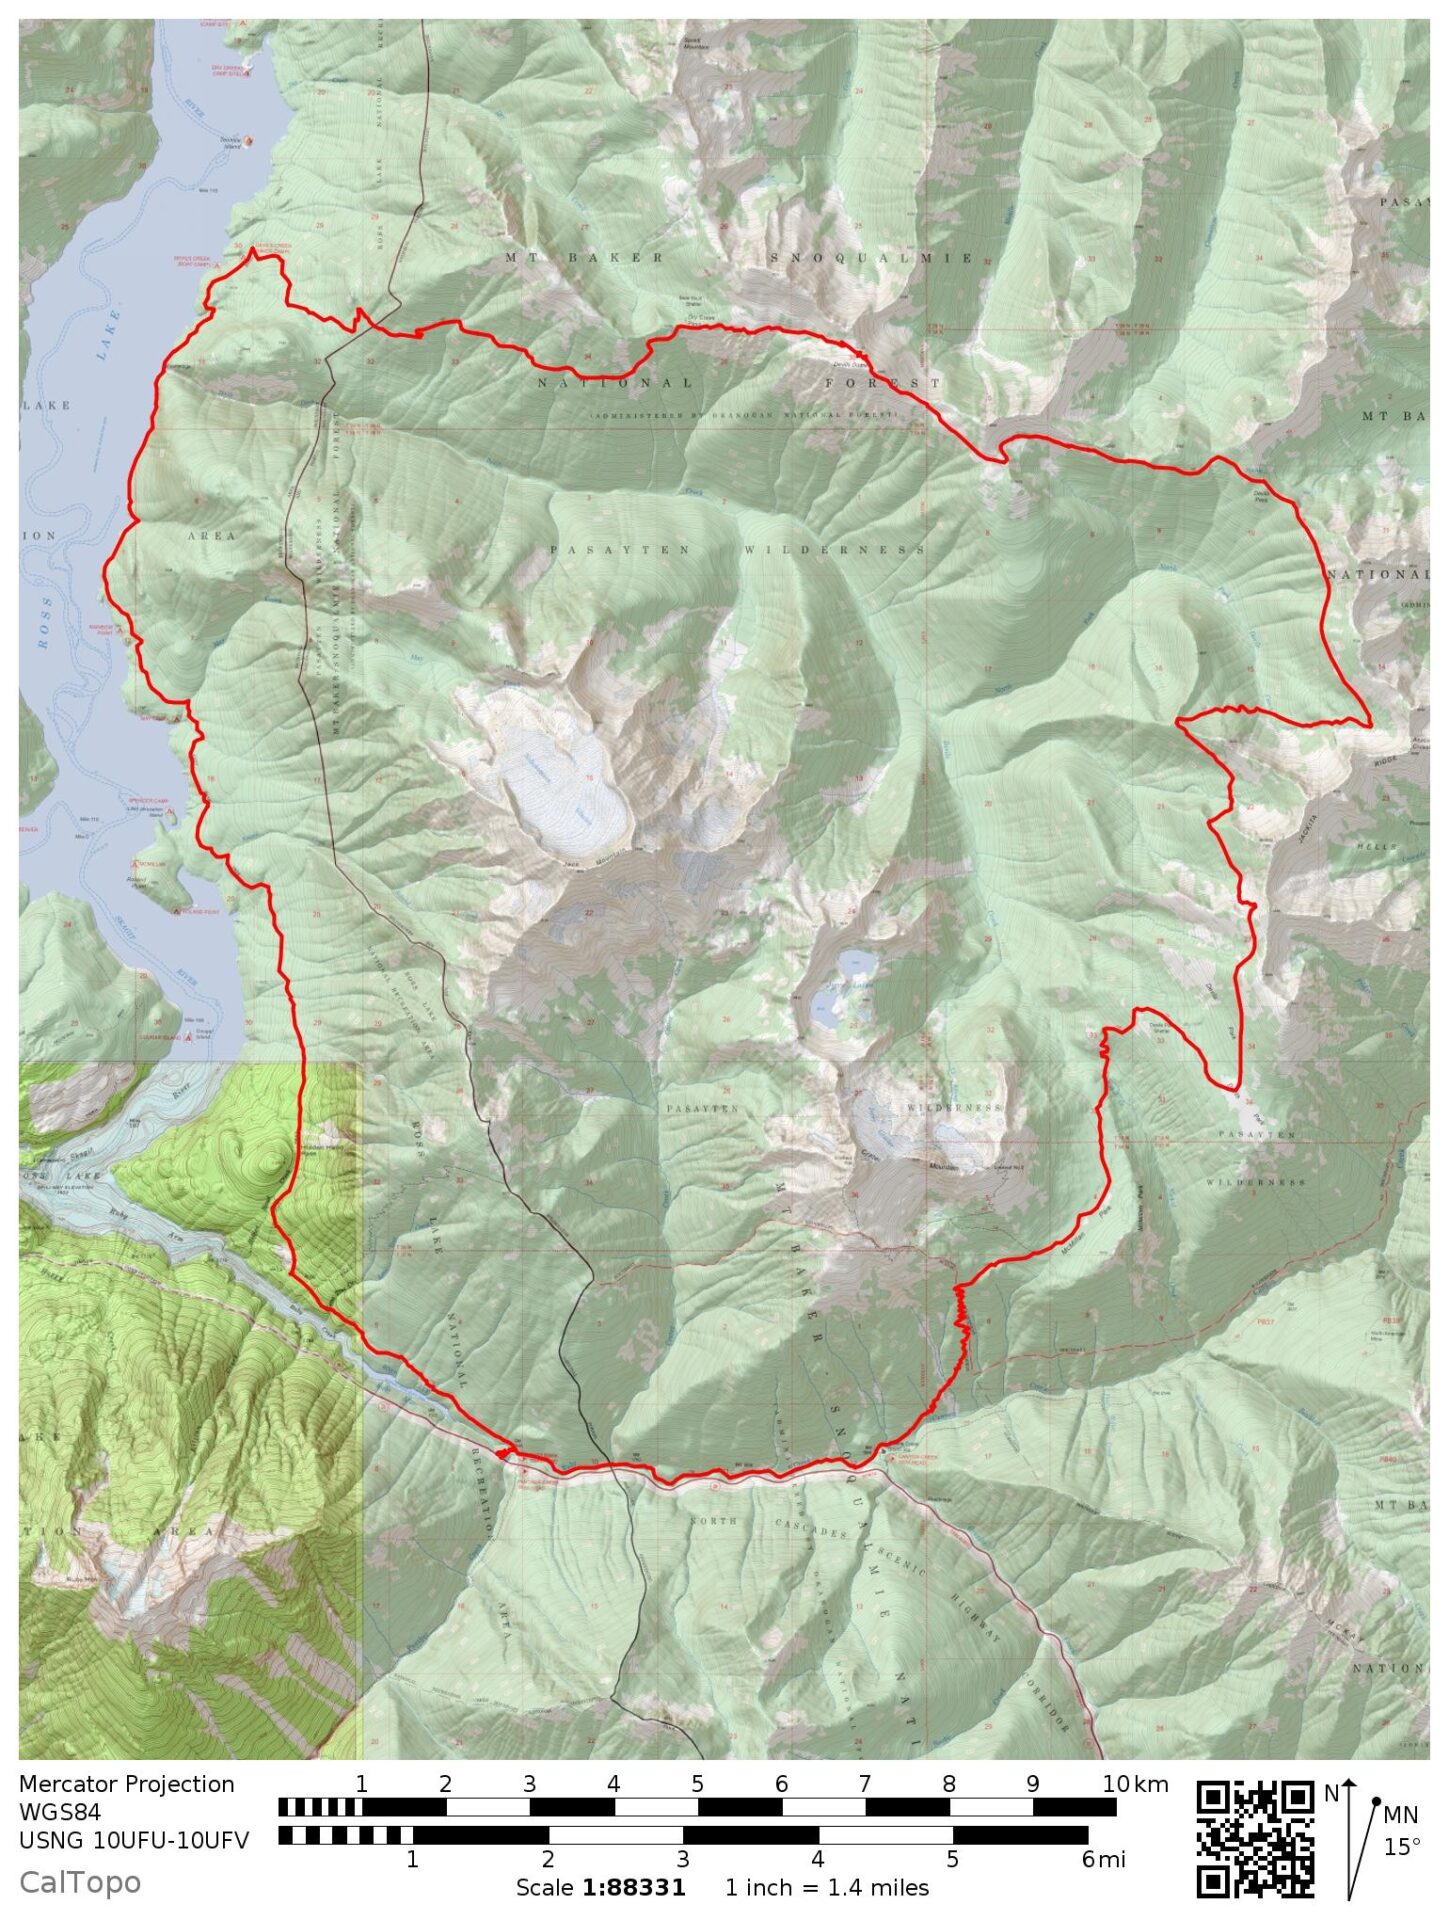
Most recommend hiking the loop counterclockwise, though it can easily be done either way. I’d recommend looking at the elevation profile and picking your poison. Do you prefer steeper descents? Or steeper climbs? Do you want to start with a long, steady climb? Or a shorter, steeper one? Either way, you won’t escape the climbing no matter which way you go.
Some do a car shuttle between the East Bank and Canyon Creek trailheads on Highway 20 or employ an expensive Ross Lake Resort water taxi to start the loop further in and cut out the “boring parts”. Personally, when I commit to a backpacking loop, I commit to the entire loop. Sure, those alpine ridge top panoramas are fantastic, but so is beautiful green forest.
My advice is to do the whole loop. It’s not only logistically easier, but appreciating all the pieces of nature makes the ordinary extraordinary. It’s worth the effort and allows you to truly appreciate the incredible diversity of this amazing wilderness.
Day 1: East Bank to South Jackita Ridge
Distance: 13.2 miles | Elevation Gain: 6,500’
The start of my trip was certainly not without some unexpected complications. With my vacation starting Wednesday, I packed my Jeep Tuesday afternoon and drove out to Ross Lake with the plan to camp at the trailhead and get an early start Wednesday. The only problem? I made it nearly the entire 3 hour drive before realizing that in my excitement, although I had grabbed my backpack, I had failed to grab the bag that contained all of my clothing!
<insert crazy, record-setting expletive-laden tirade here>
Nothing like showing up to a trailhead without any of your stuff! Missing was my socks, hiking pants, shorts, tank tops, extra layers, warm clothes, and pretty much everything I needed for not only this backpack, but the upcoming week. After regaining my composure, I resolved to simply drive home, crash in my own bed, and woke up at 4am Wednesday to start the drive over.
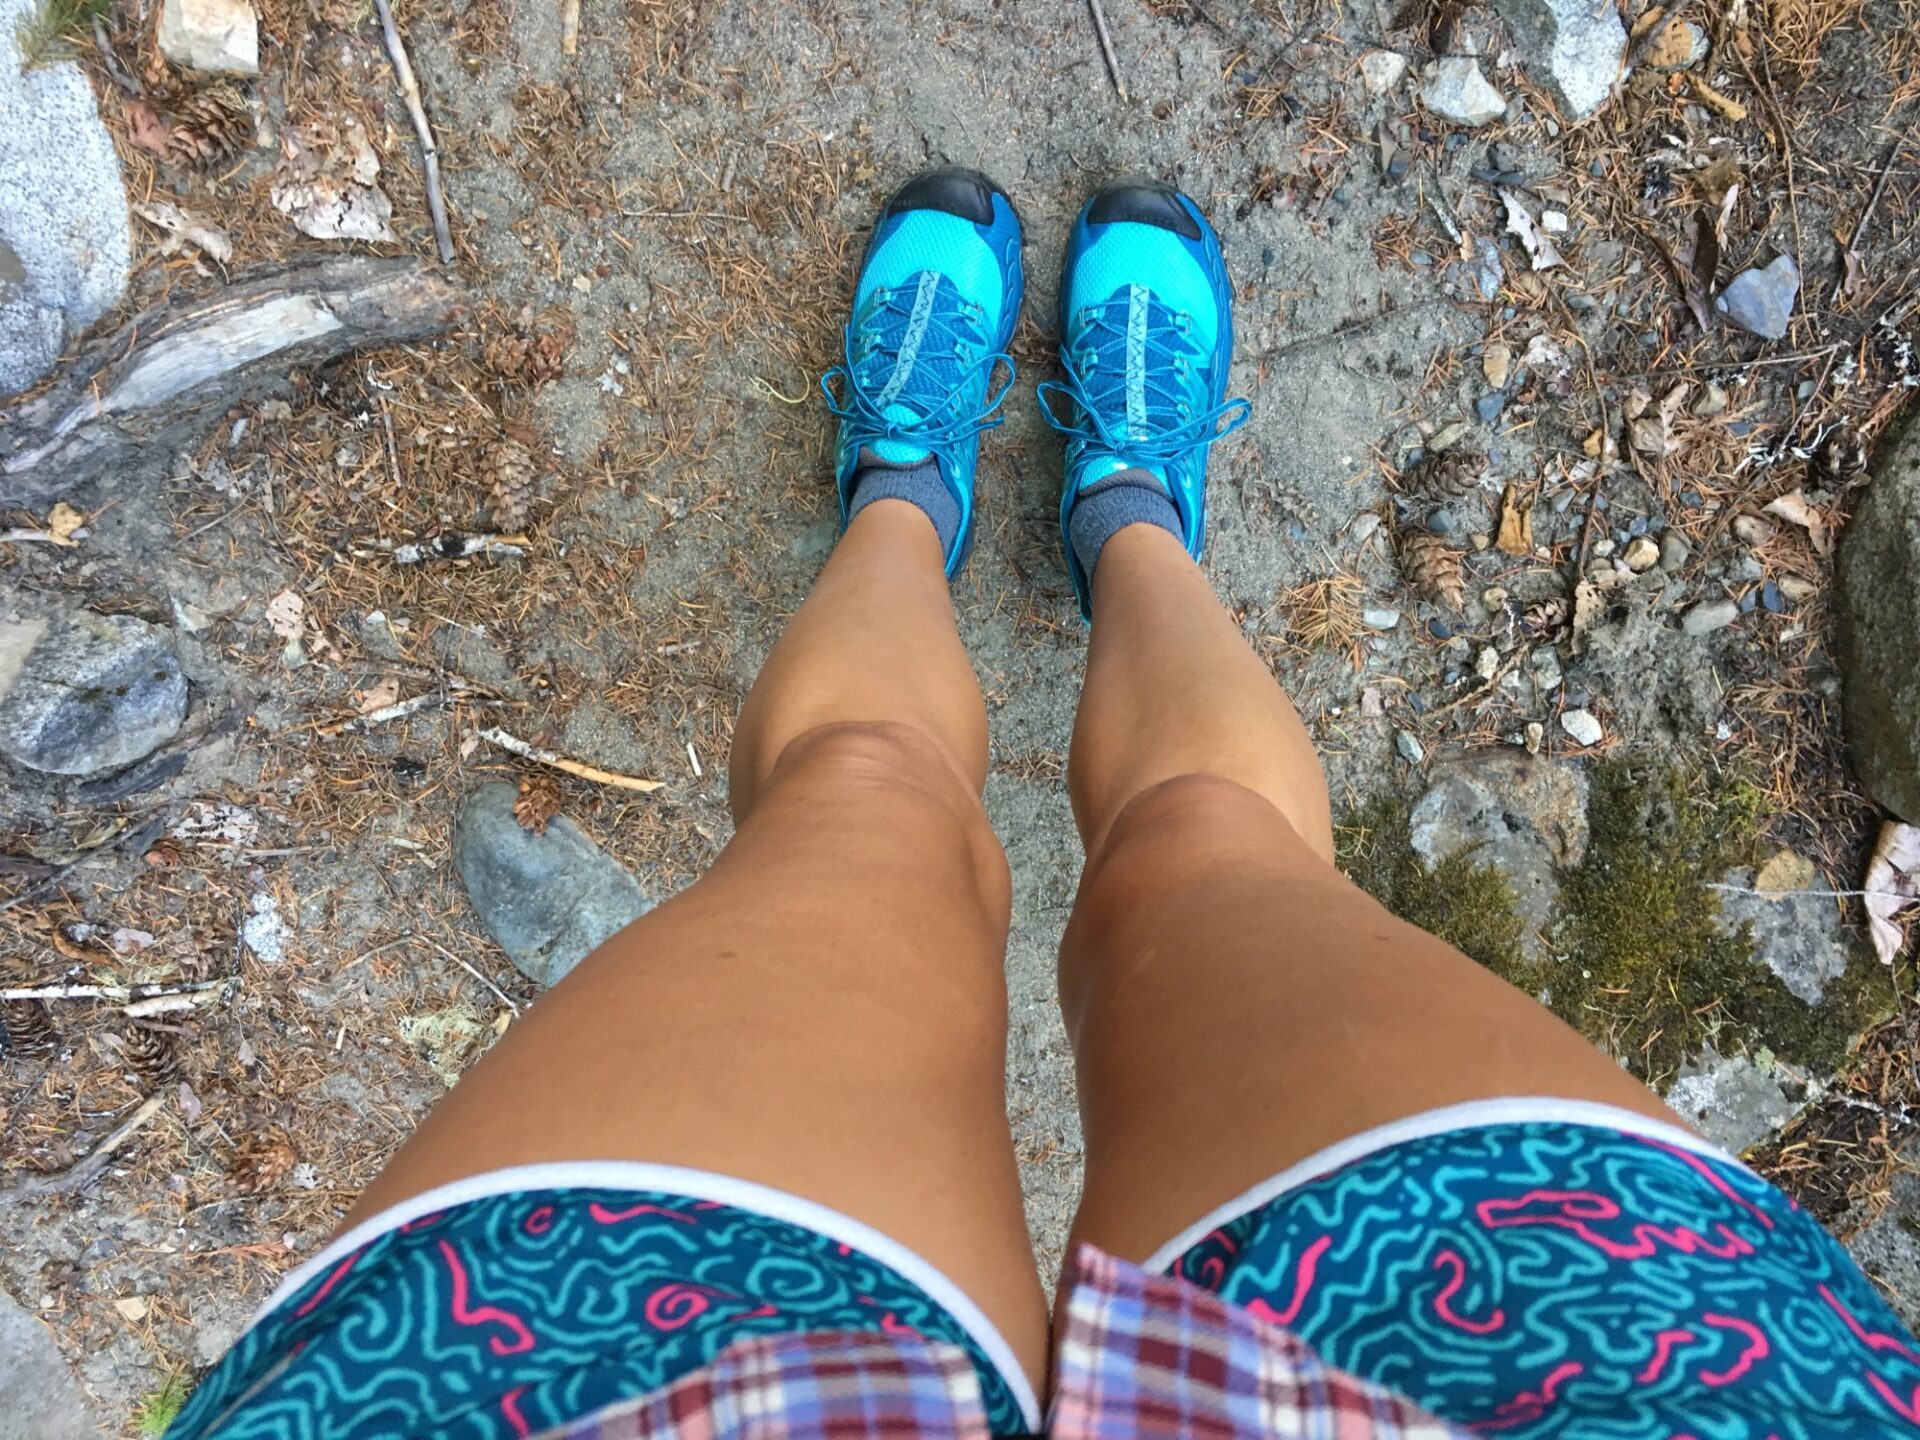
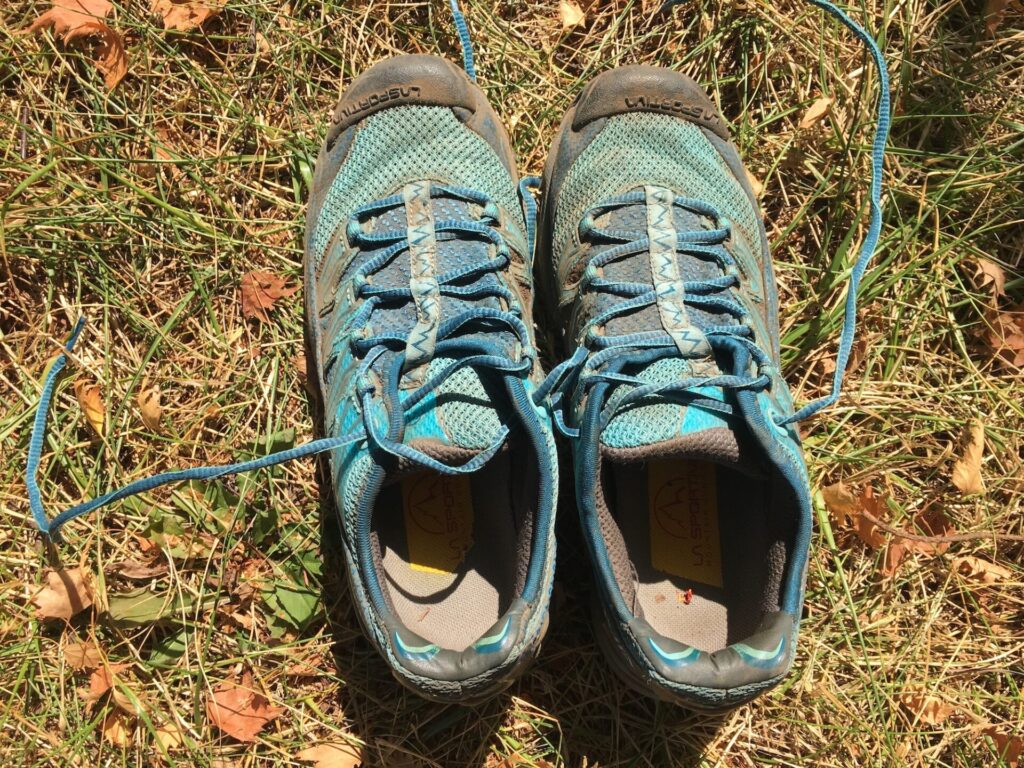
After 9 hours of driving, 6 of those hopelessly unnecessary, I finally set out from the East Bank trailhead Wednesday morning, praying the debacle was behind me. As if tempting fate, I looked down at my brand new La Sportiva Ultra Raptor trail shoes, crossing my fingers. Nothing like taking a brand new pair of shoes on a 40-mile 3-day backpack!
The benefit to starting at East Bank is that the trail is relatively flat and easy for the first 3.5 miles to and just past Canyon Creek, making it a great warm up for the climbing to come. Once you cross the Ruby Creek bridge, the trail follows along the north side of noisy Highway 20, but traffic noise won’t last for long.
The bridge is indeed out at the Canyon Creek TH to the east, having been destroyed this past winter by falling trees; however, enough remains in combination with the trees that some creative balancing skills and a little gumption should get you across. If you start at Canyon Creek, Ruby Creek isn’t running strongly this time of year, so at least the stakes aren’t very high and it’s easy to ford as a backup option.
The trail at the Canyon Creek bridge junction had one blowdown and erosion spot to navigate, but not too tricky. With a large pack it might require some acrobatics.

Shortly after Canyon Creek, the trail turns upward and climbs about 3,000’ in 4 miles. With temps forecast at 90° for my first day on the trail, I was thankful that much of the climb was forested and not exposed. It was still plenty warm, but could have been much, much worse!
Water on the loop this late in season can be a challenge, so I did my best to mark water sources on my map based on trip reports from prior years. Less than a half mile from the trail junction with Crater Mountain is a small waterfall that seems to be a reliable source of water year round. I carried a liter up the climb, then refilled almost two liters here for the more exposed and hot trail ahead.
The junction to Crater Mountain continues to the left with a small camping area. I’d love to come back and explore that spur, especially since the forest service map shows two former lookout sites on the summit of Crater.
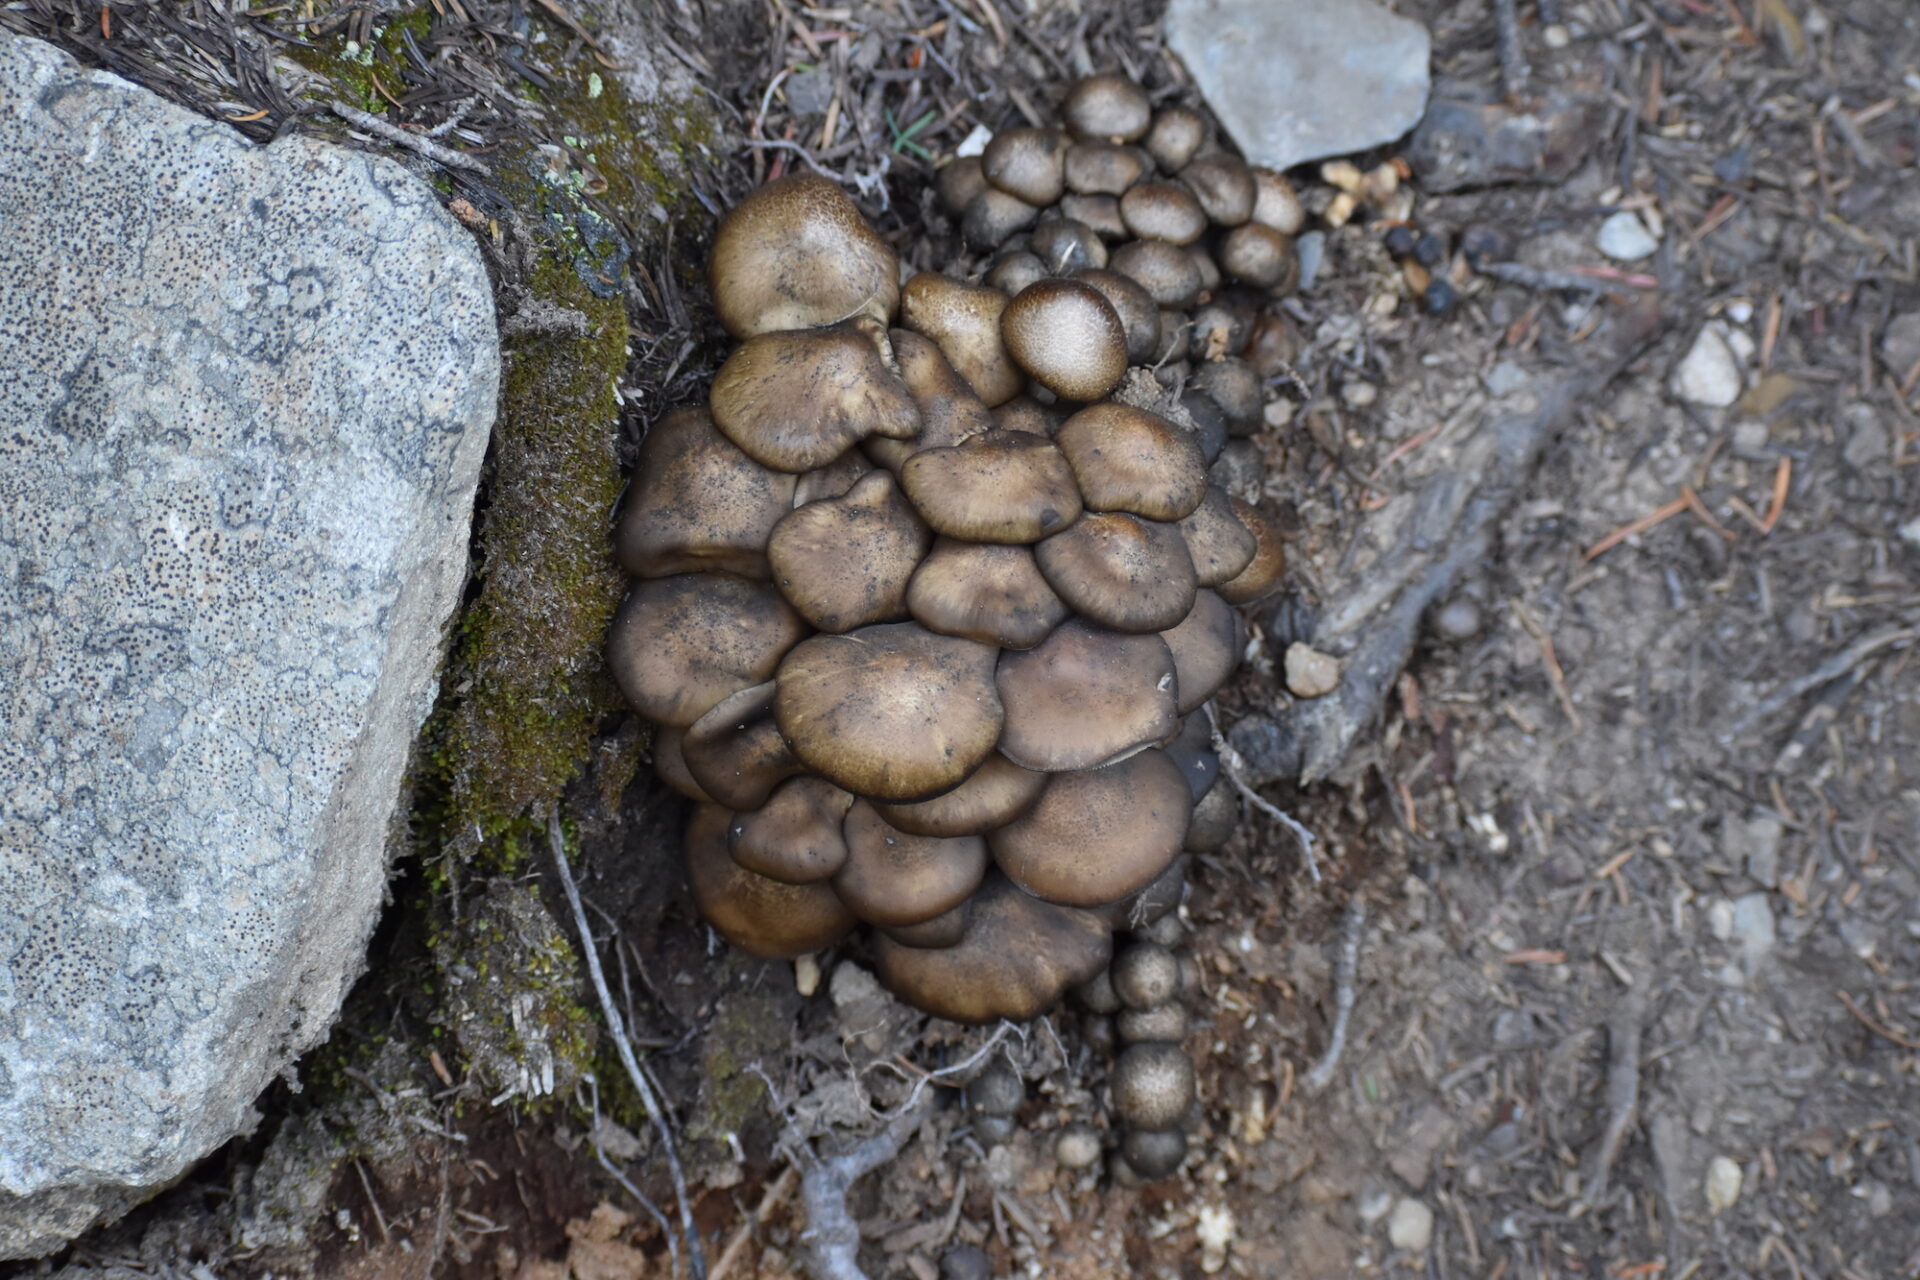
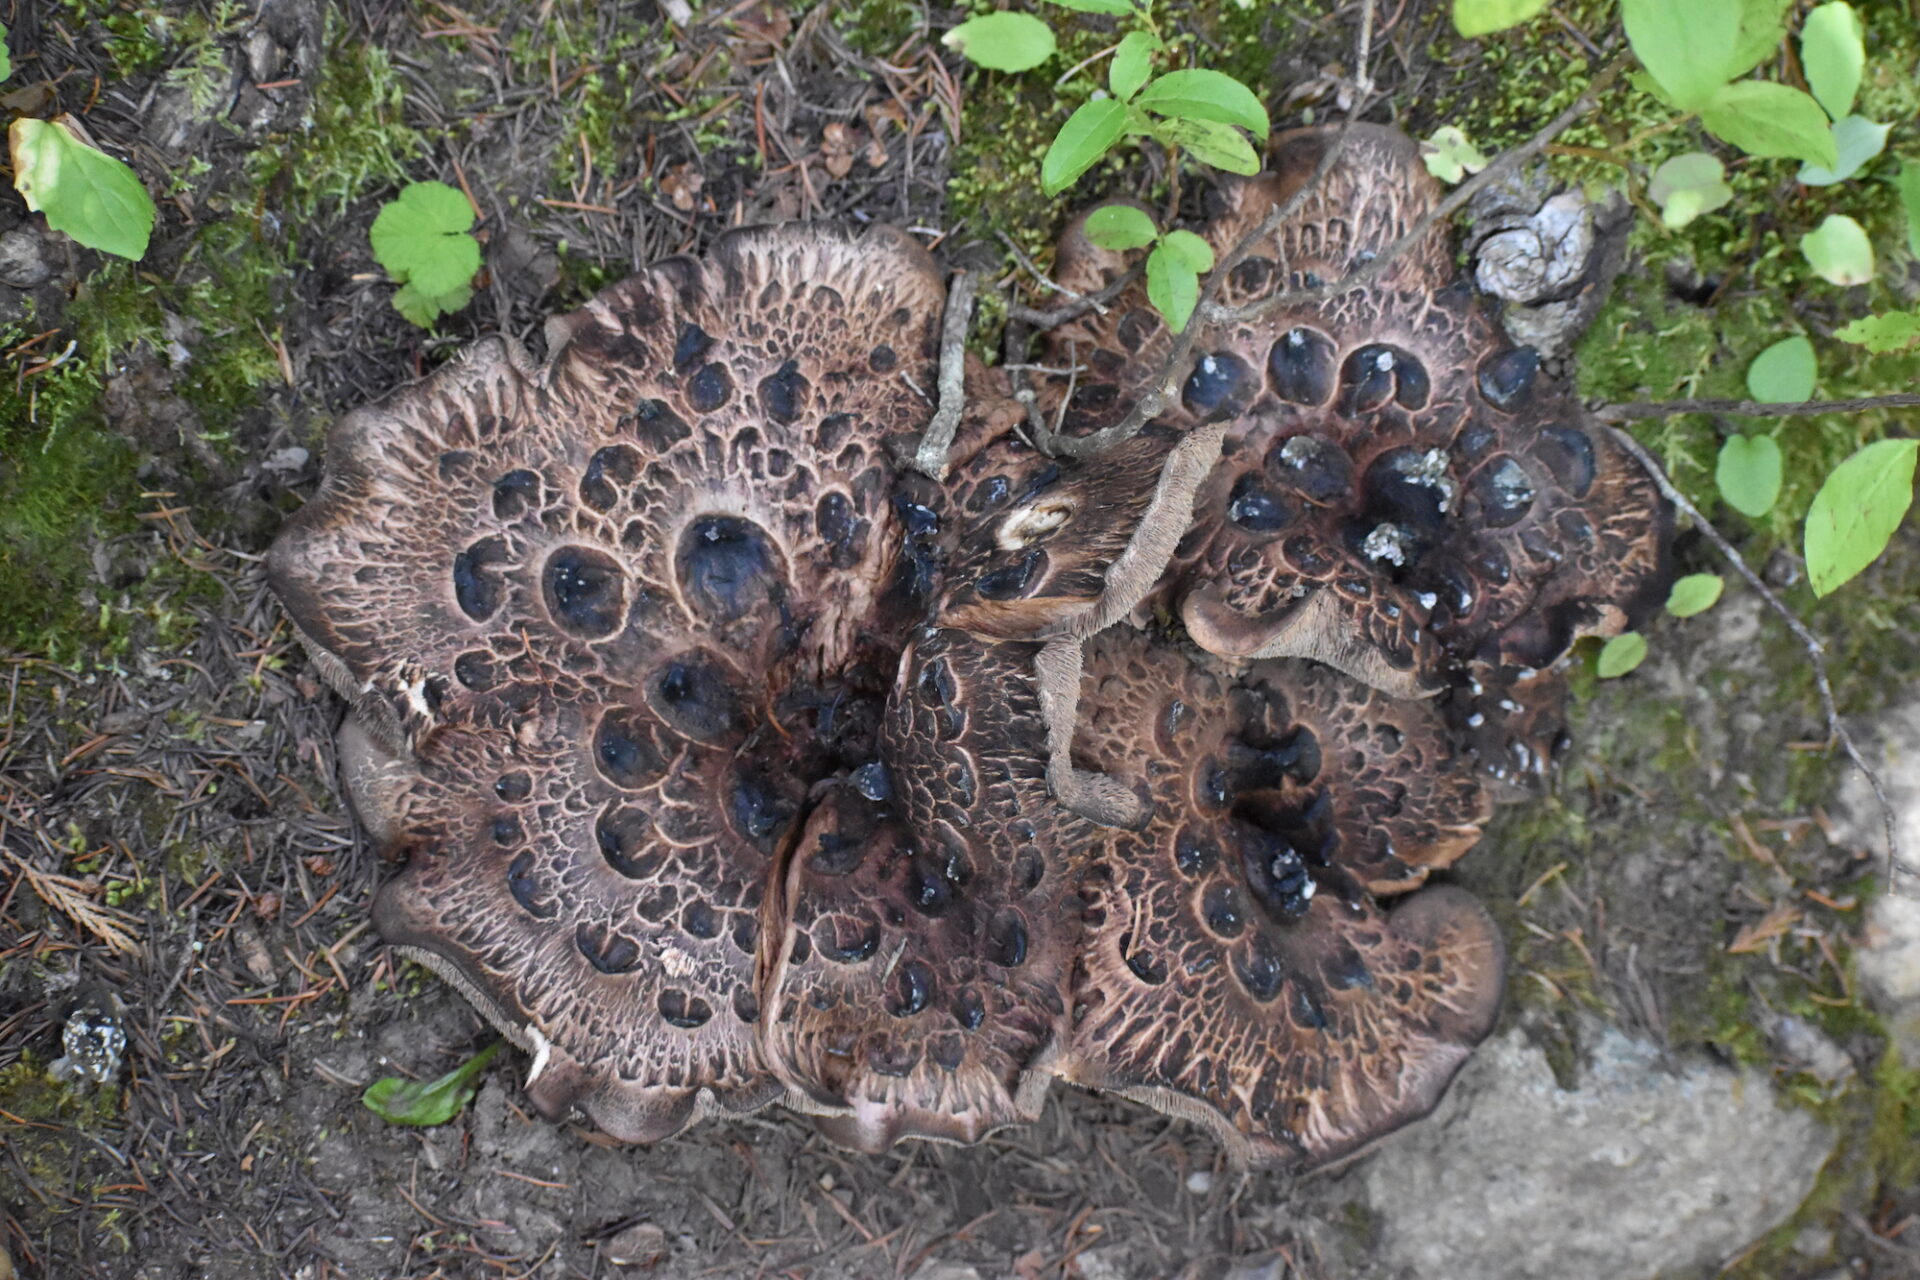
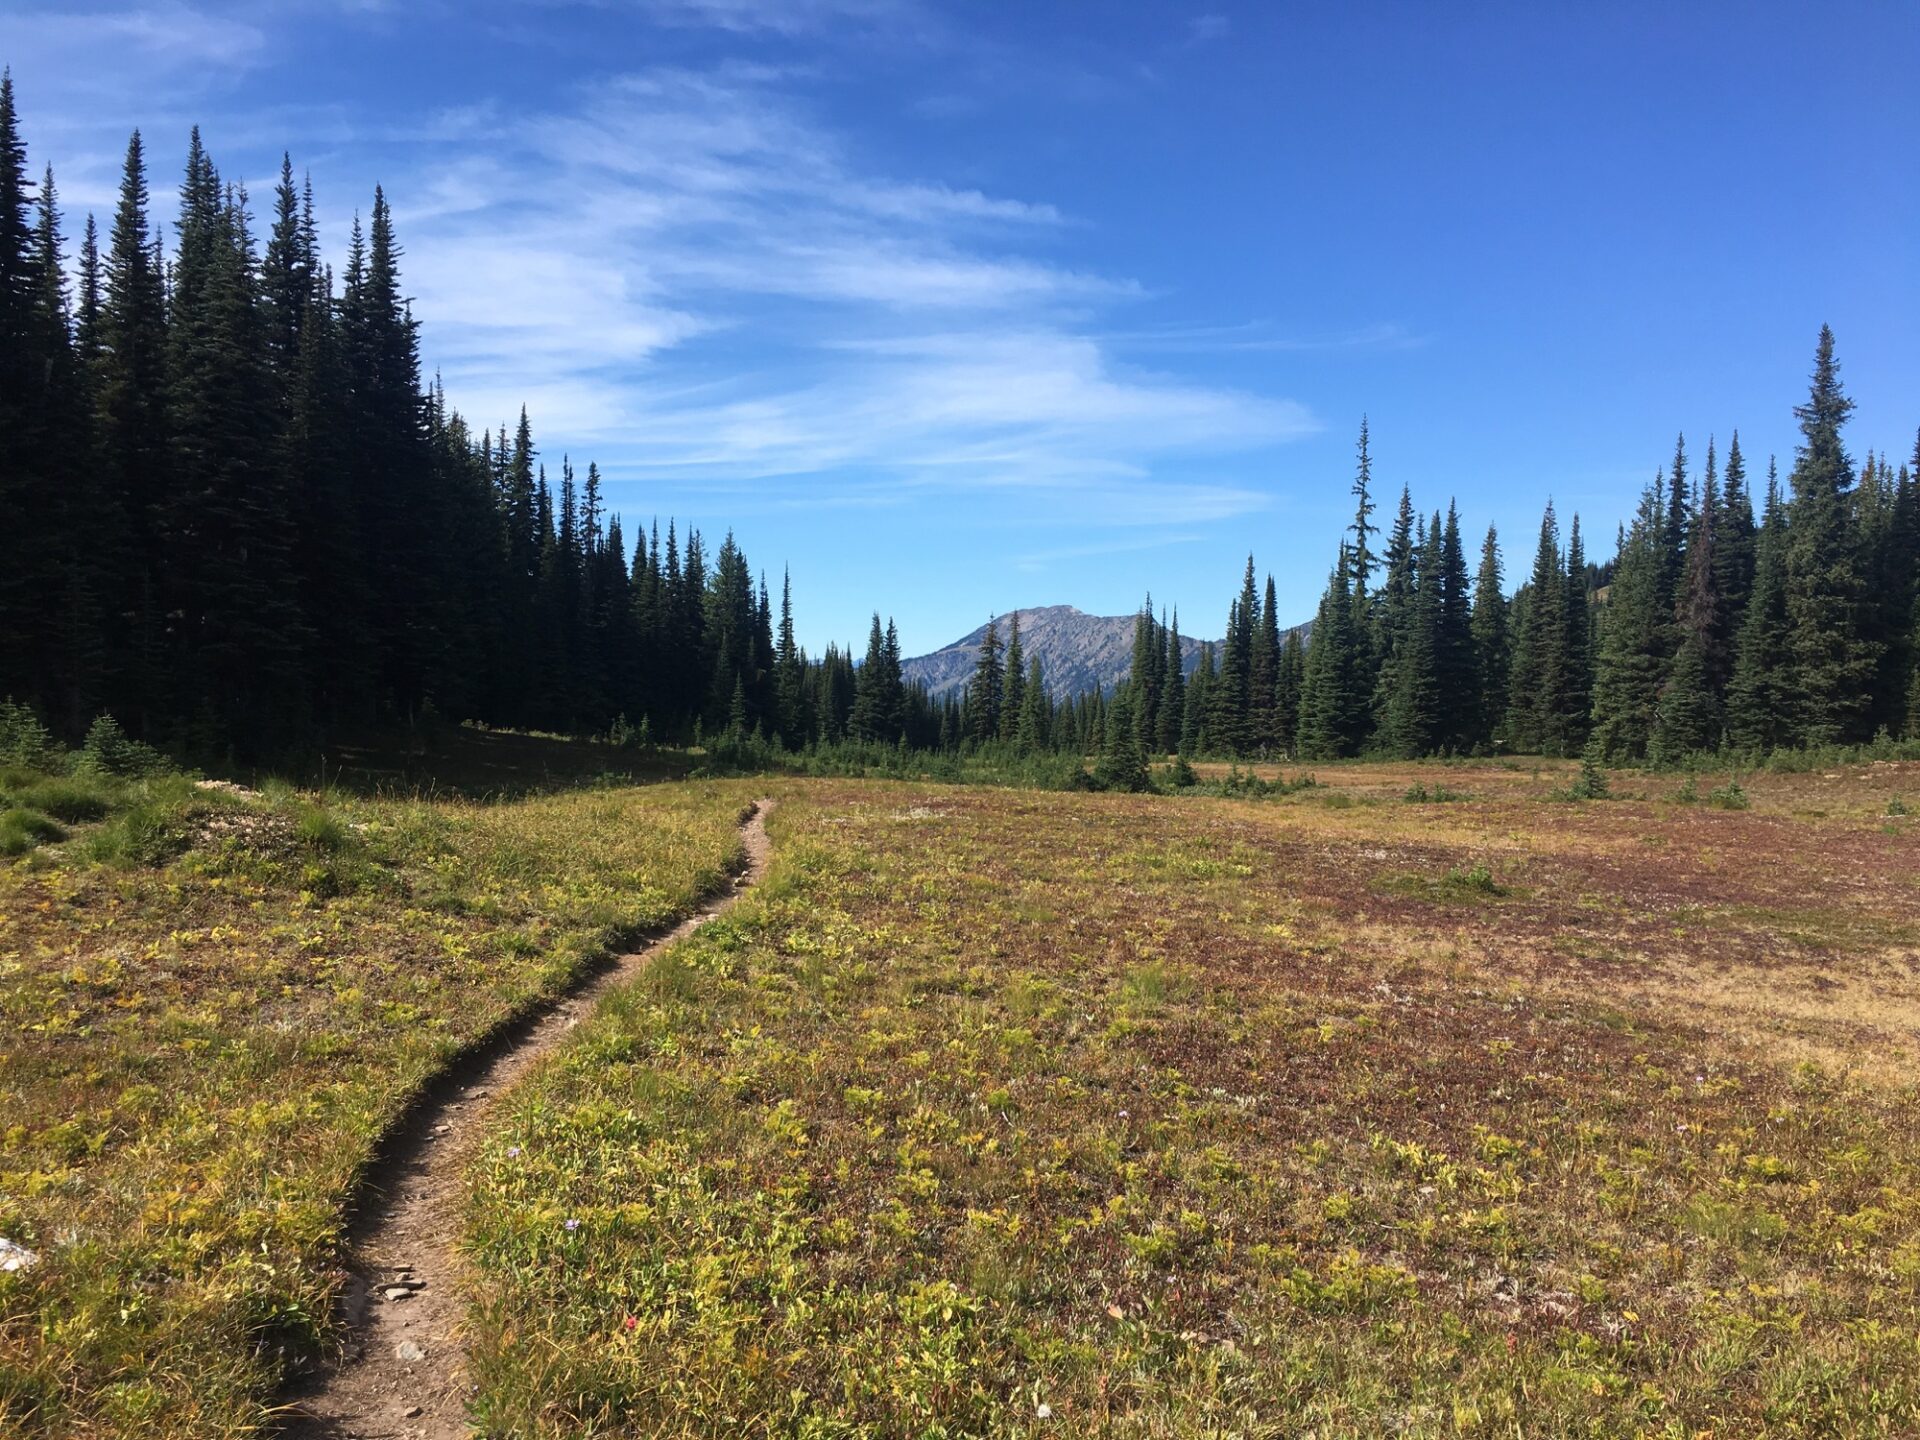
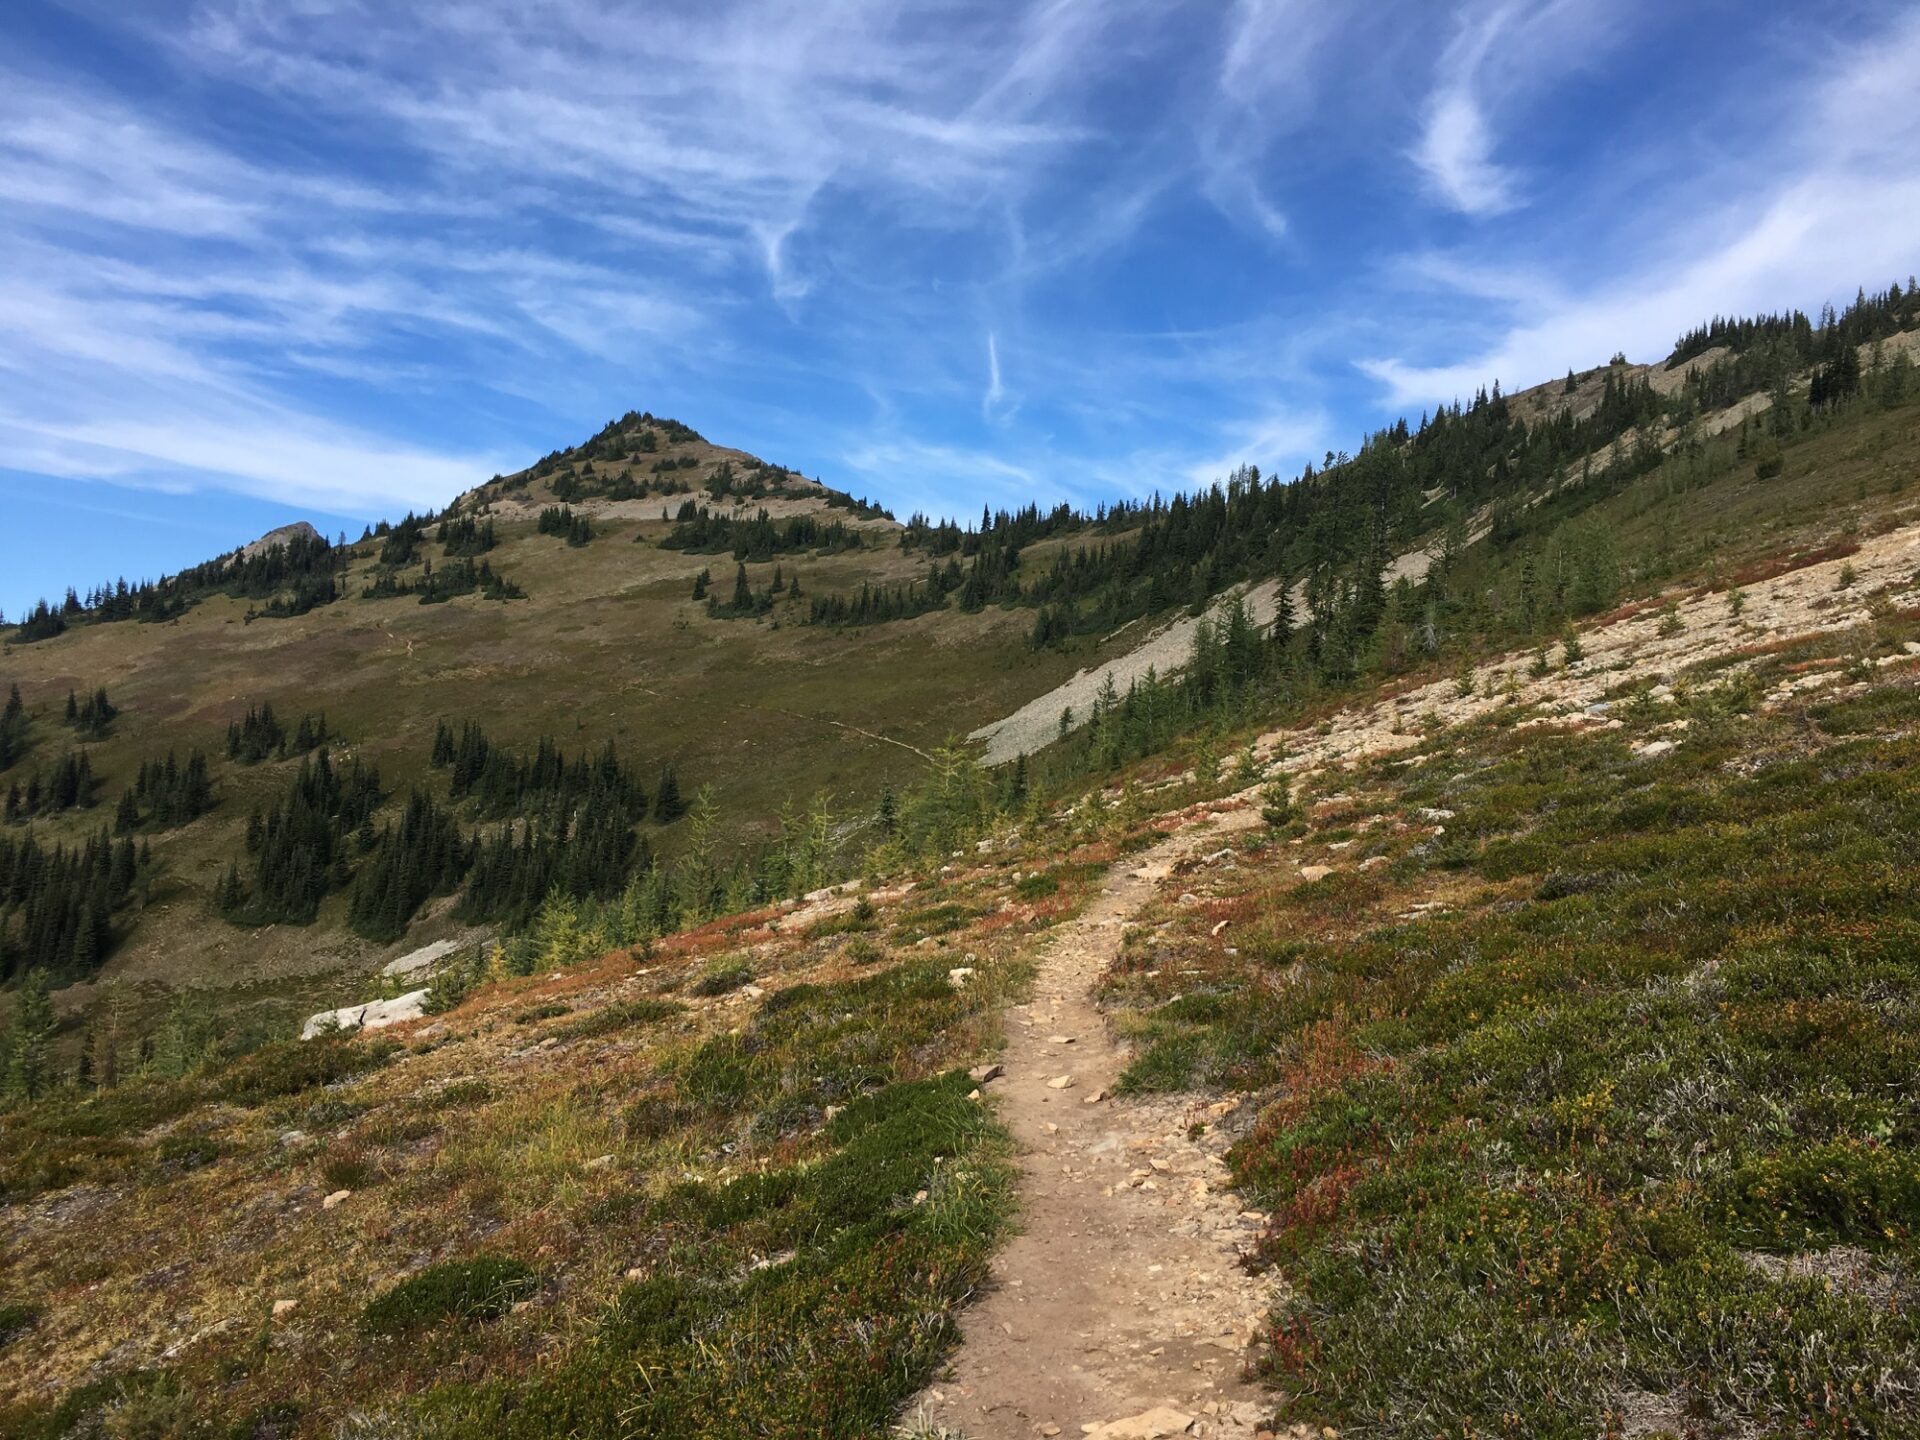
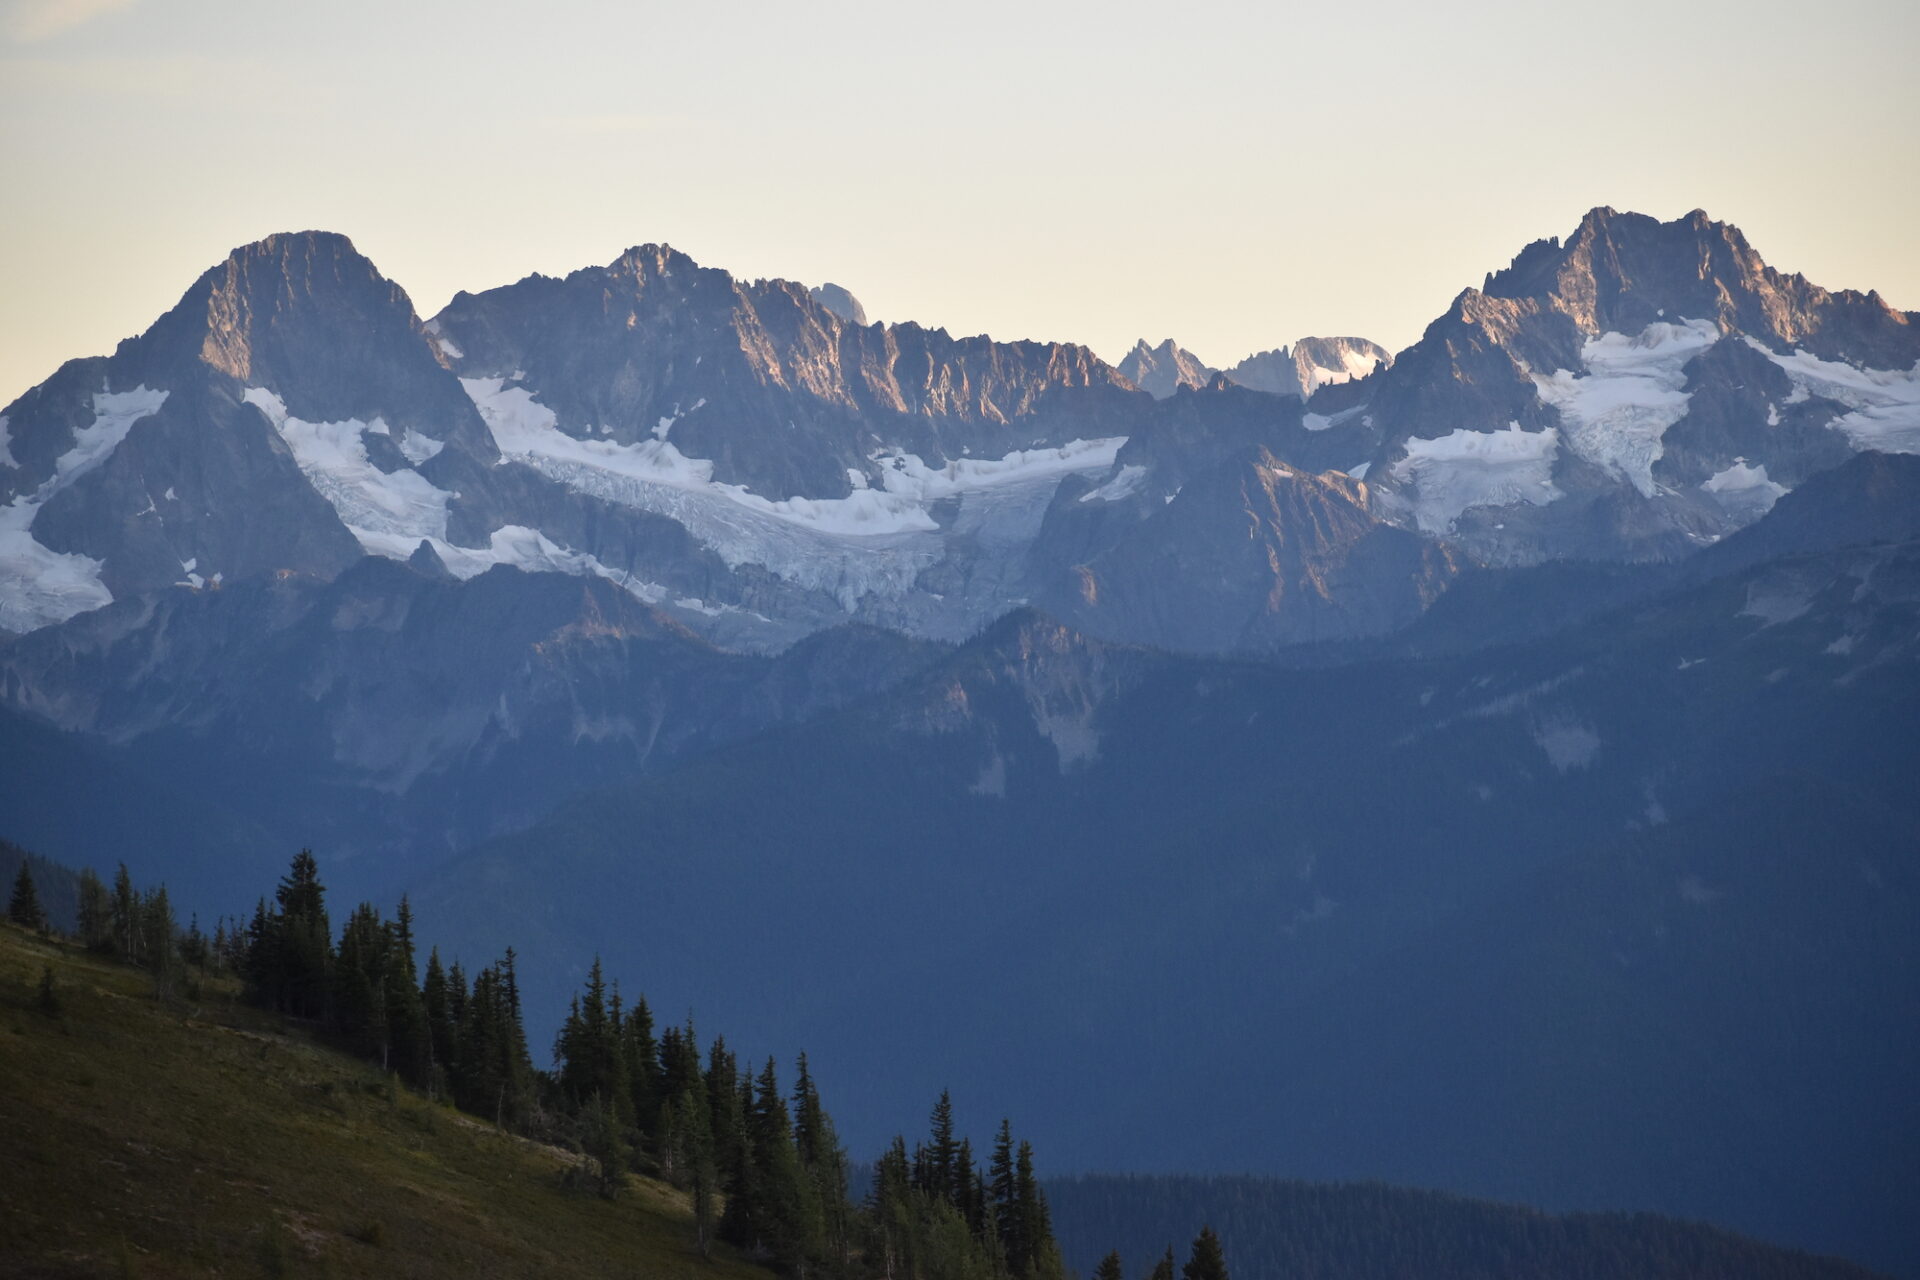
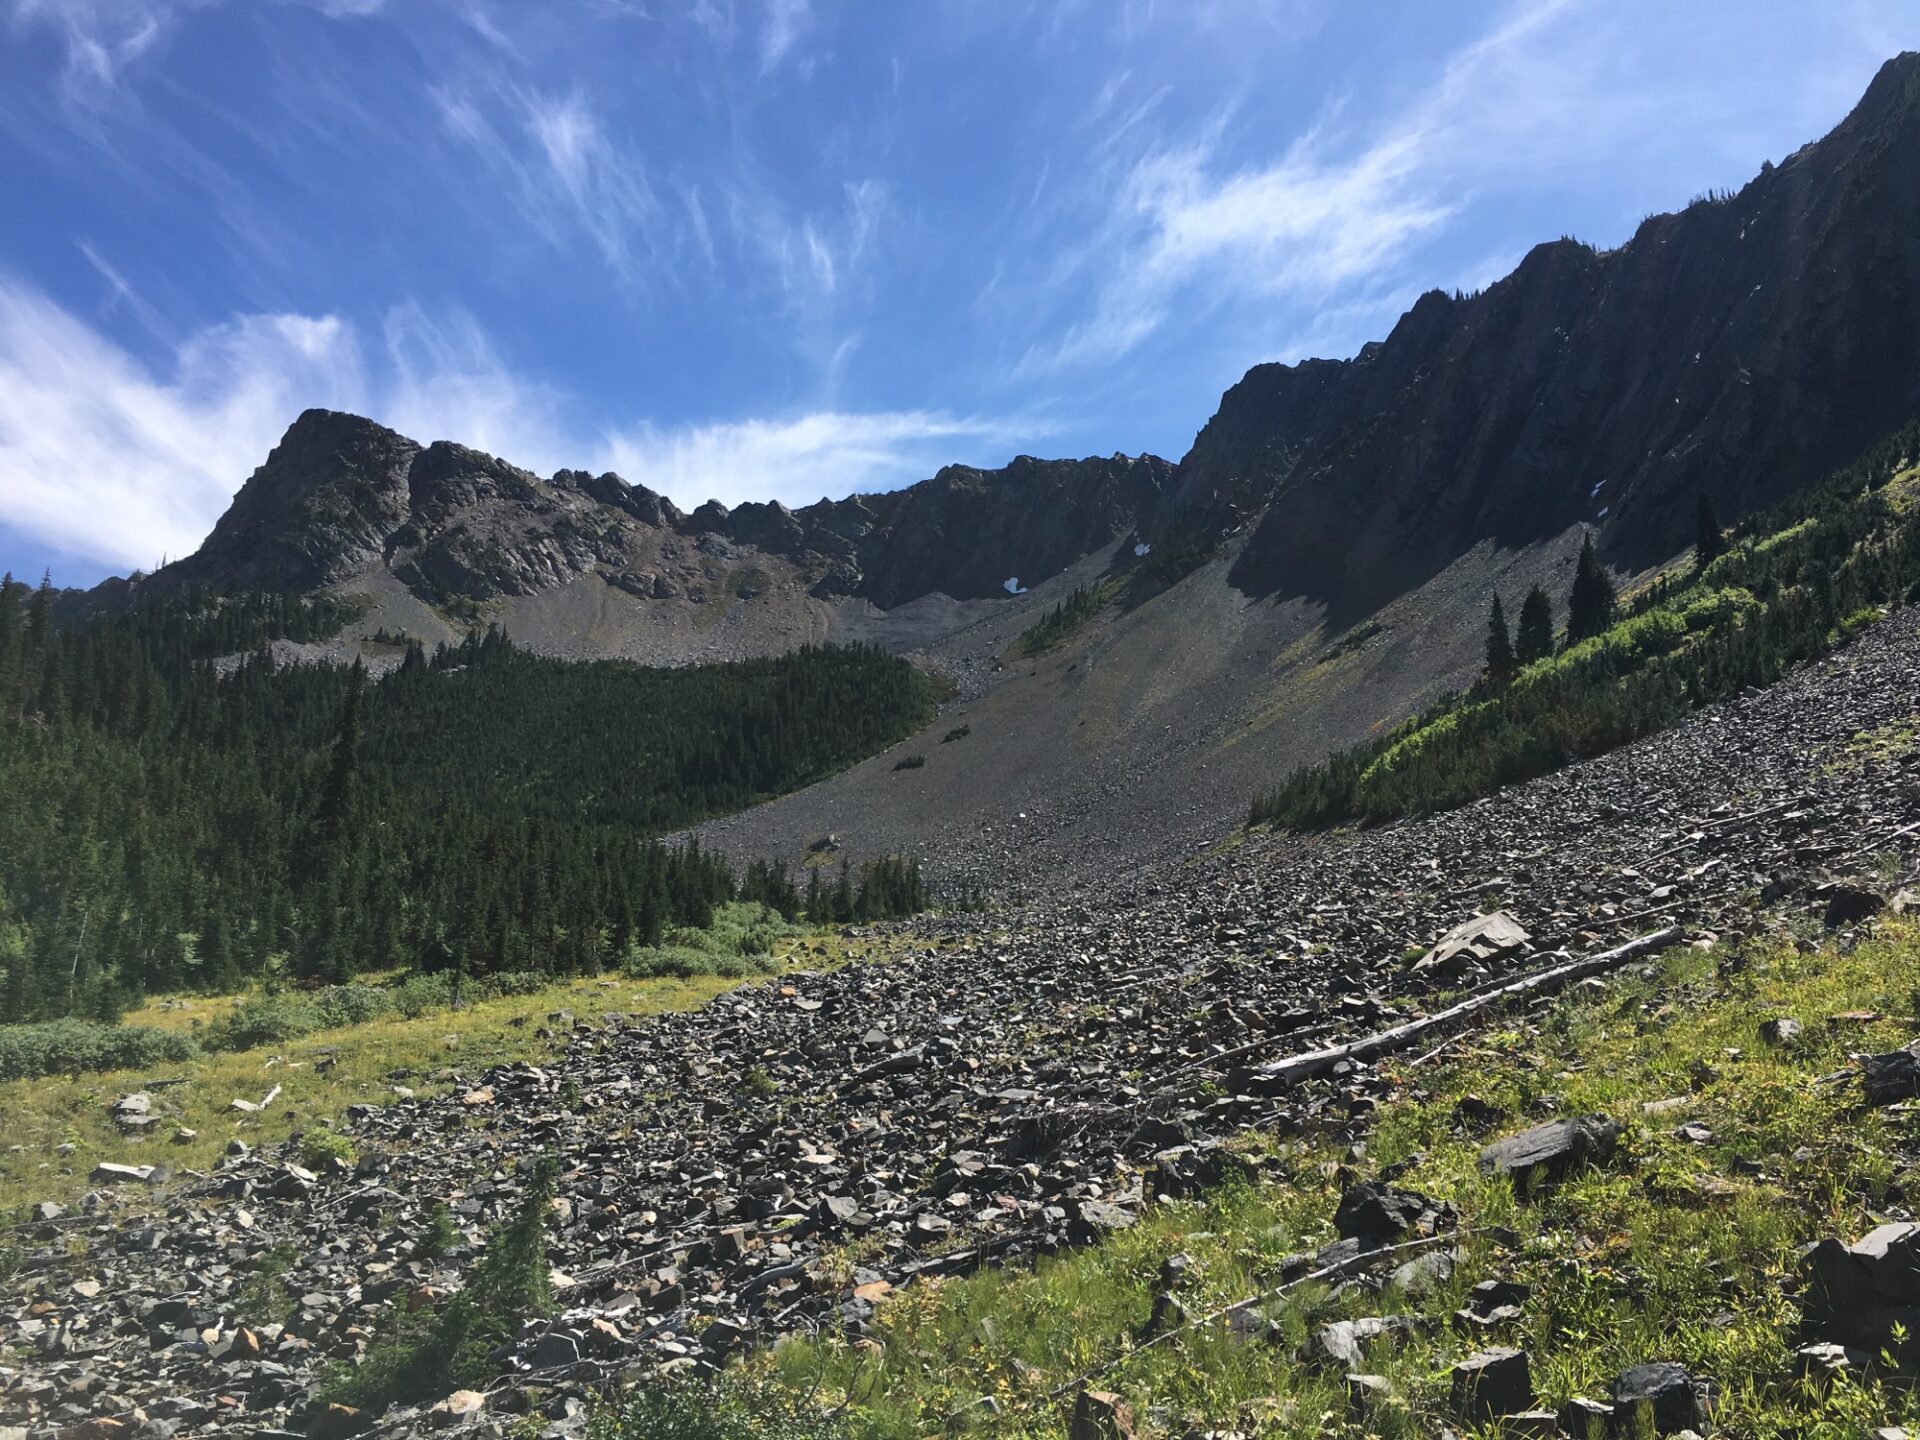
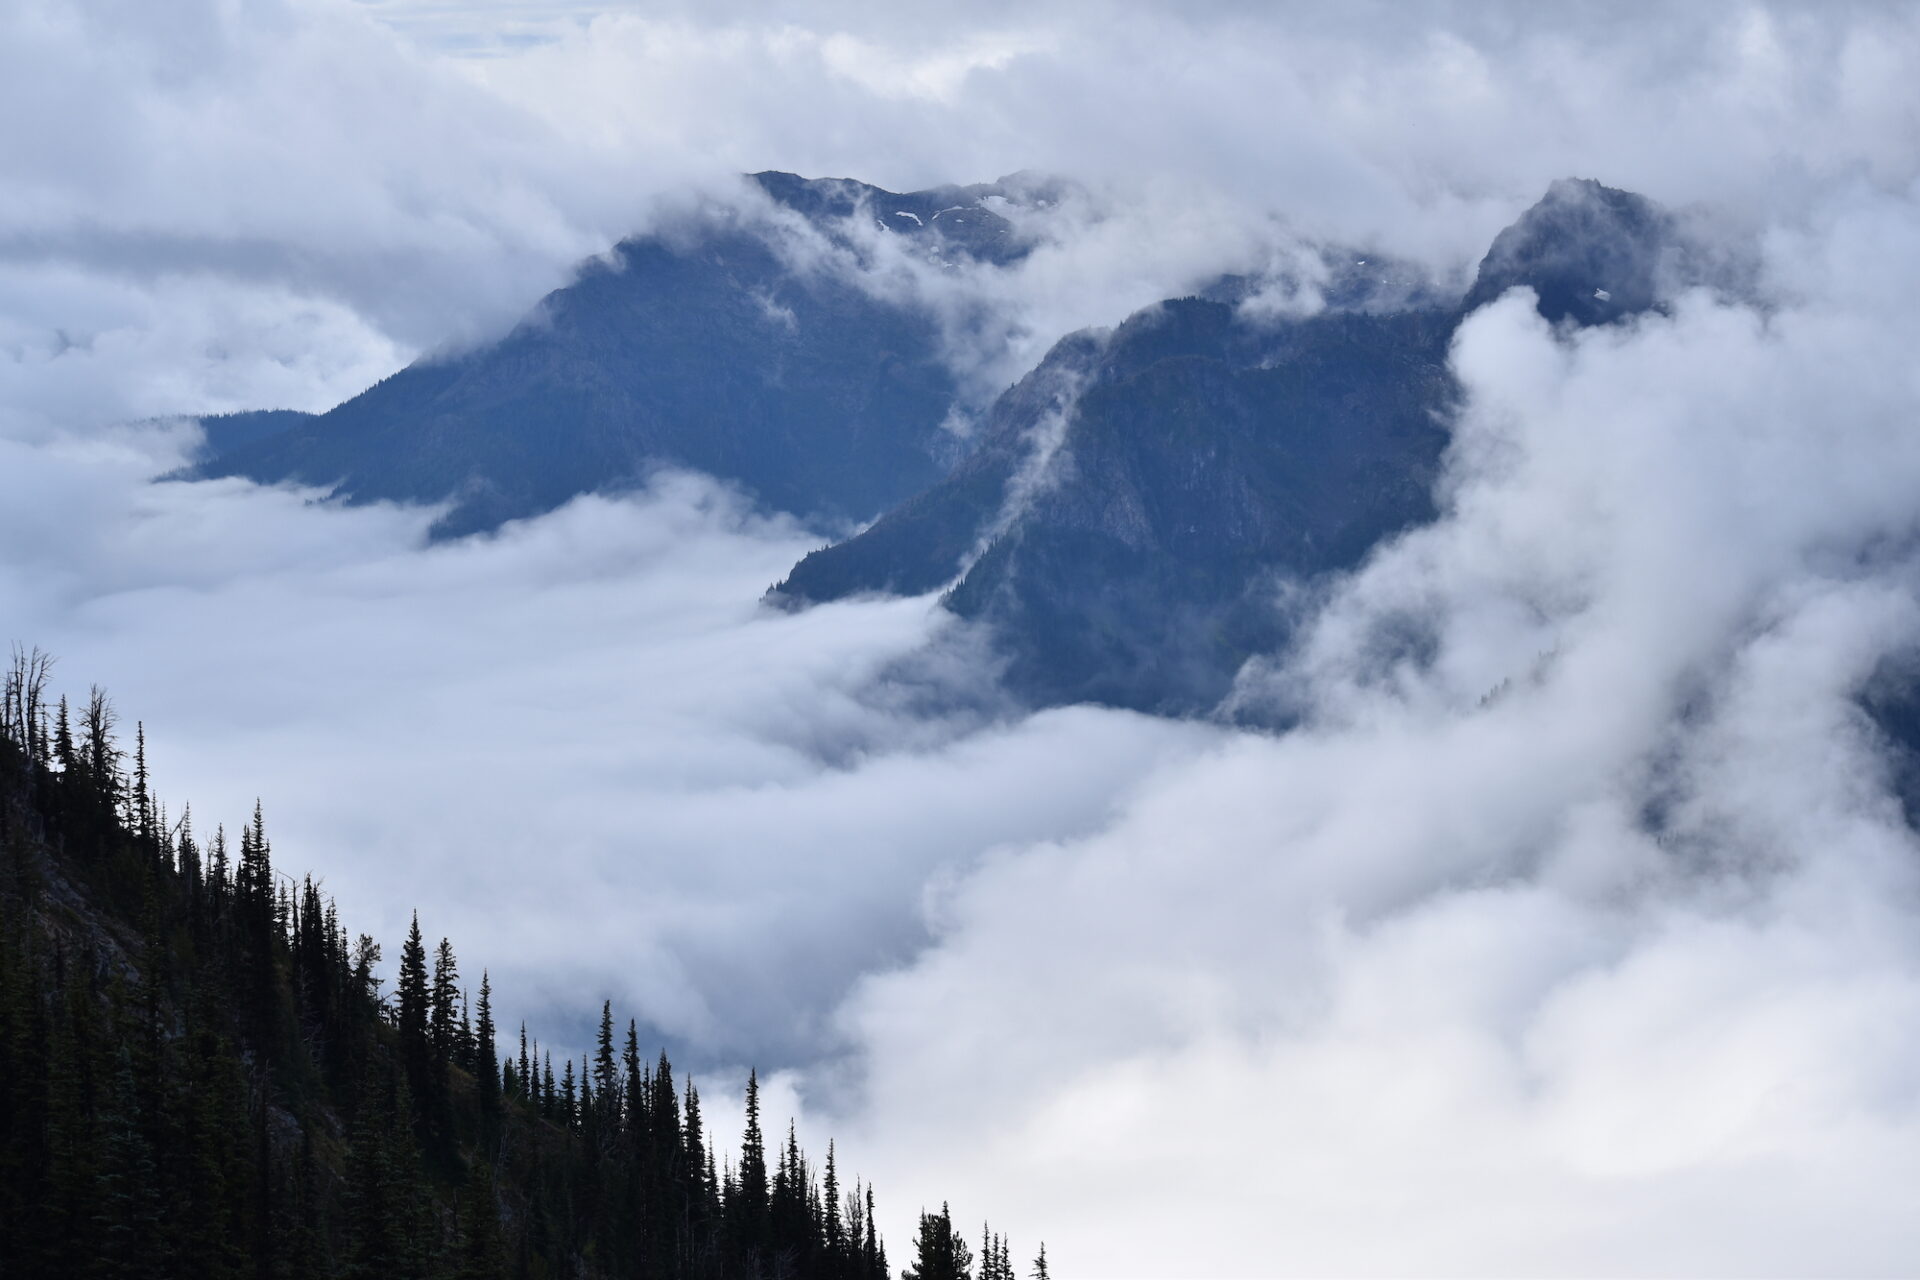
After the Crater Mountain junction, the trail grade eases and heads through the meadows of McMillan Park, before climbing again into the more open meadows of beautiful Devils Park. Though there were a few anemic water sources, most weren’t running strong enough to be options. Despite flowers being past bloom, I still found a smattering of Indian Paintbrush and daises here and there as well as some magnificent mushroom displays.
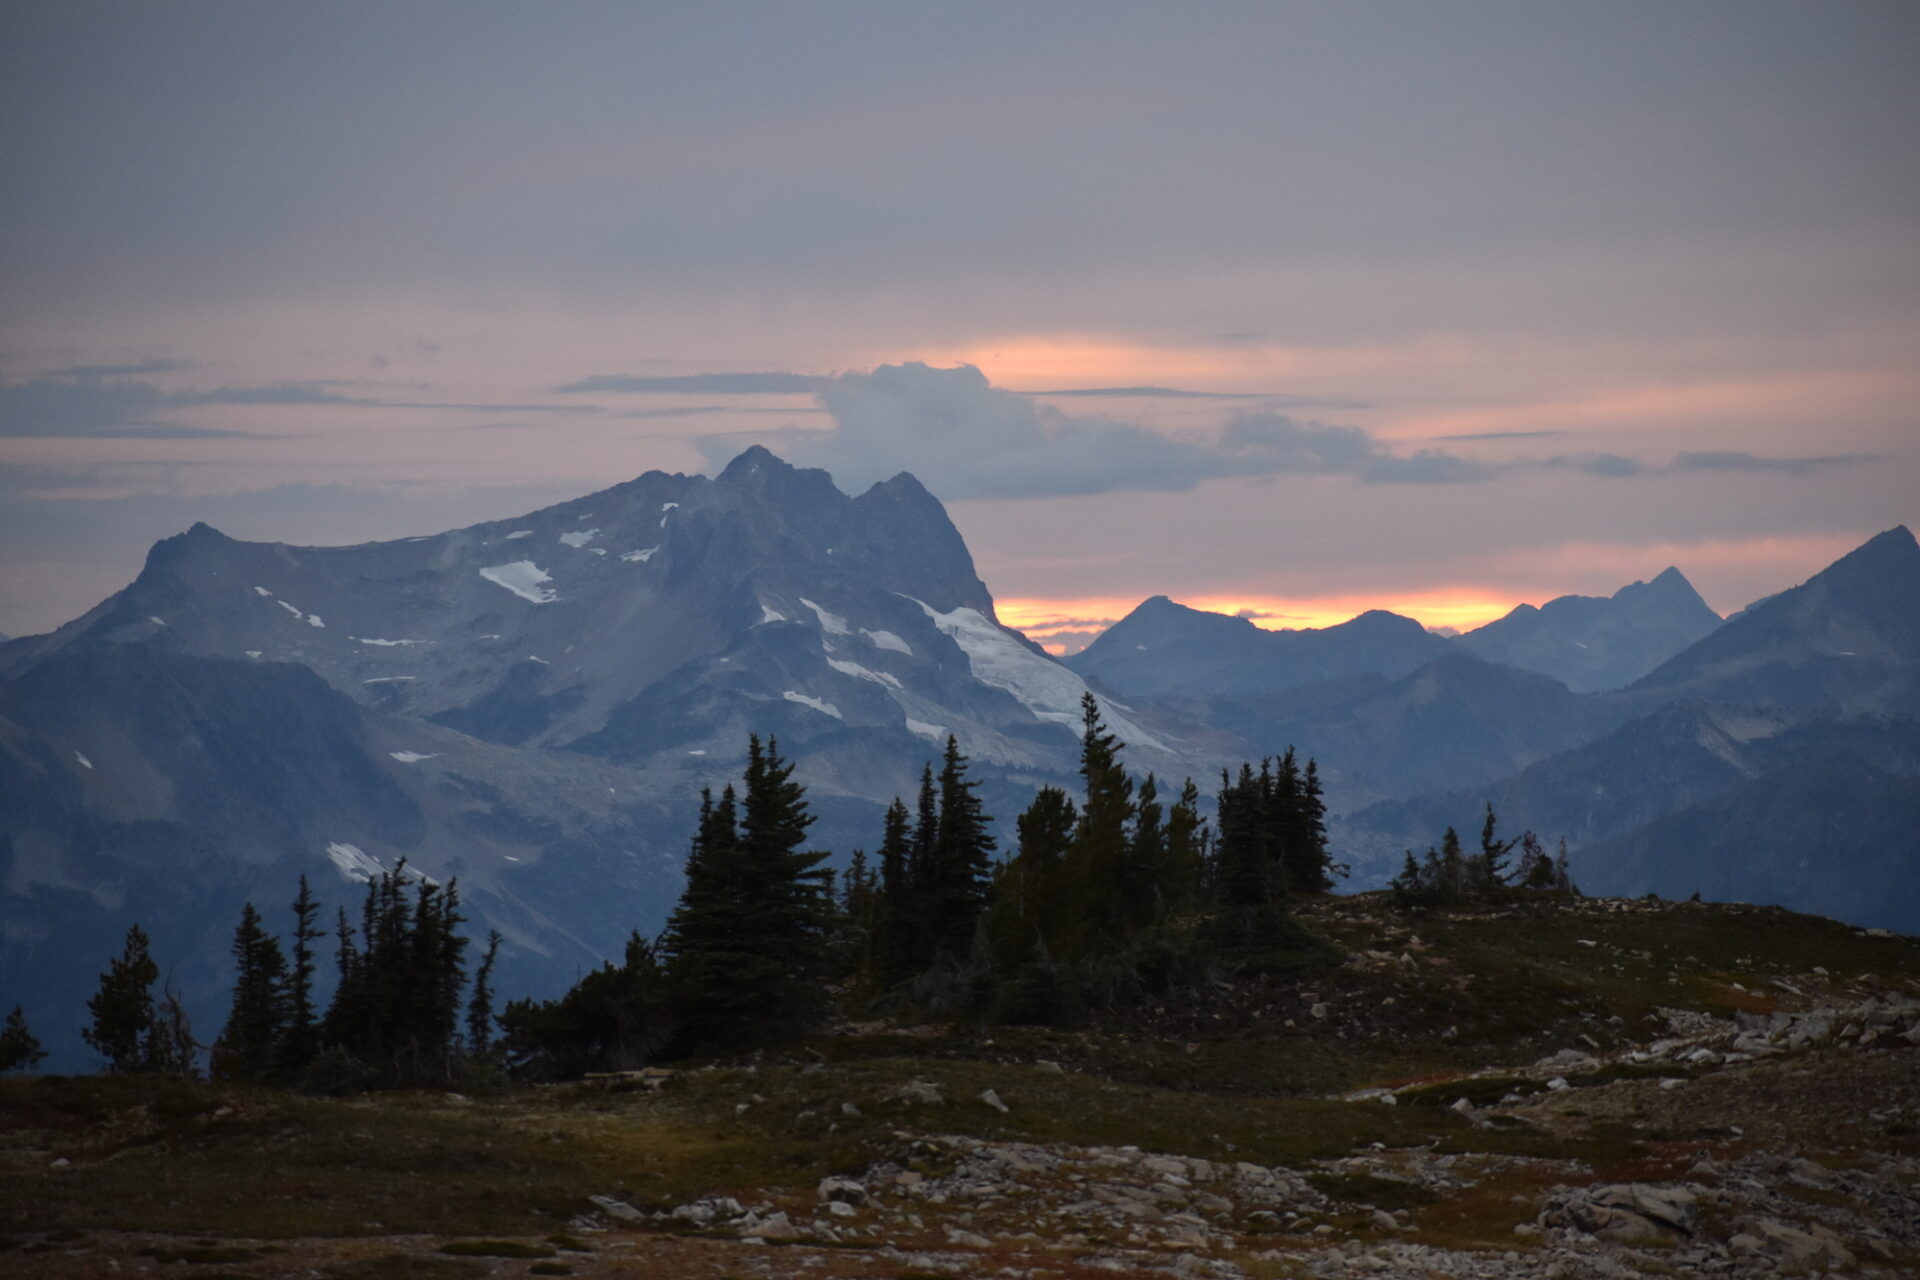
About 10 miles in, I reached the Devils Park shelter, with a few rickety bunks that I suppose would provide a good option in the event of inclement weather. Past the shelter the meadows stretch beautifully in all directions with some peek-a-boo views over to Jack and Crater Mountain. It’s stunningly beautiful.
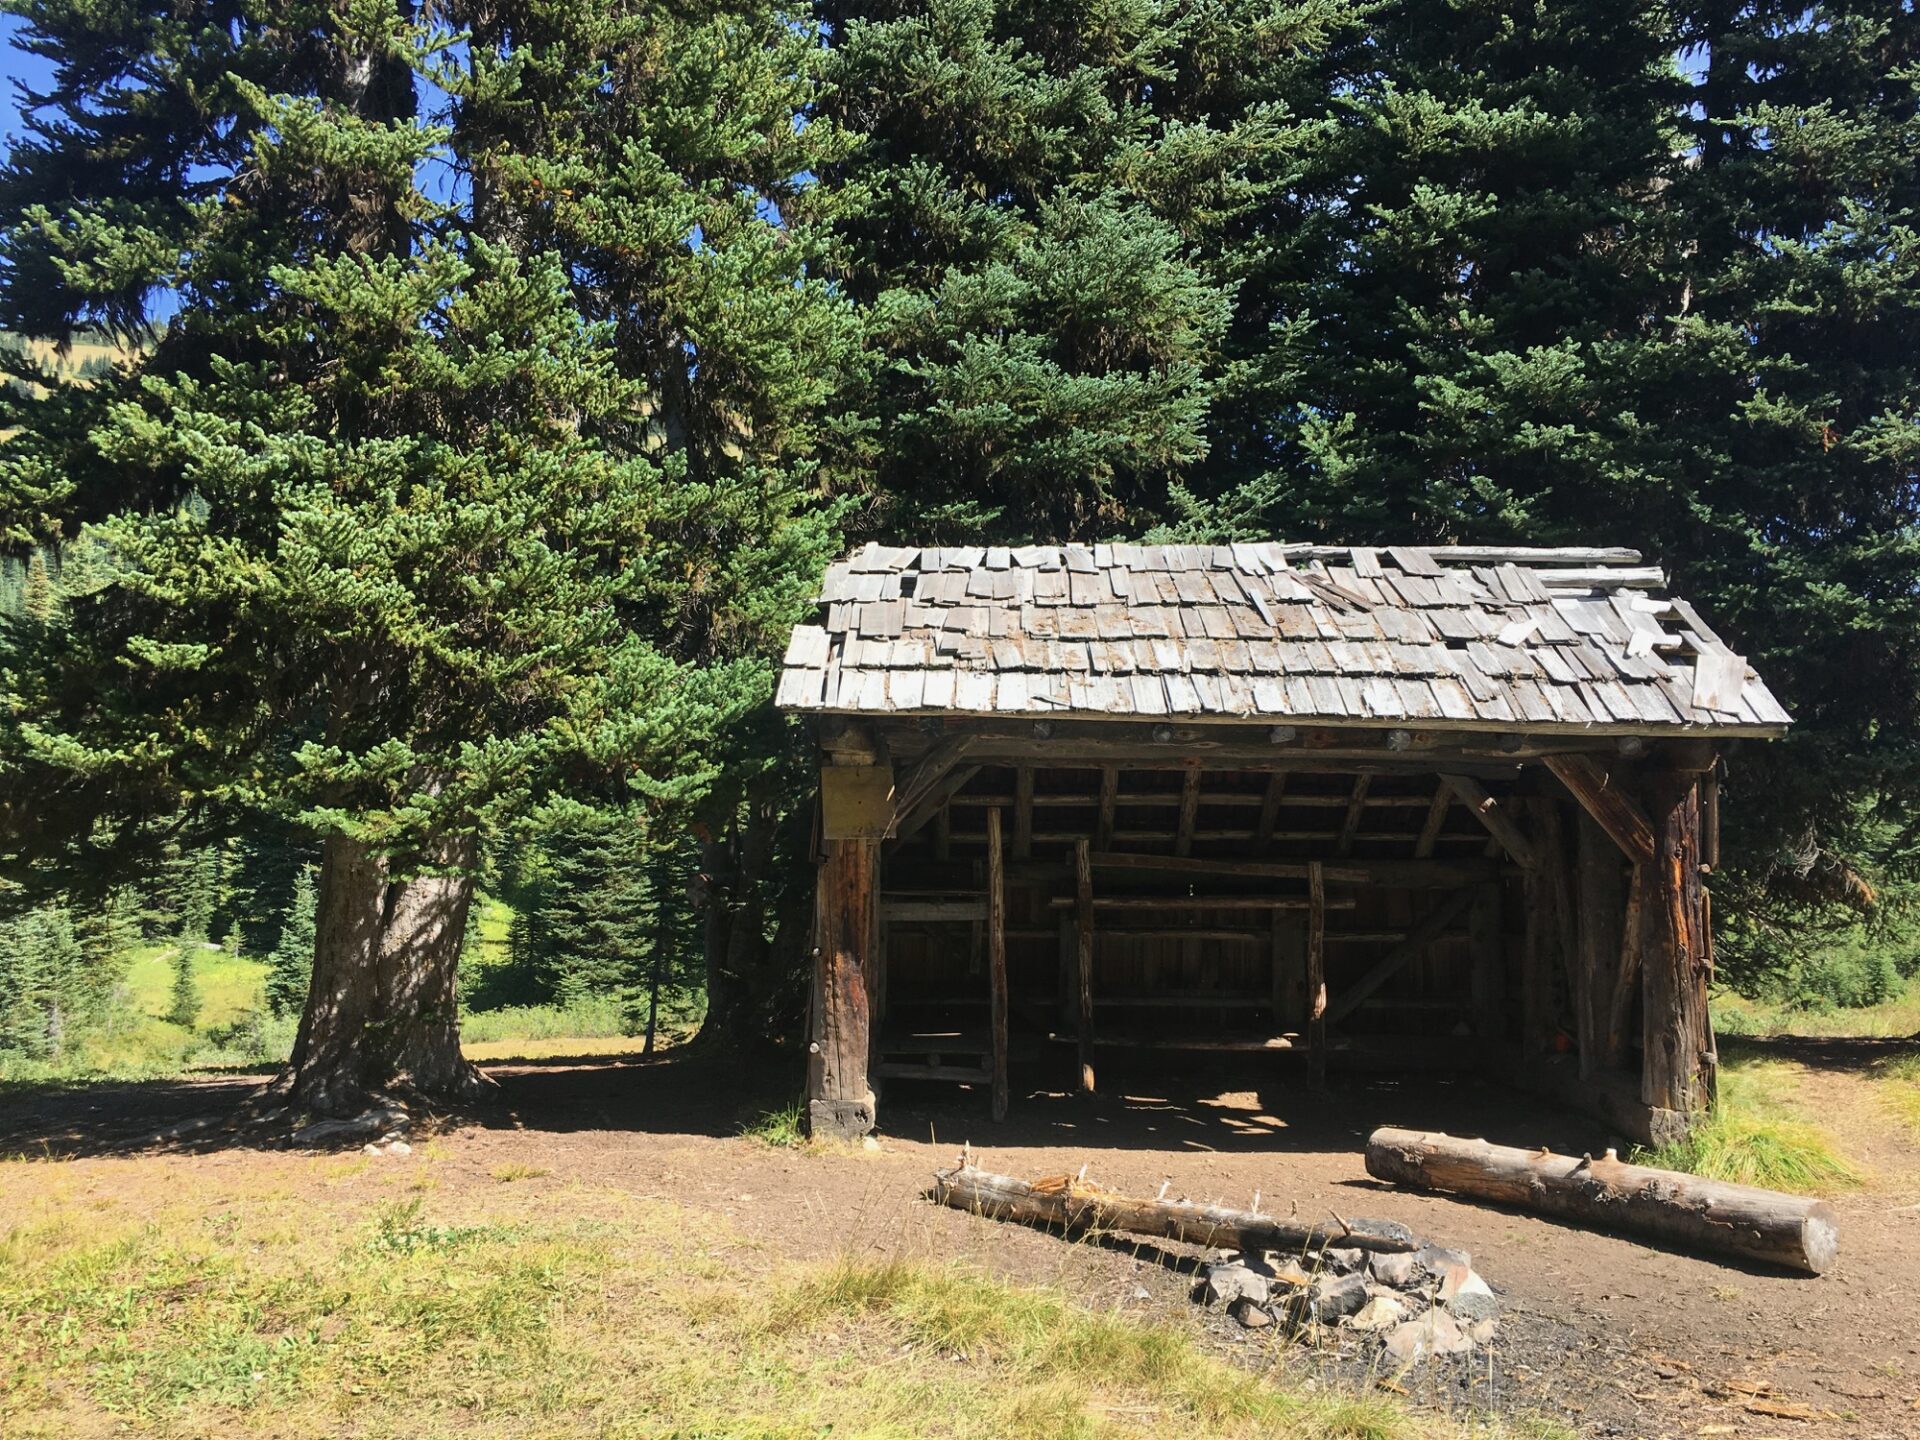
Past the shelter is a large camping area that could house several parties and a small stream directly across with enough of a flow to take a satisfying water break. I dropped my pack at the camp, heated up some lunch, and took full advantage of filtering fresh, cold water.
I had passed a couple at the waterfall below Crater Mountain, who were hiking the loop clockwise and were almost finished. I also passed a single woman on the climb after Canyon Creek, who was going my direction and planning to set up a basecamp for a few nights on Jackita Ridge. Aside from those three people, I hadn’t passed anyone else all day and had peaceful Devils Park surprisingly to myself.
With water at a premium and flowing readily nearby, I almost made this camp my stop for the night, but it was only 3pm and I really wanted to get higher on Jackita Ridge. I knew the ridge would most certainly be dry, so I packed 2.5 liters of water and headed out.
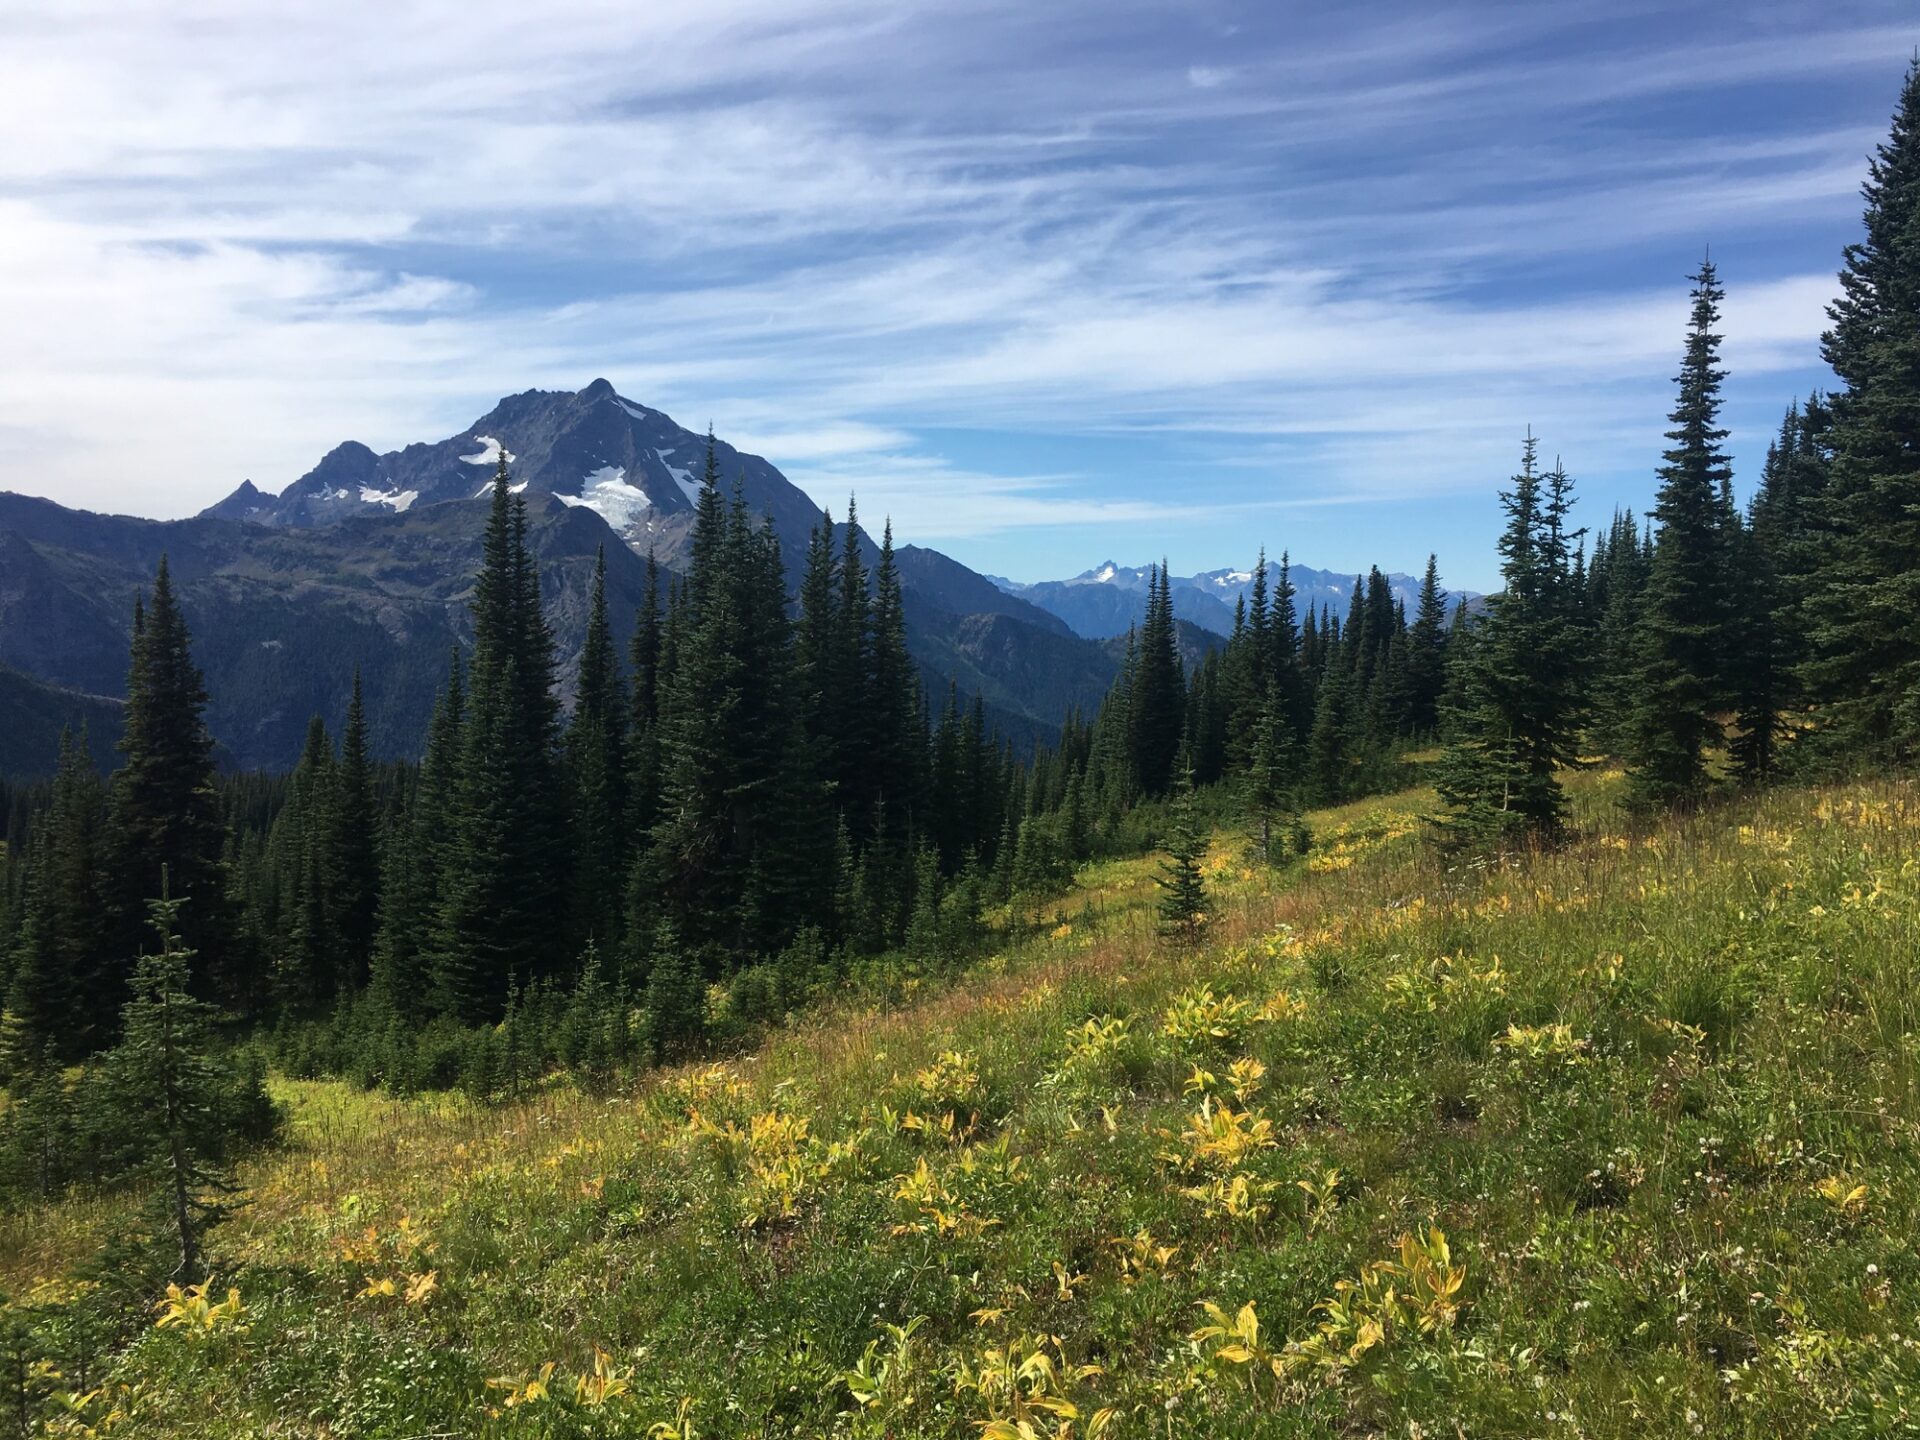
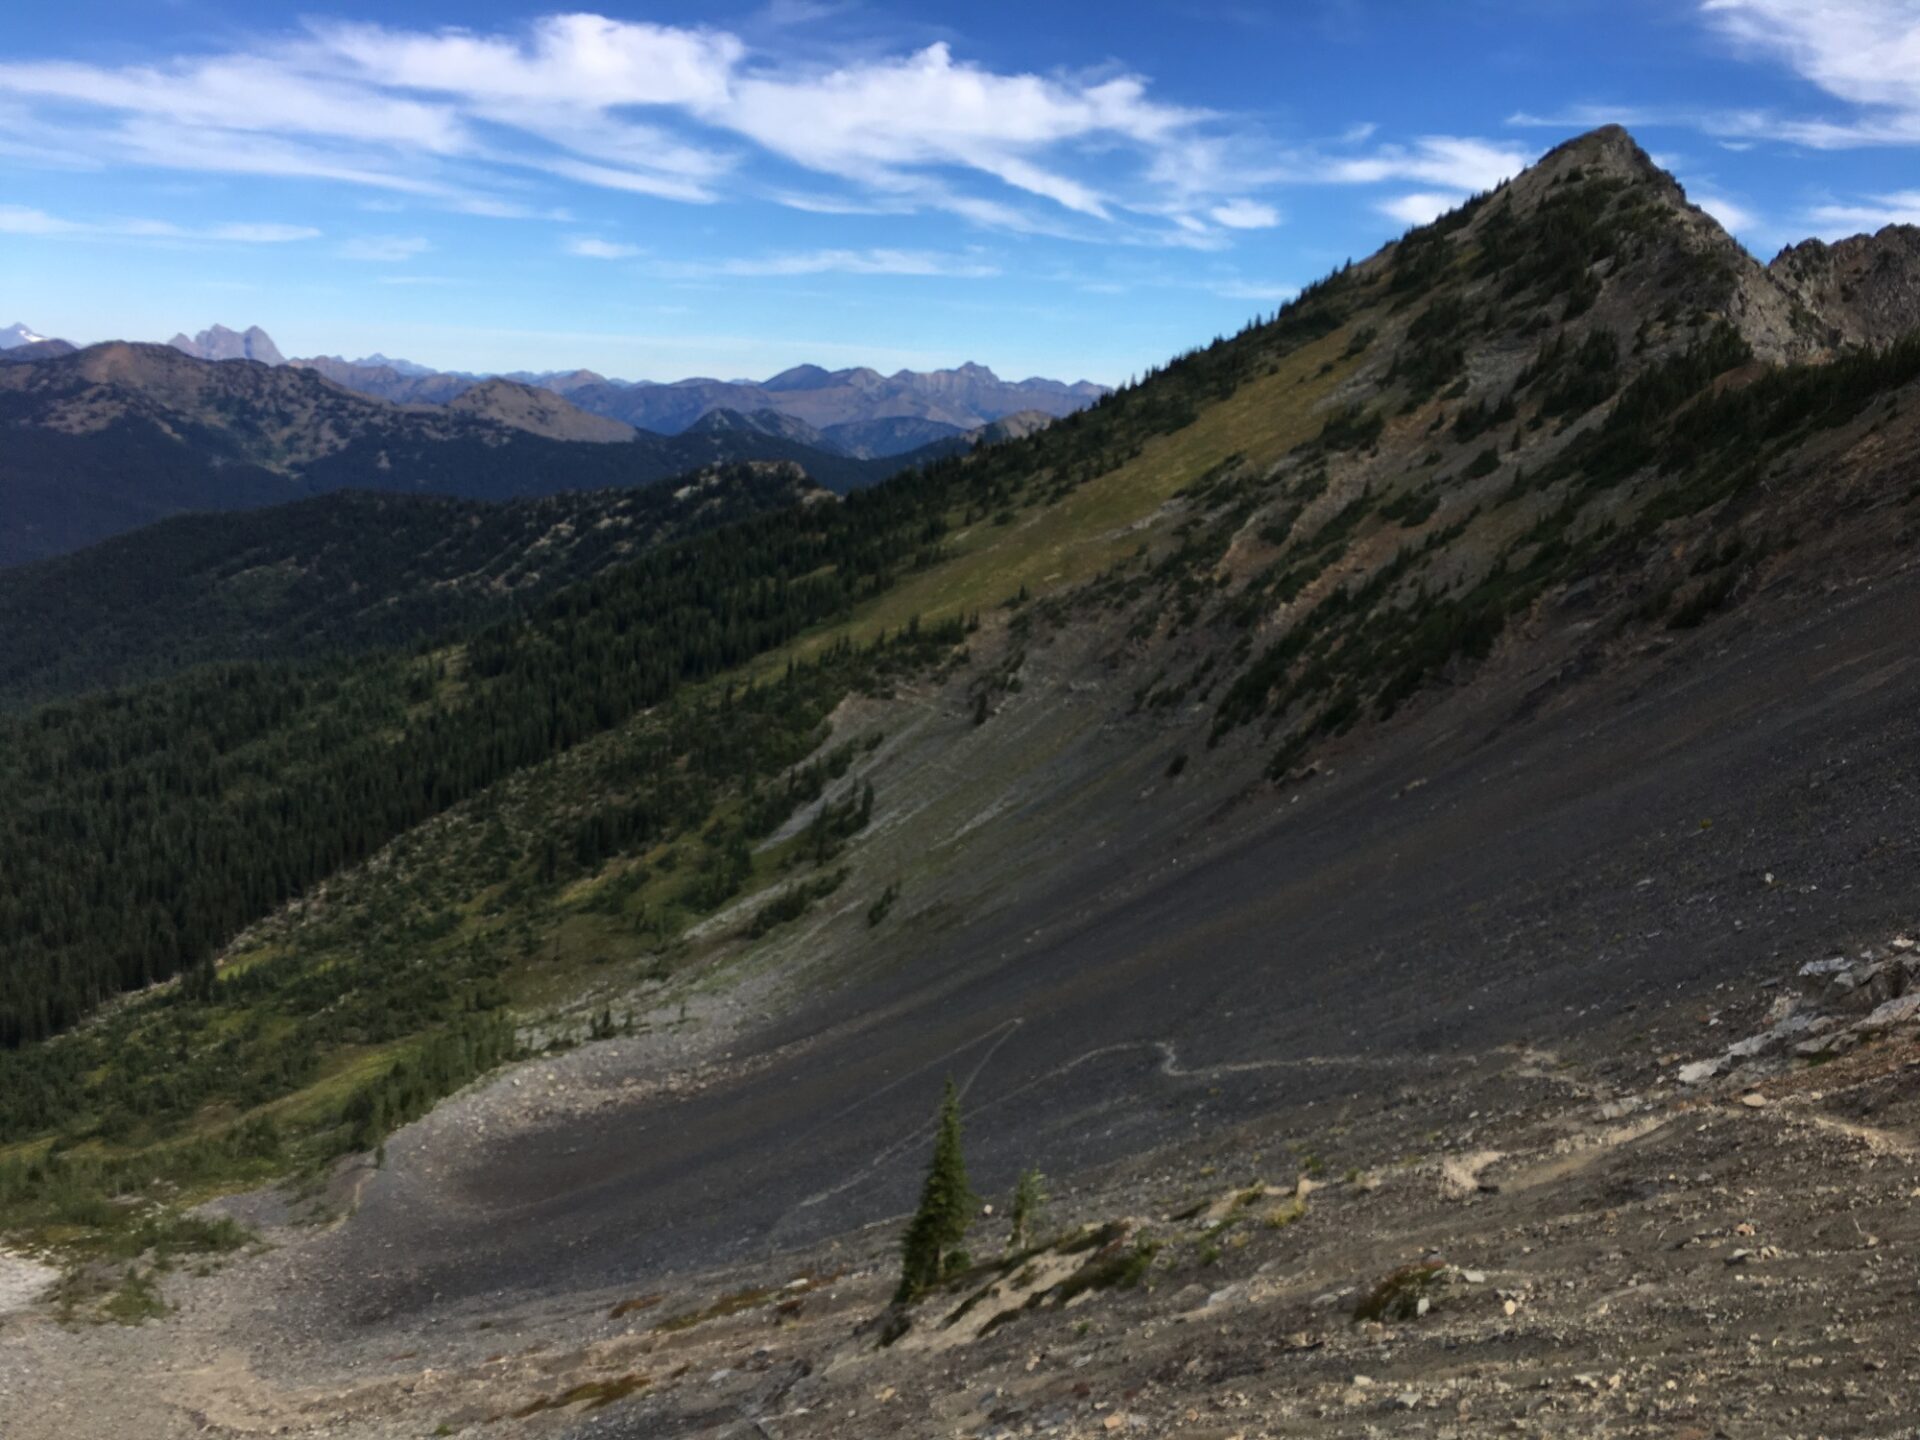
Shortly after Devils Park, the trail turns upward again, climbing the western slope of Jackita Ridge. It was hot, dry, and exposed, but with every step the views get bigger and bigger.
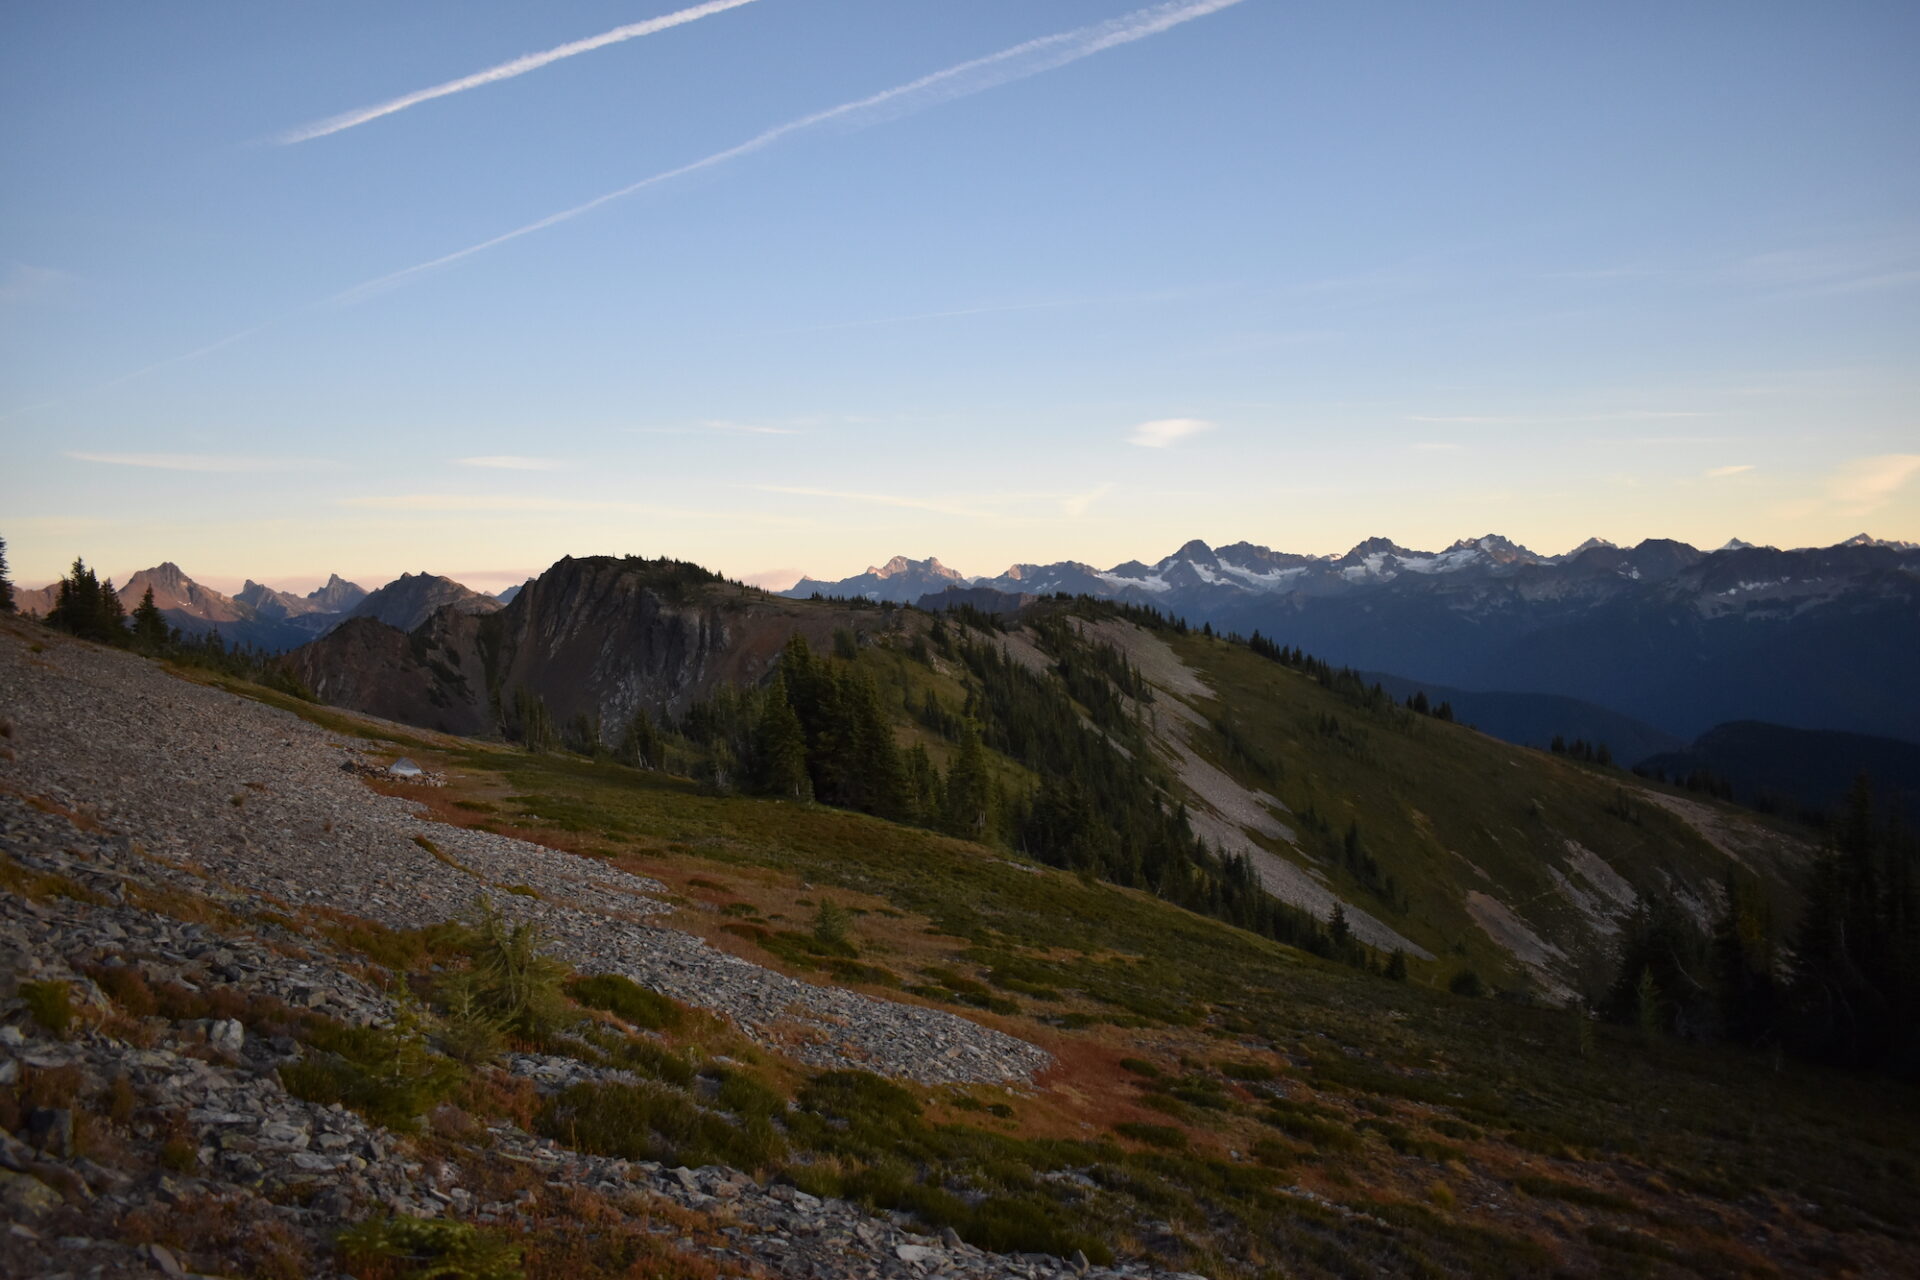
Once the trail crests the western shoulder of South Jackita Ridge, it plummets down a sketchy looking scree slope to the basin below. The views were so gorgeous that I really didn’t feel like descending. I wanted to spend the night up high, so I decided instead to explore a boot track up the ridge of South Jackita, hoping to find a high camp somewhere along its slopes.
Turns out my curiosity would be rewarded. The boot track led not just to South Jackita’s summit, but also to a spectacular rock shelter camp with an incredible panoramic view. It was only 4pm, with plenty of time to kick back and relax.
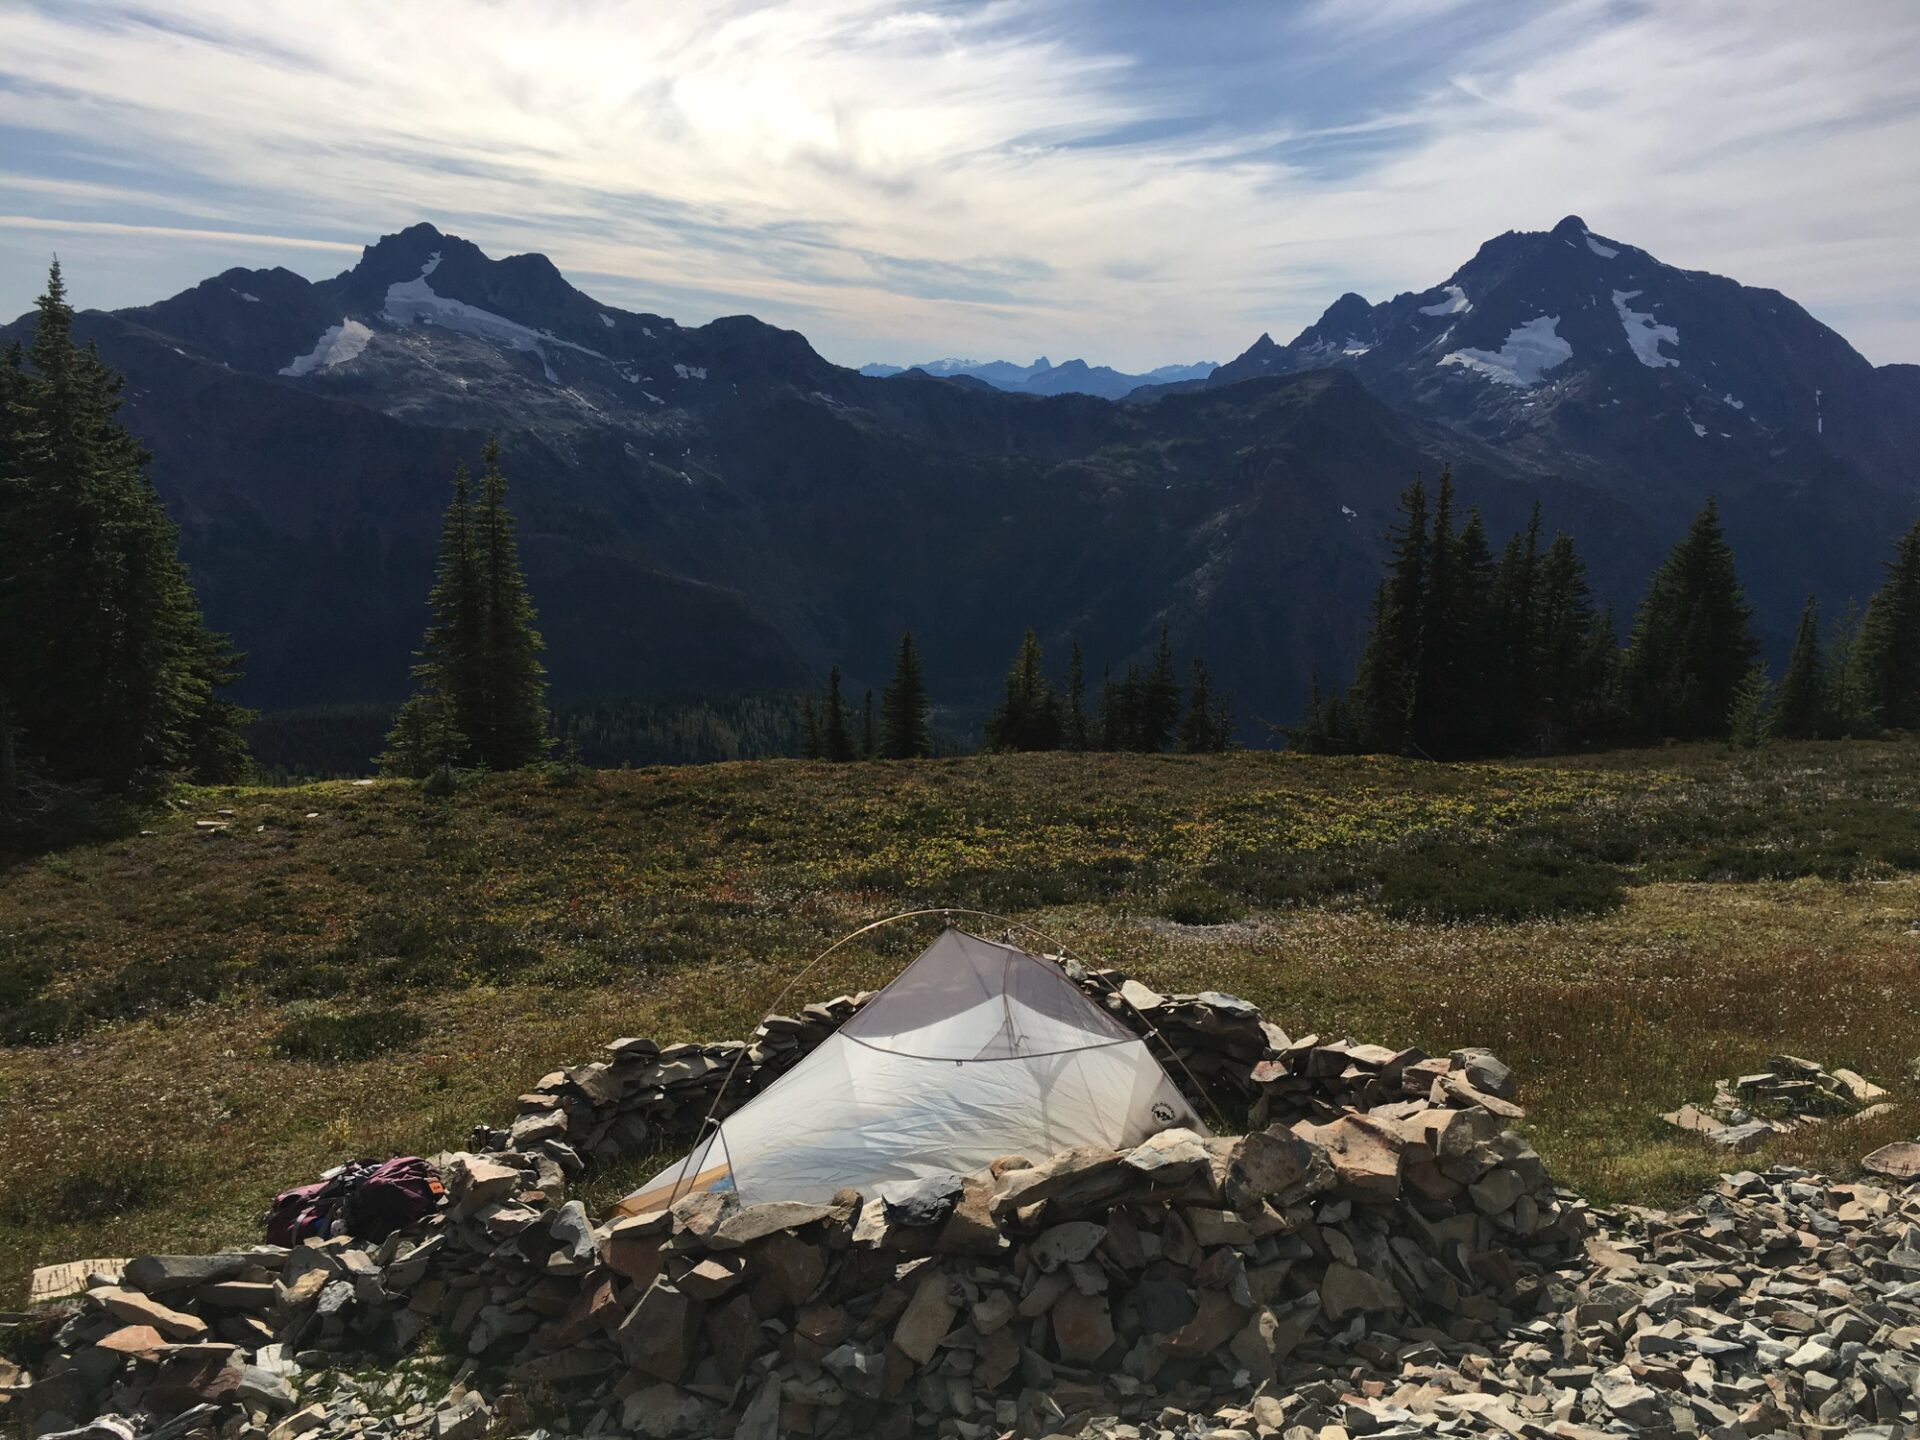
More unbelievable than the views and solitude was the surprising lack of wind. It was absolutely still. Not a sound, not a breeze, not a whisper. They say true silence will drive you mad but for me, that kind of silence is the most amazing kind of therapy. It was absolute heaven.
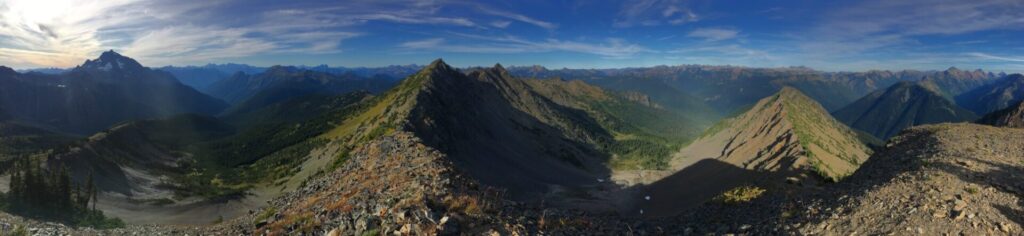
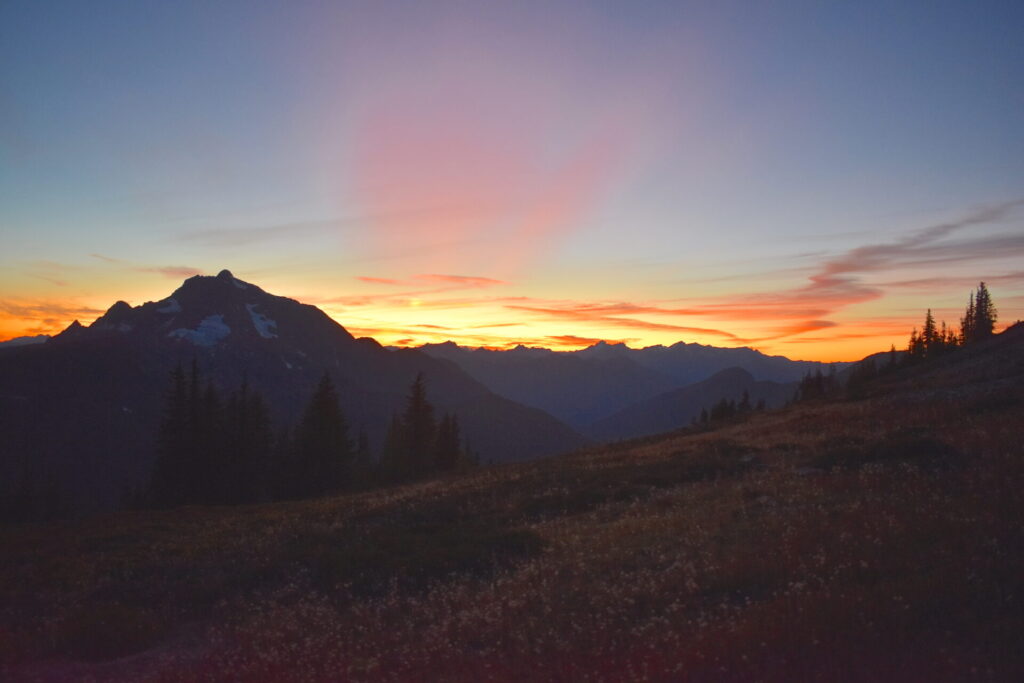
After relaxing at camp for over an hour, I hiked up the short scree field to the top of the South Jackita summit and enjoyed a 360 view including some small lakes down below. Turns out there is water on this ridge, though I’m not sure I’d want to hike the 800-1000’ down a steep scree slope to get it!
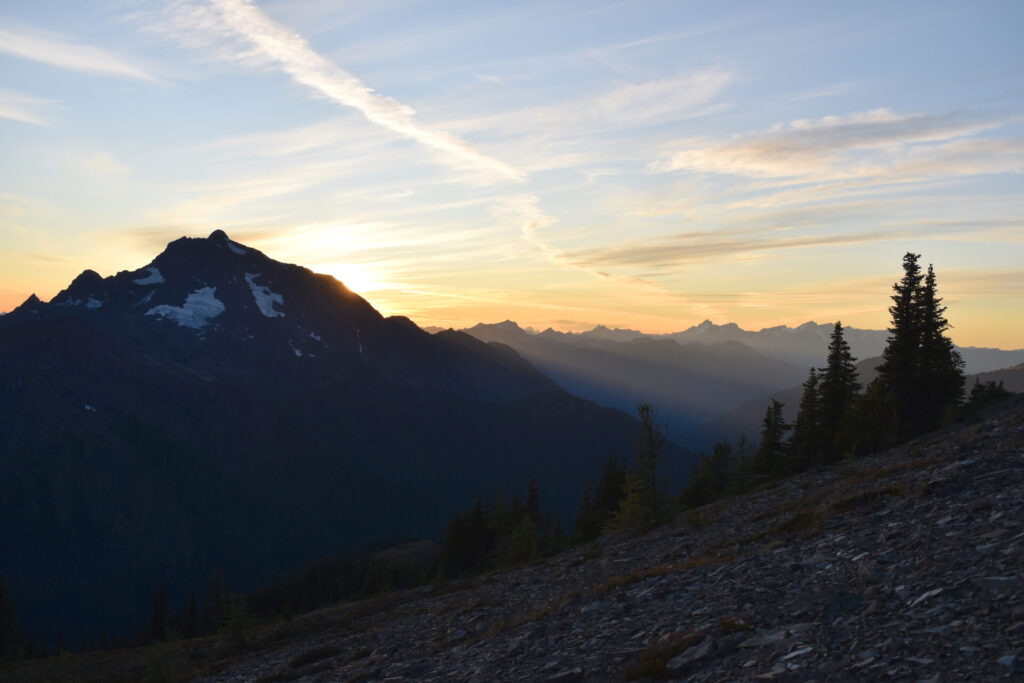
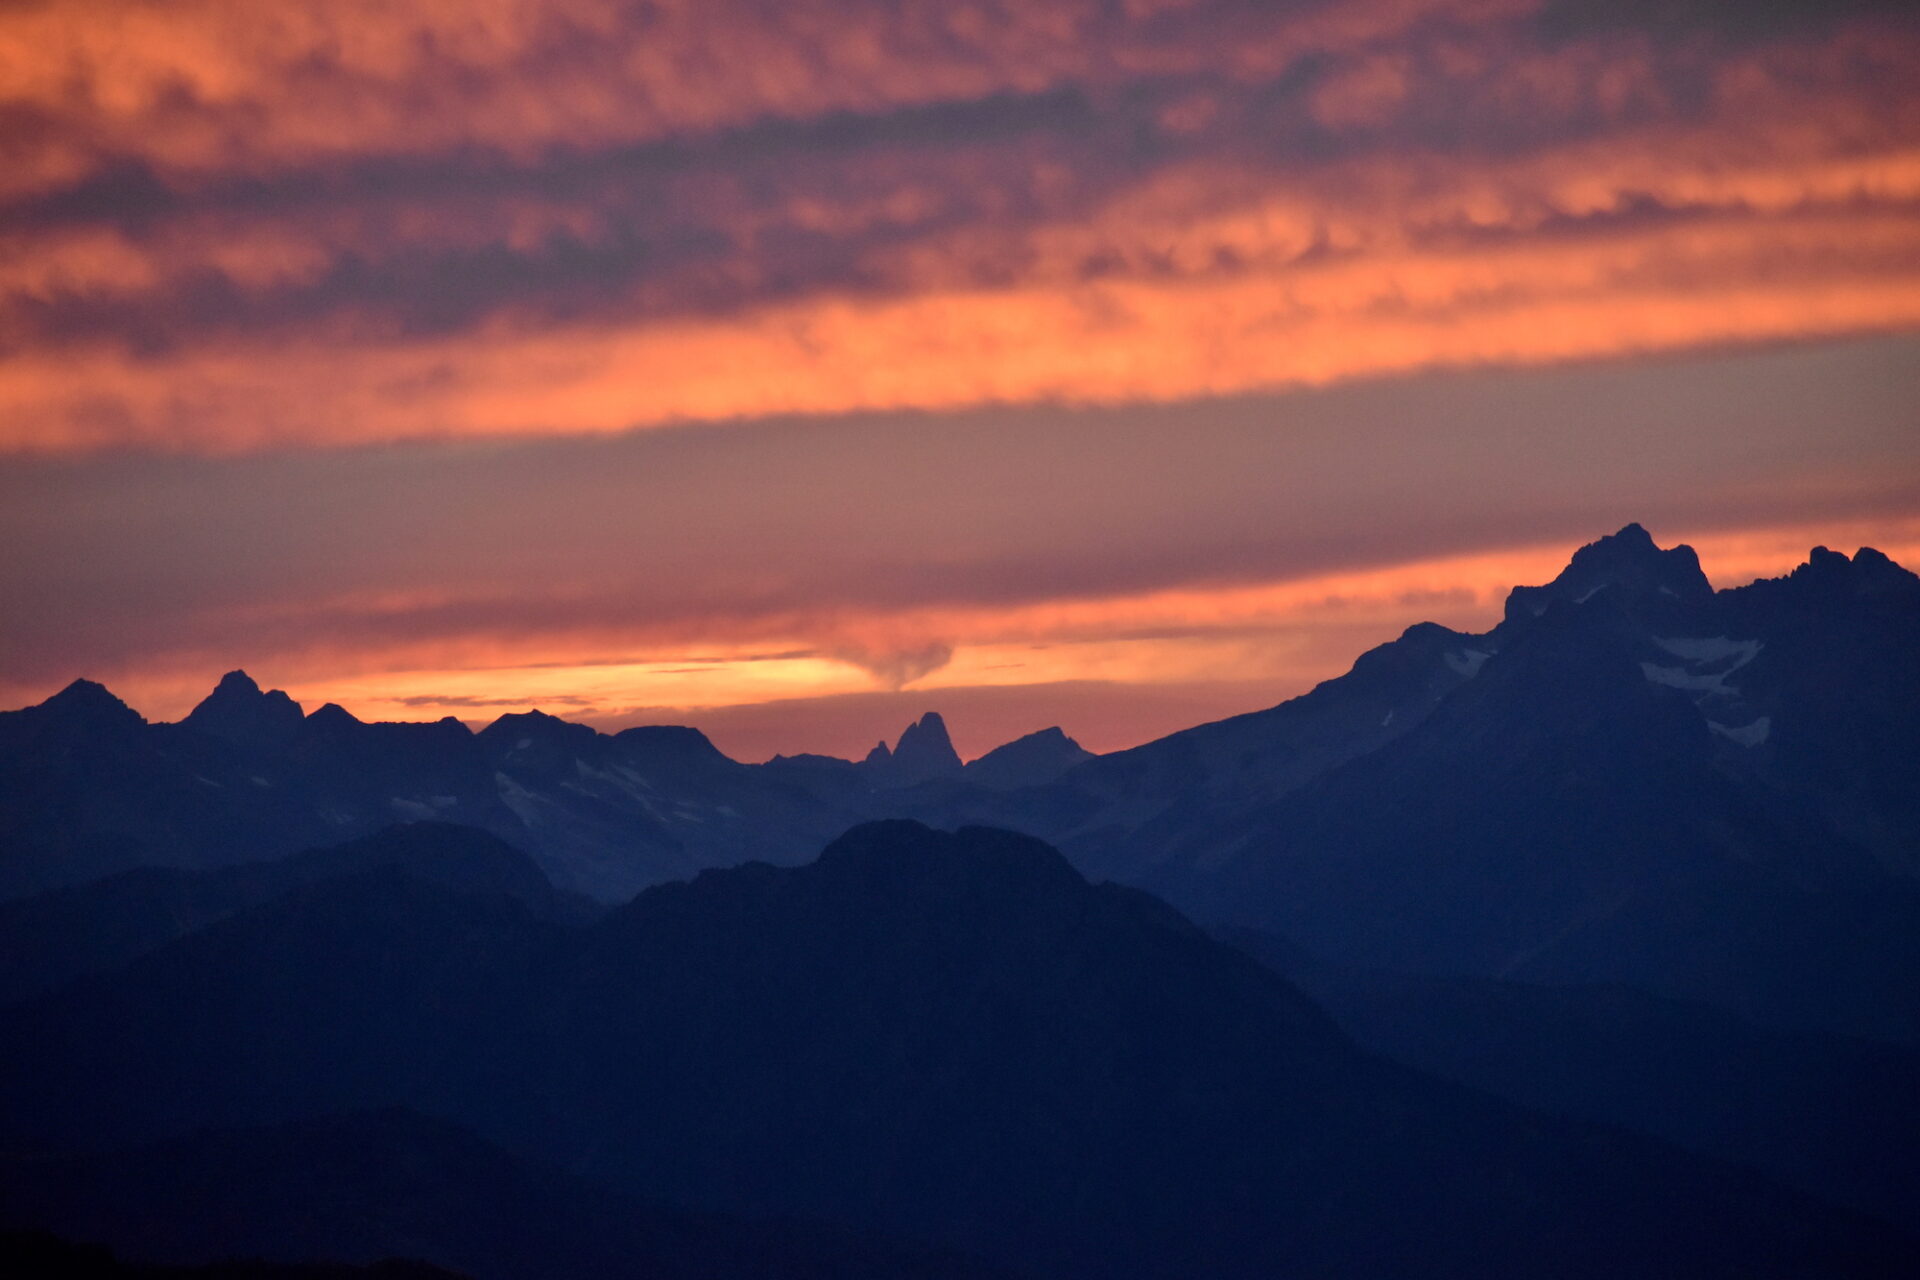
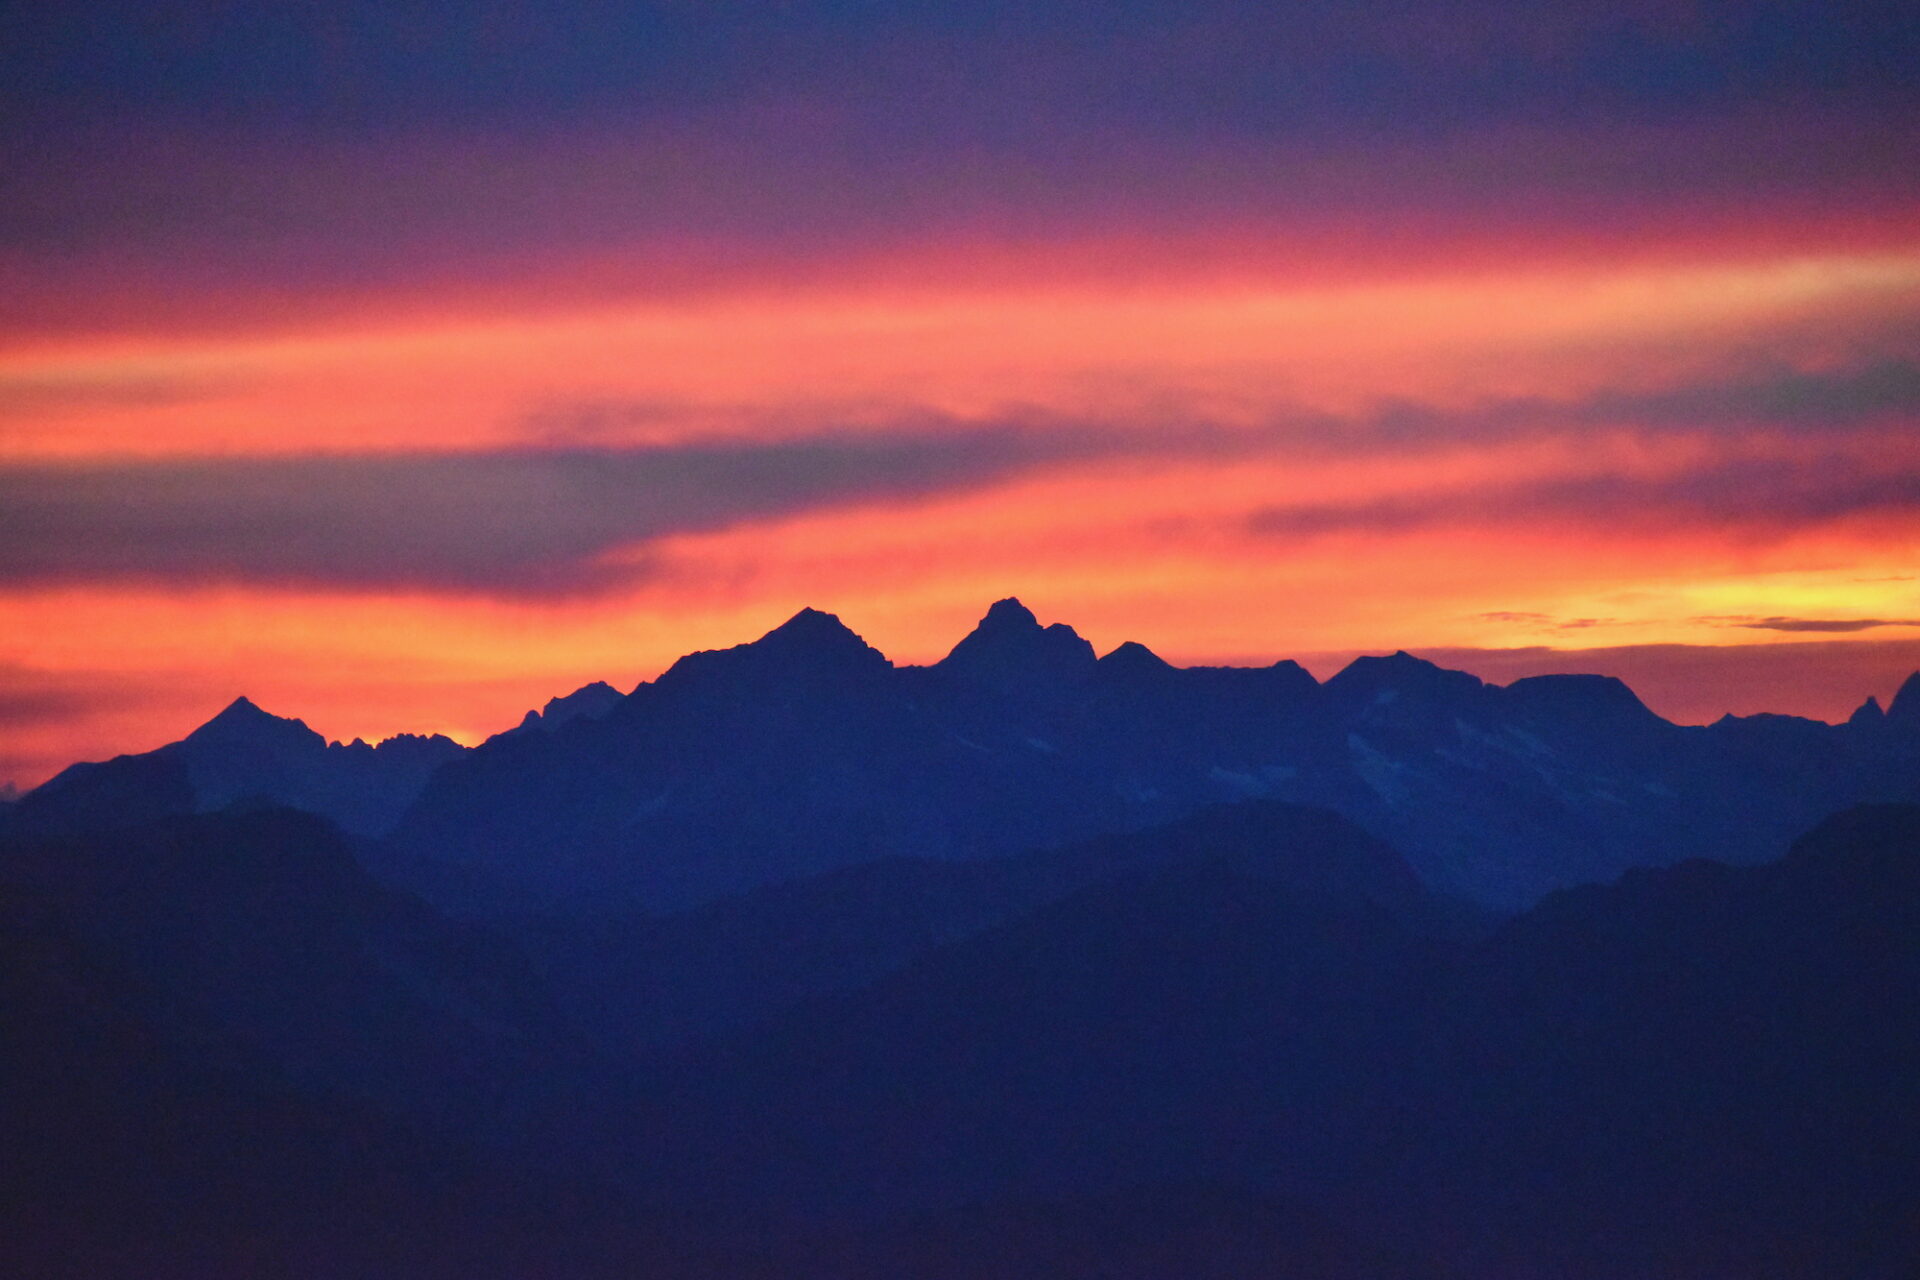
That evening I enjoyed a beautiful, peaceful sunset, all to myself with no one around for miles. I was fast asleep before 9pm and slept about as soundly as I ever had. If anything had walked across my tent, I likely wouldn’t have noticed!
Day 2: South Jackita Ridge to Devils Dome
Distance: 10 miles | Elevation Gain: 3,050’
The morning dawned beautifully and I didn’t even need to get out of my tent to enjoy it! I had only 10 miles to cover to reach Devils Dome, the high point of the route and location for my next evening camp, so I stayed most of the morning at South Jackita, soaking up every last drop. I almost didn’t want to come down, but alas, I was nearly out of water and it was time to move on.
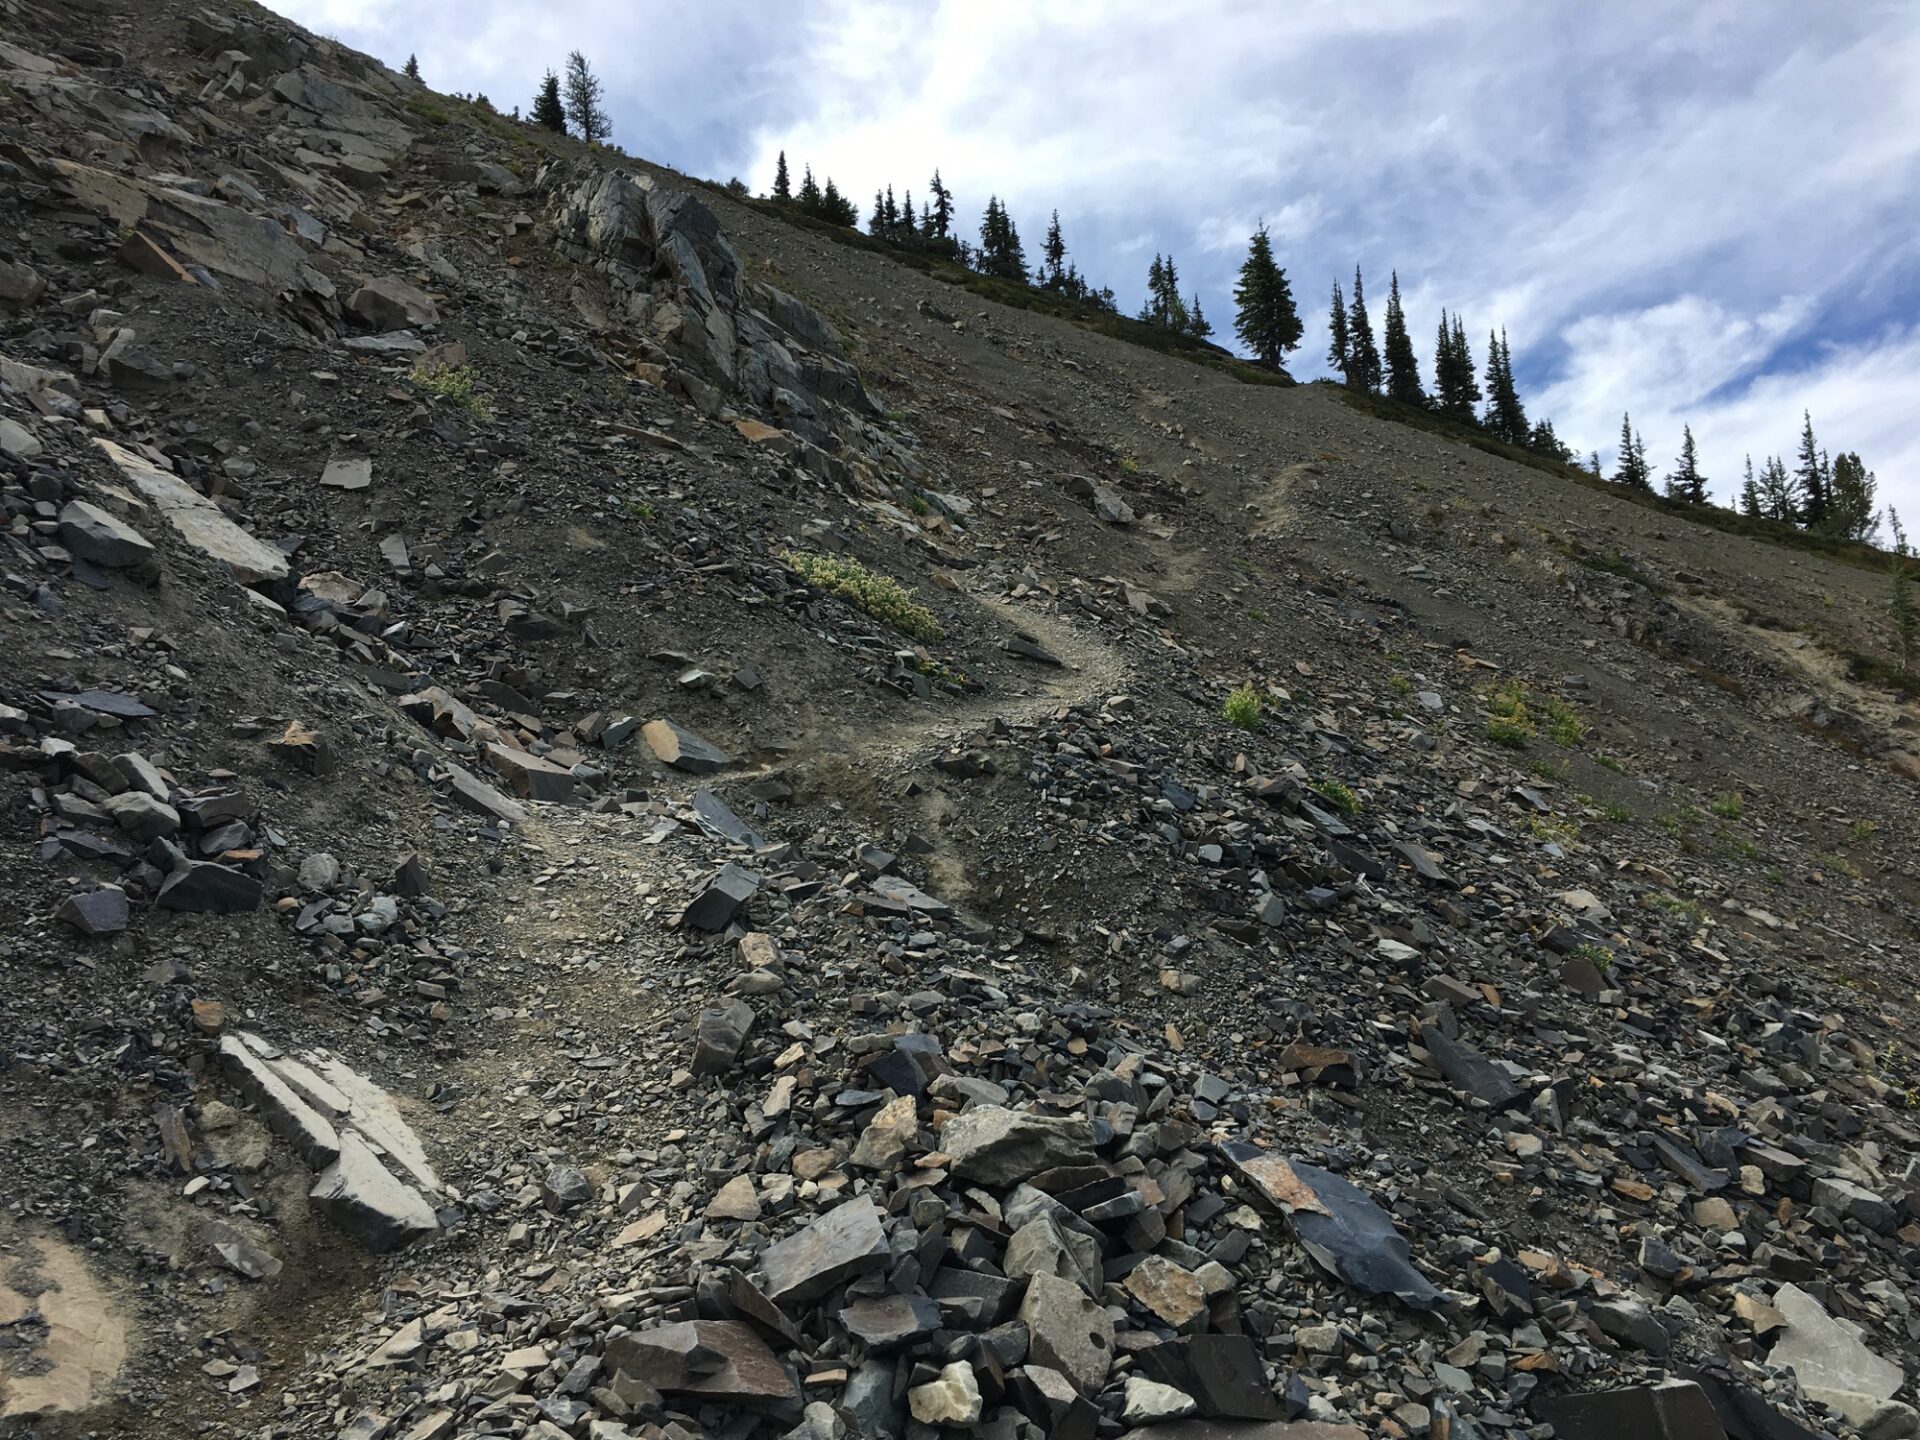
If I had my own personal kryptonite, it would contain ladders and scree slopes. Luckily Devils Dome had no ladders but the scree slope on Jackita looked downright sketchy. I took my time, especially at the top, which was the steepest section and full of tiny rocks that were like walking on ball bearings. As a solo backpacker, slipping was really not an option.
The good news is that the very top of the descent is the worst, slickest part. About midway down the trail enters deeper shale, which still warrants caution but provides much better traction.
Once in the basin below, it’s not far to the South Fork of Devils Creek, which has a good supply of water. With only half a liter left from my night on South Jackita, I happily filtered plenty of cold, fresh water. I had heard that the stretch of trail from somewhere around this point to Devils Dome was very dry and I hadn’t passed anyone who could tell me whether the upcoming North Fork of Devils Creek was running. To be safe, I reluctantly strapped 3 liters of water to my pack.
After a short climb, the trail then drops a maddeningly steep 2,000’ all the way to the basin floor. Descents are rough on my arthritic knees, especially with extra weight, and I’m sure my pack was nearing 30 pounds with those extra 6-7 pounds of water! Wouldn’t you know, I didn’t need to carry the extra water because the North Fork of Devils Creek was flowing quite well. Oh well, better safe than sorry!
I had yet to see anyone all day so I took yet another water stop, enjoyed the solitude, rested my knees, and fired up some lunch.
So far I had gone down a steep scree slope, then back up again, then down a steep descent. Now it was time to go back up again. After the North Fork Devils Creek basin, the trail climbs steeply before relaxing a bit, but not before gaining another 1,500’ or so up to the junction with Anacortes Crossing. Between Devils Park and Devils Dome, you’re either climbing or descending.
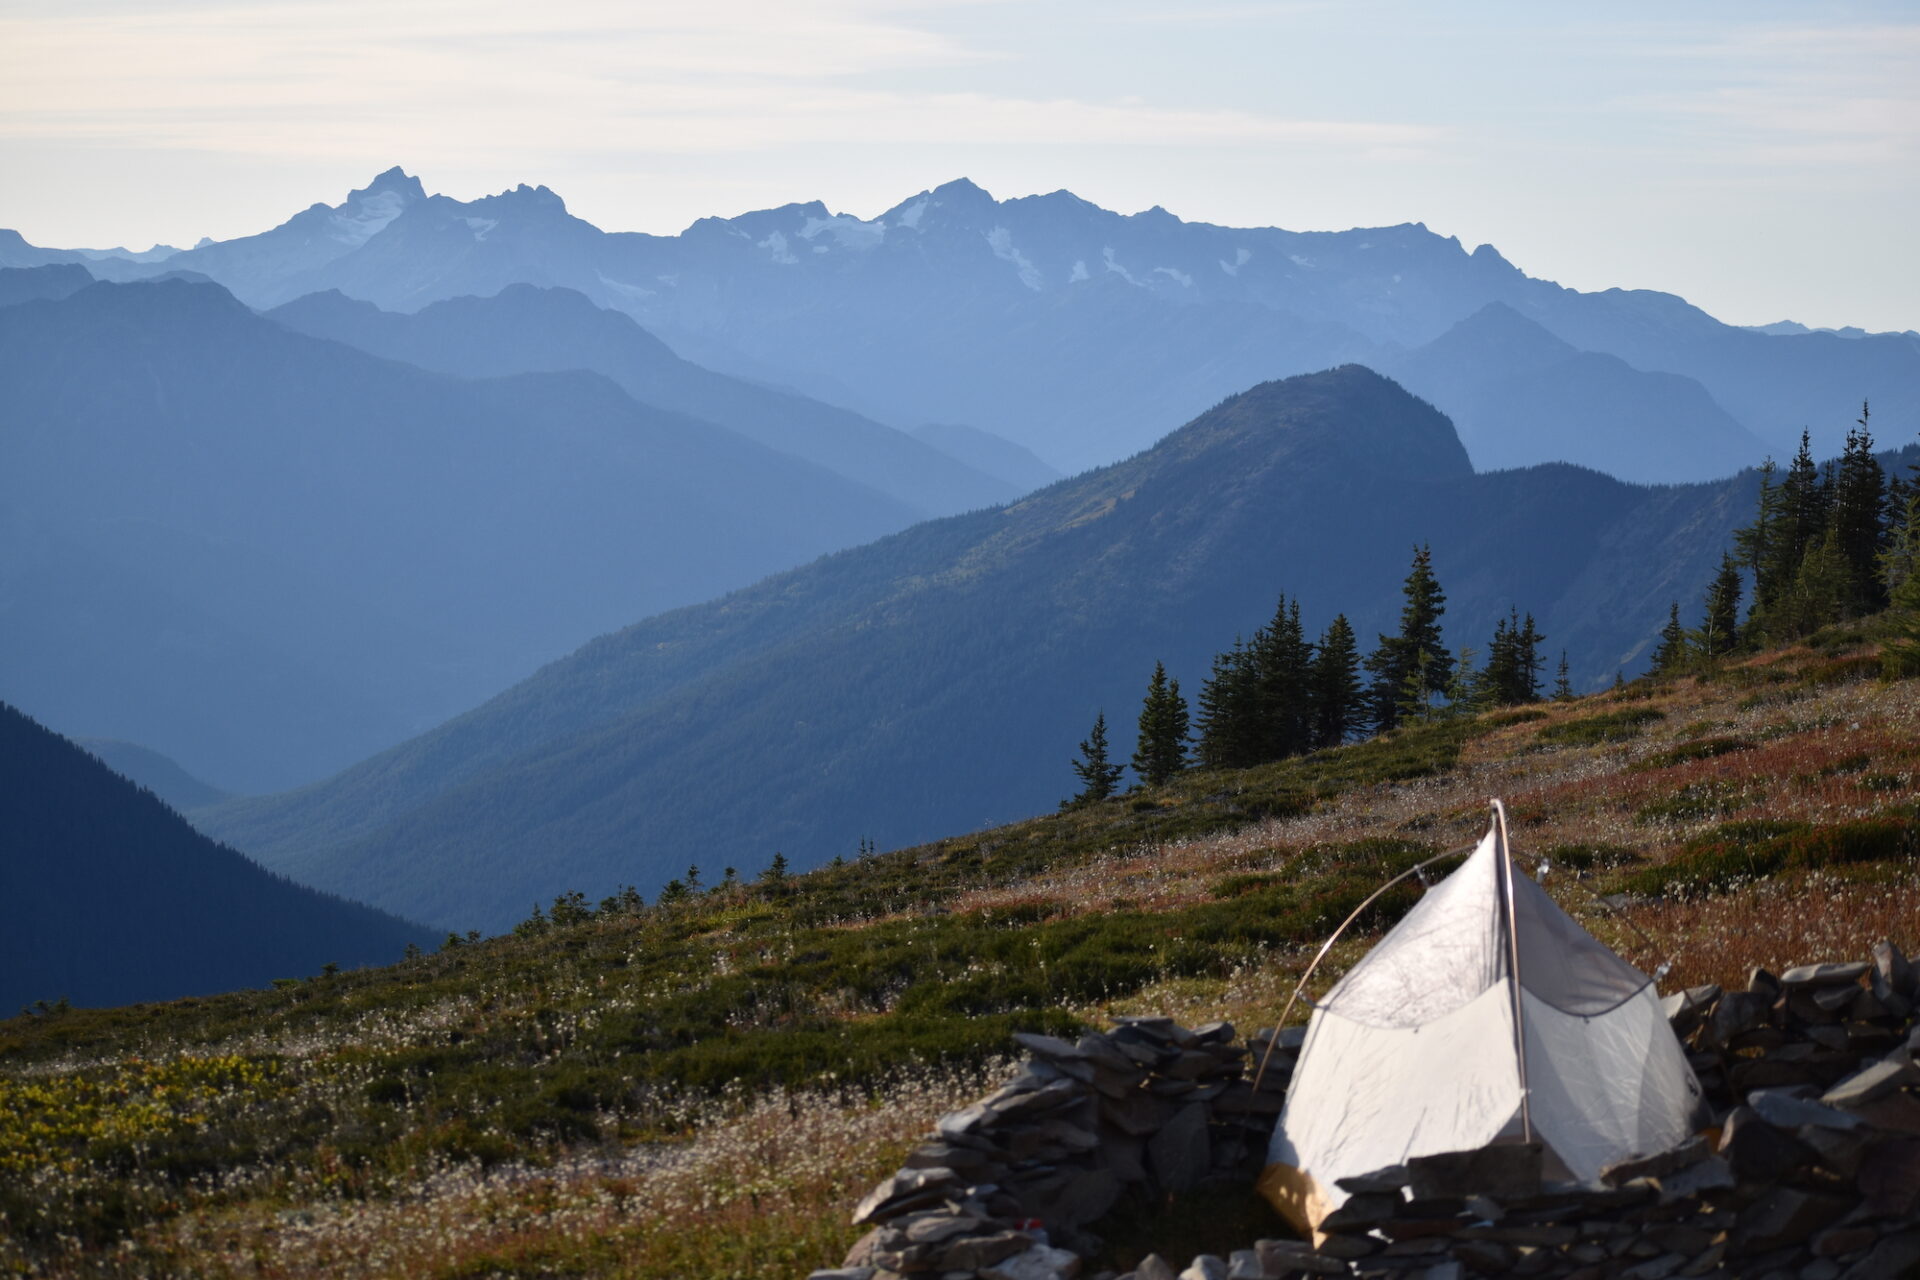
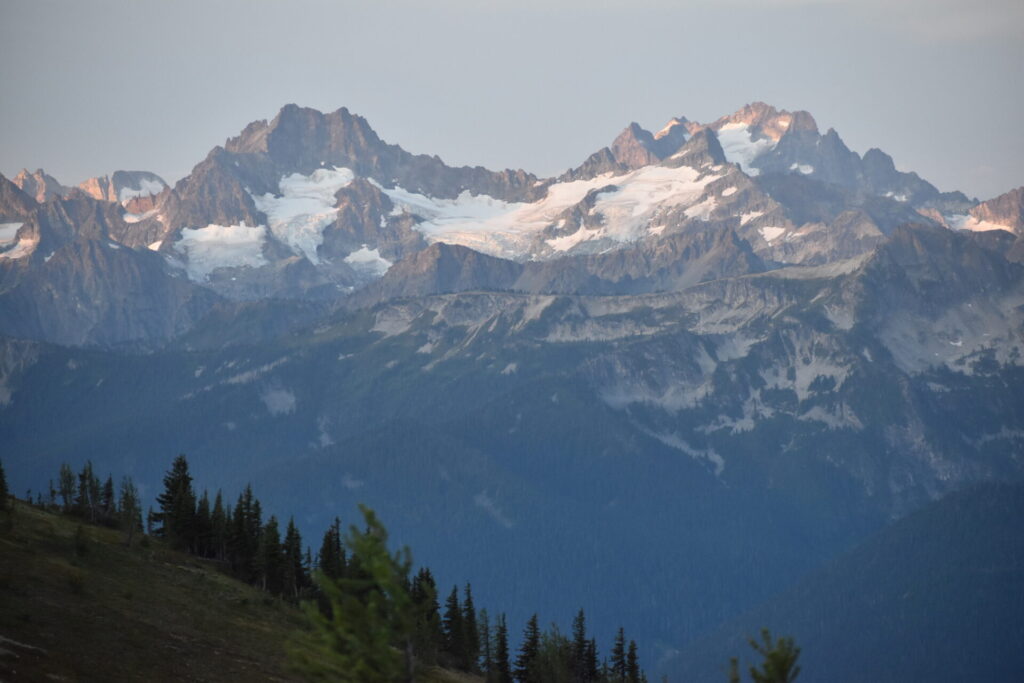
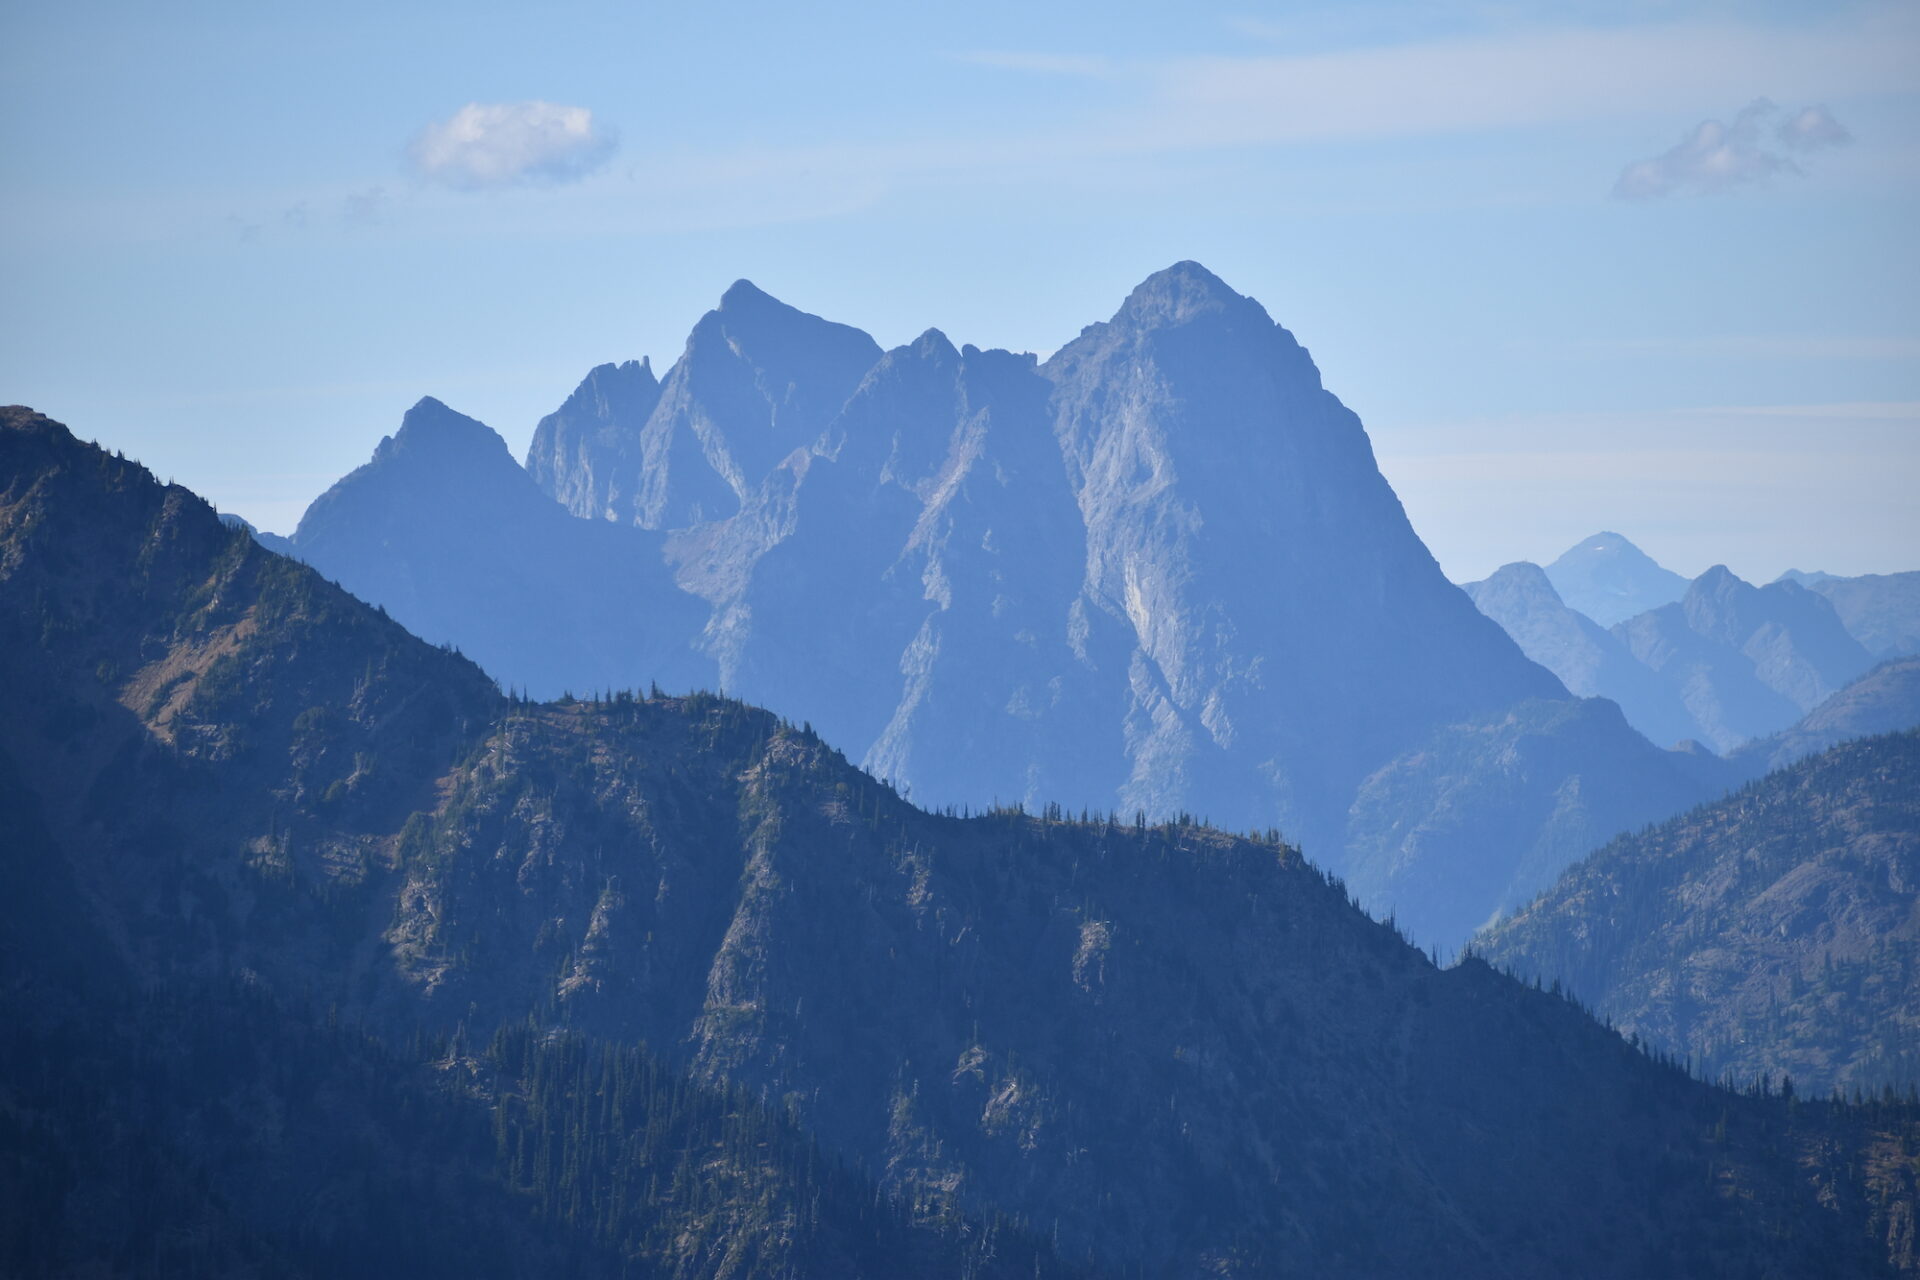
Just past the Anacortes Crossing there was a small eroded section of trail that took a little care to cross and could get ugly fast without some maintenance. The trail then eases into a rolling traverse westward, with fantastic views back to Jackita Ridge and the North Cascades. I really enjoyed looking back to see how far I’d already come. I could also see the general area I had camped the night prior.
Eventually the trail comes to a junction at Devils Pass and becomes the Devil’s Ridge Trail. To the left is Devils Dome. To the right is Sky Pilot Peak and yet another interesting idea for a loop trip. There are some camps at Devils Pass and a spring that is supposed to be flowing year-round, but I admit that I didn’t stop to check it out.
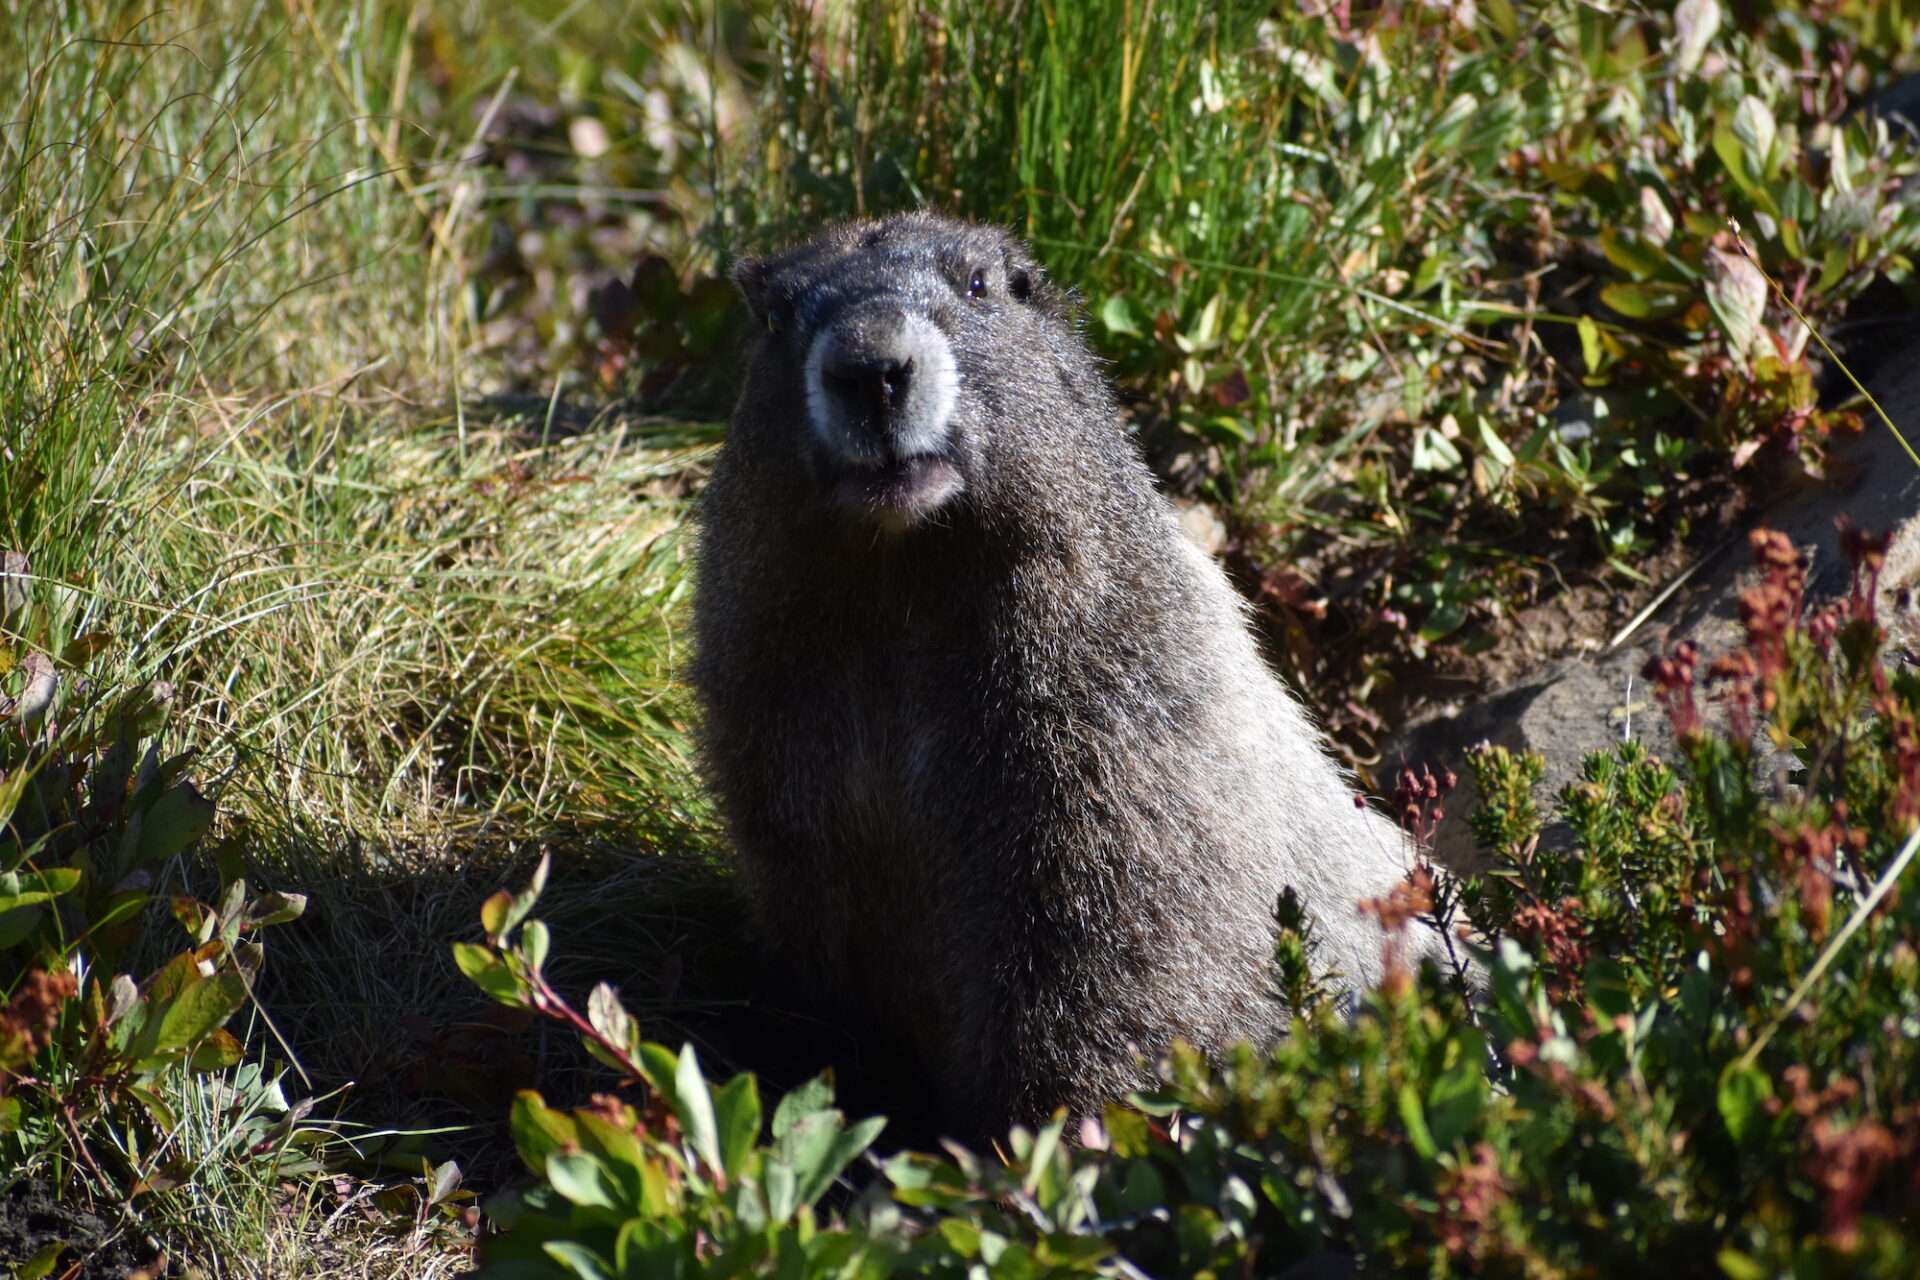
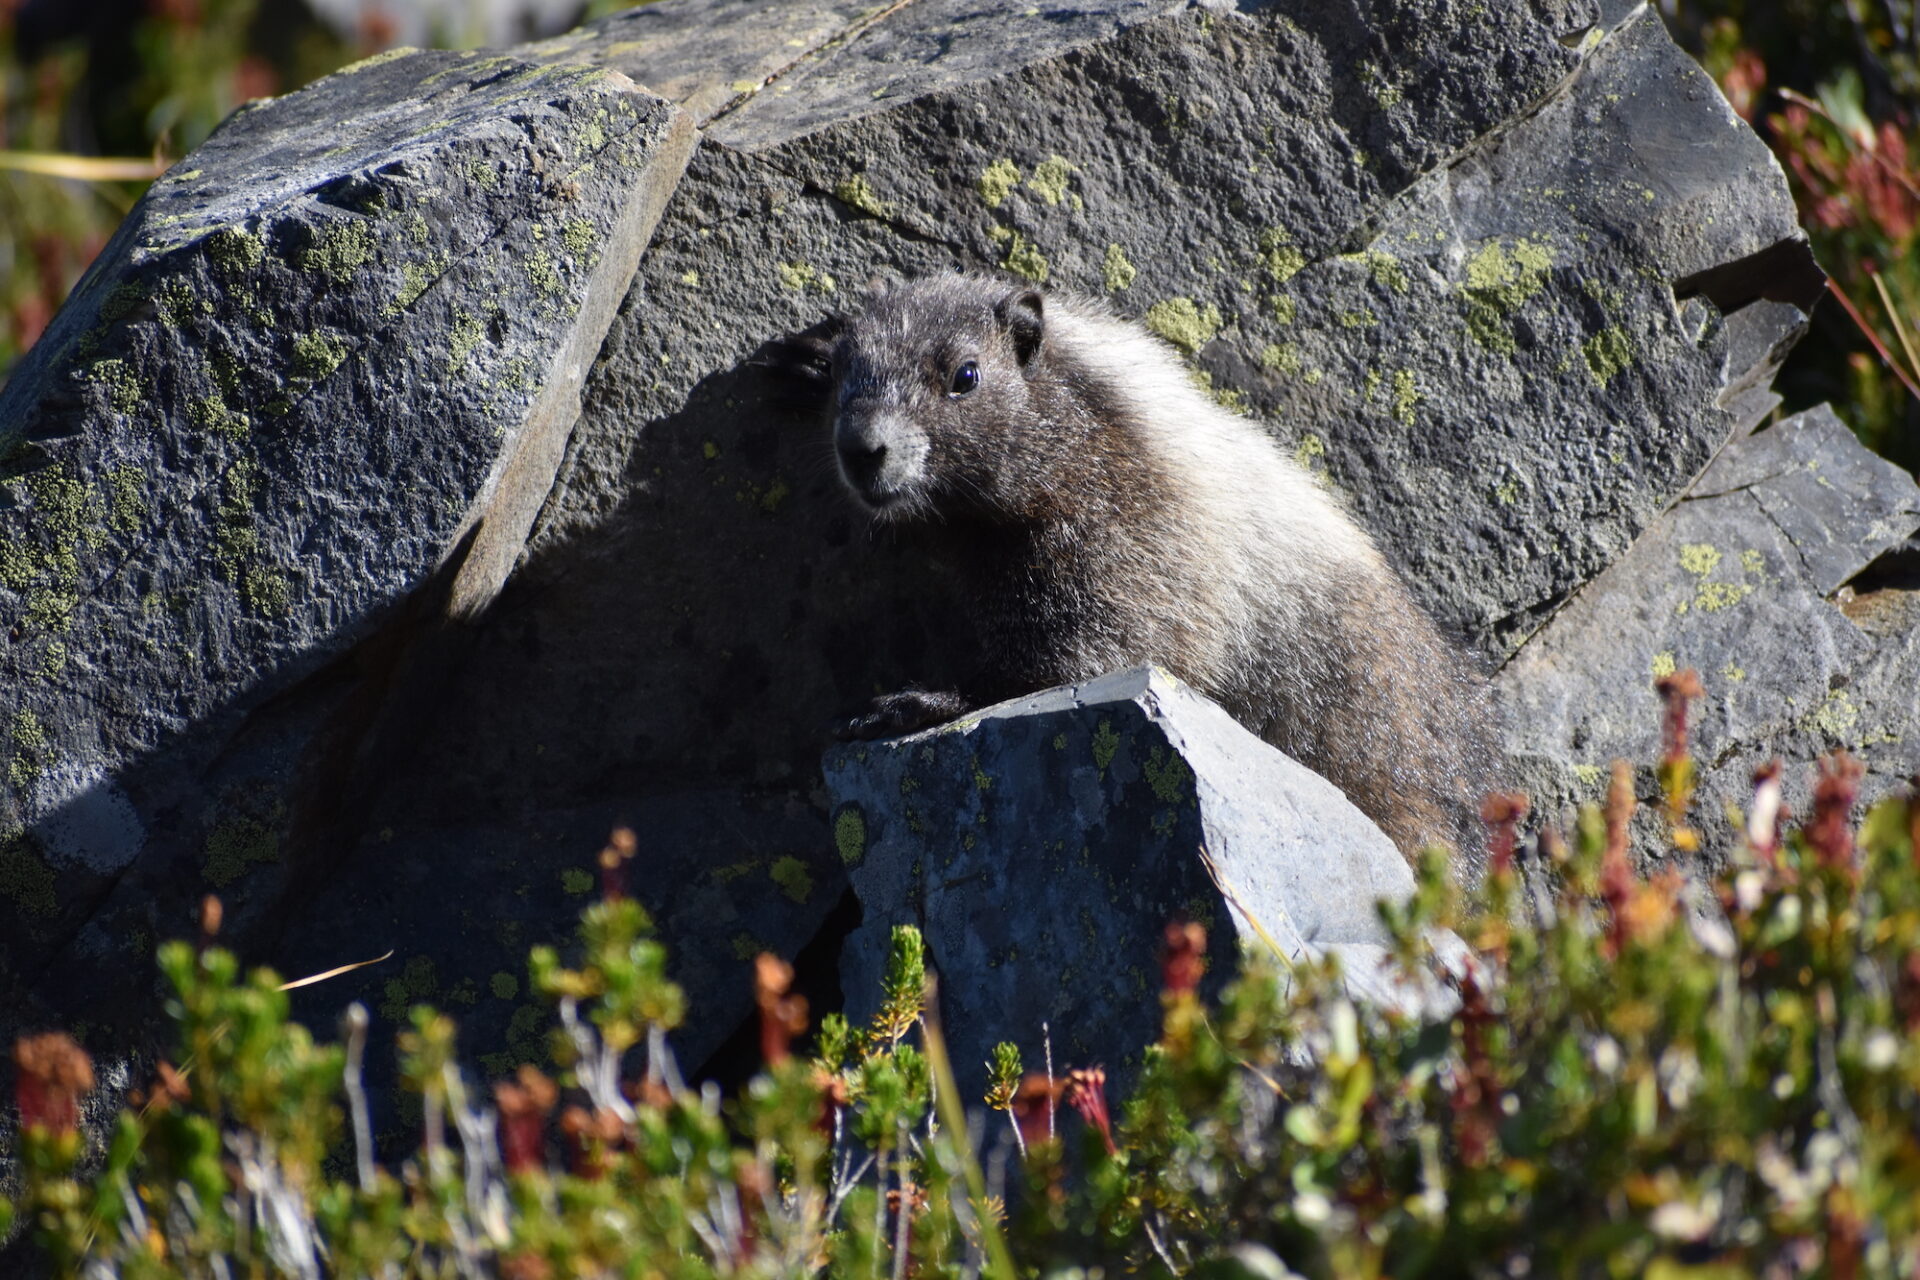
After Devils Pass, the trail passes through surprisingly lush forest before breaking out into another rocky basin with a climb up to a shoulder between peaks 6881 and 6402. As I continued up, sheer whistles broke the silence and I knew it was only one thing: mountain marmots!
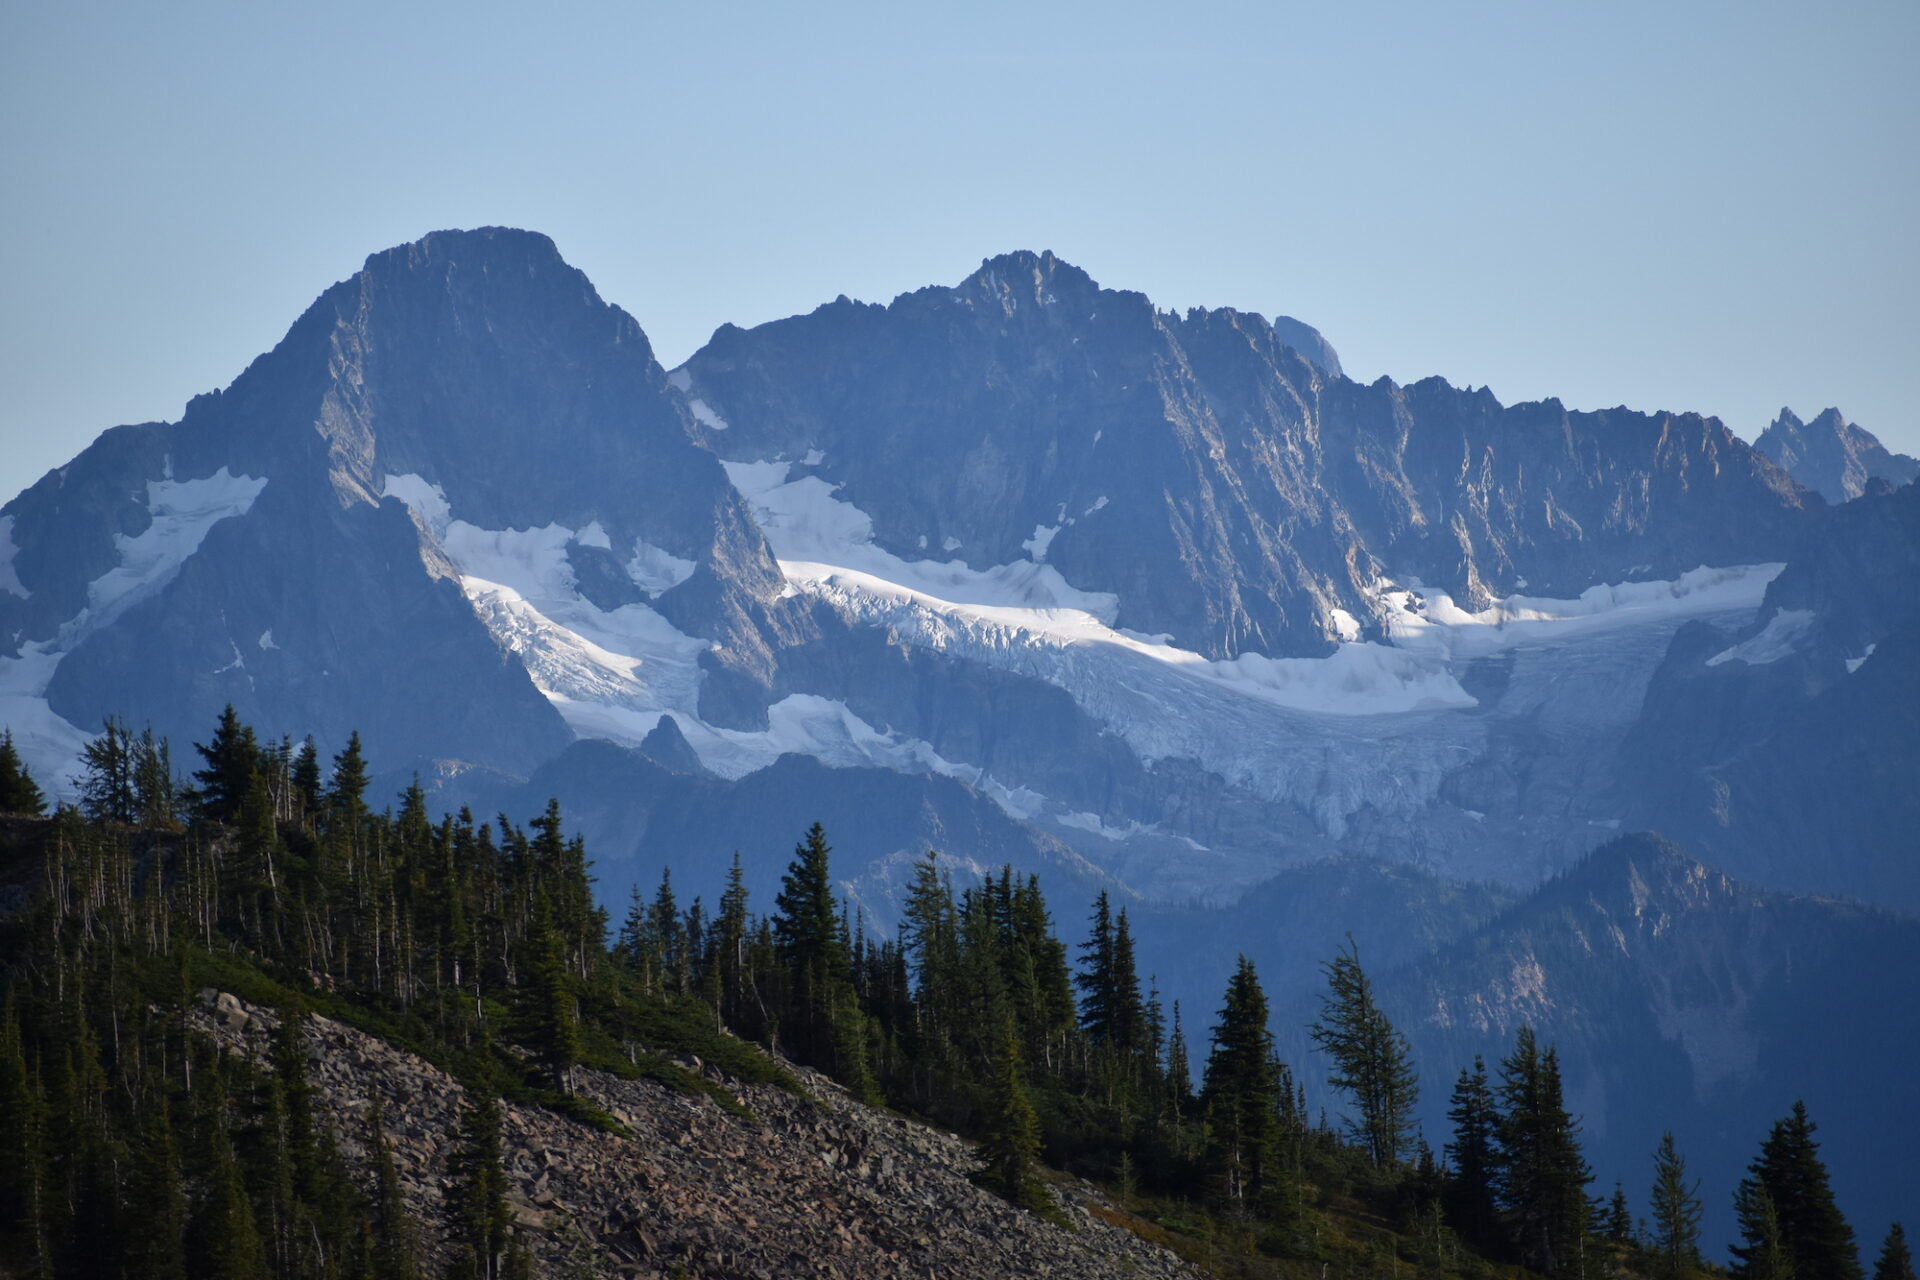
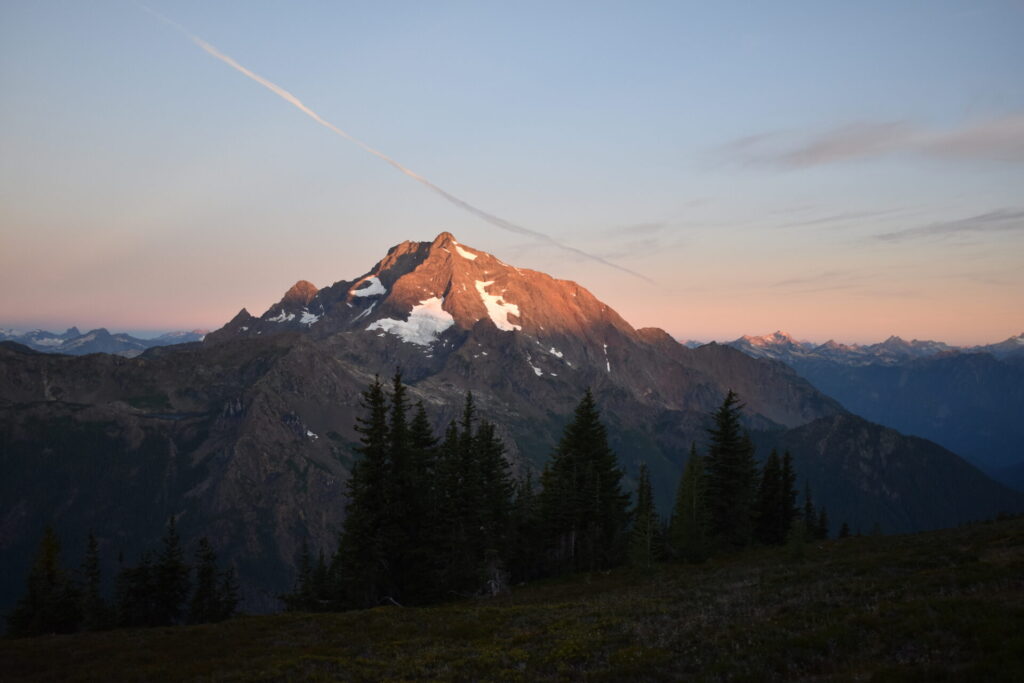
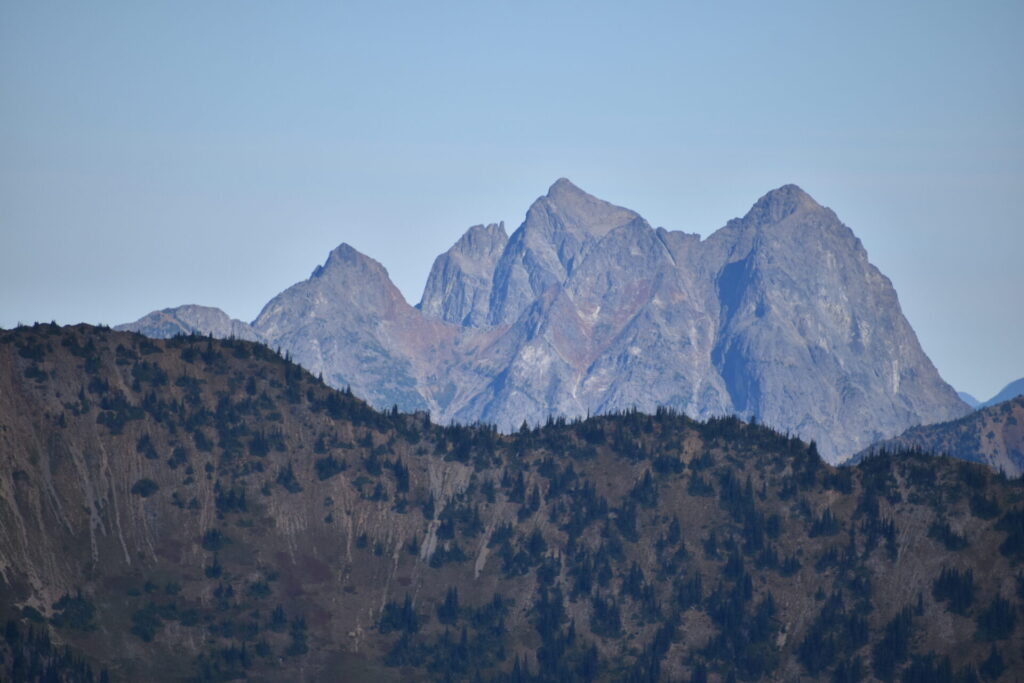
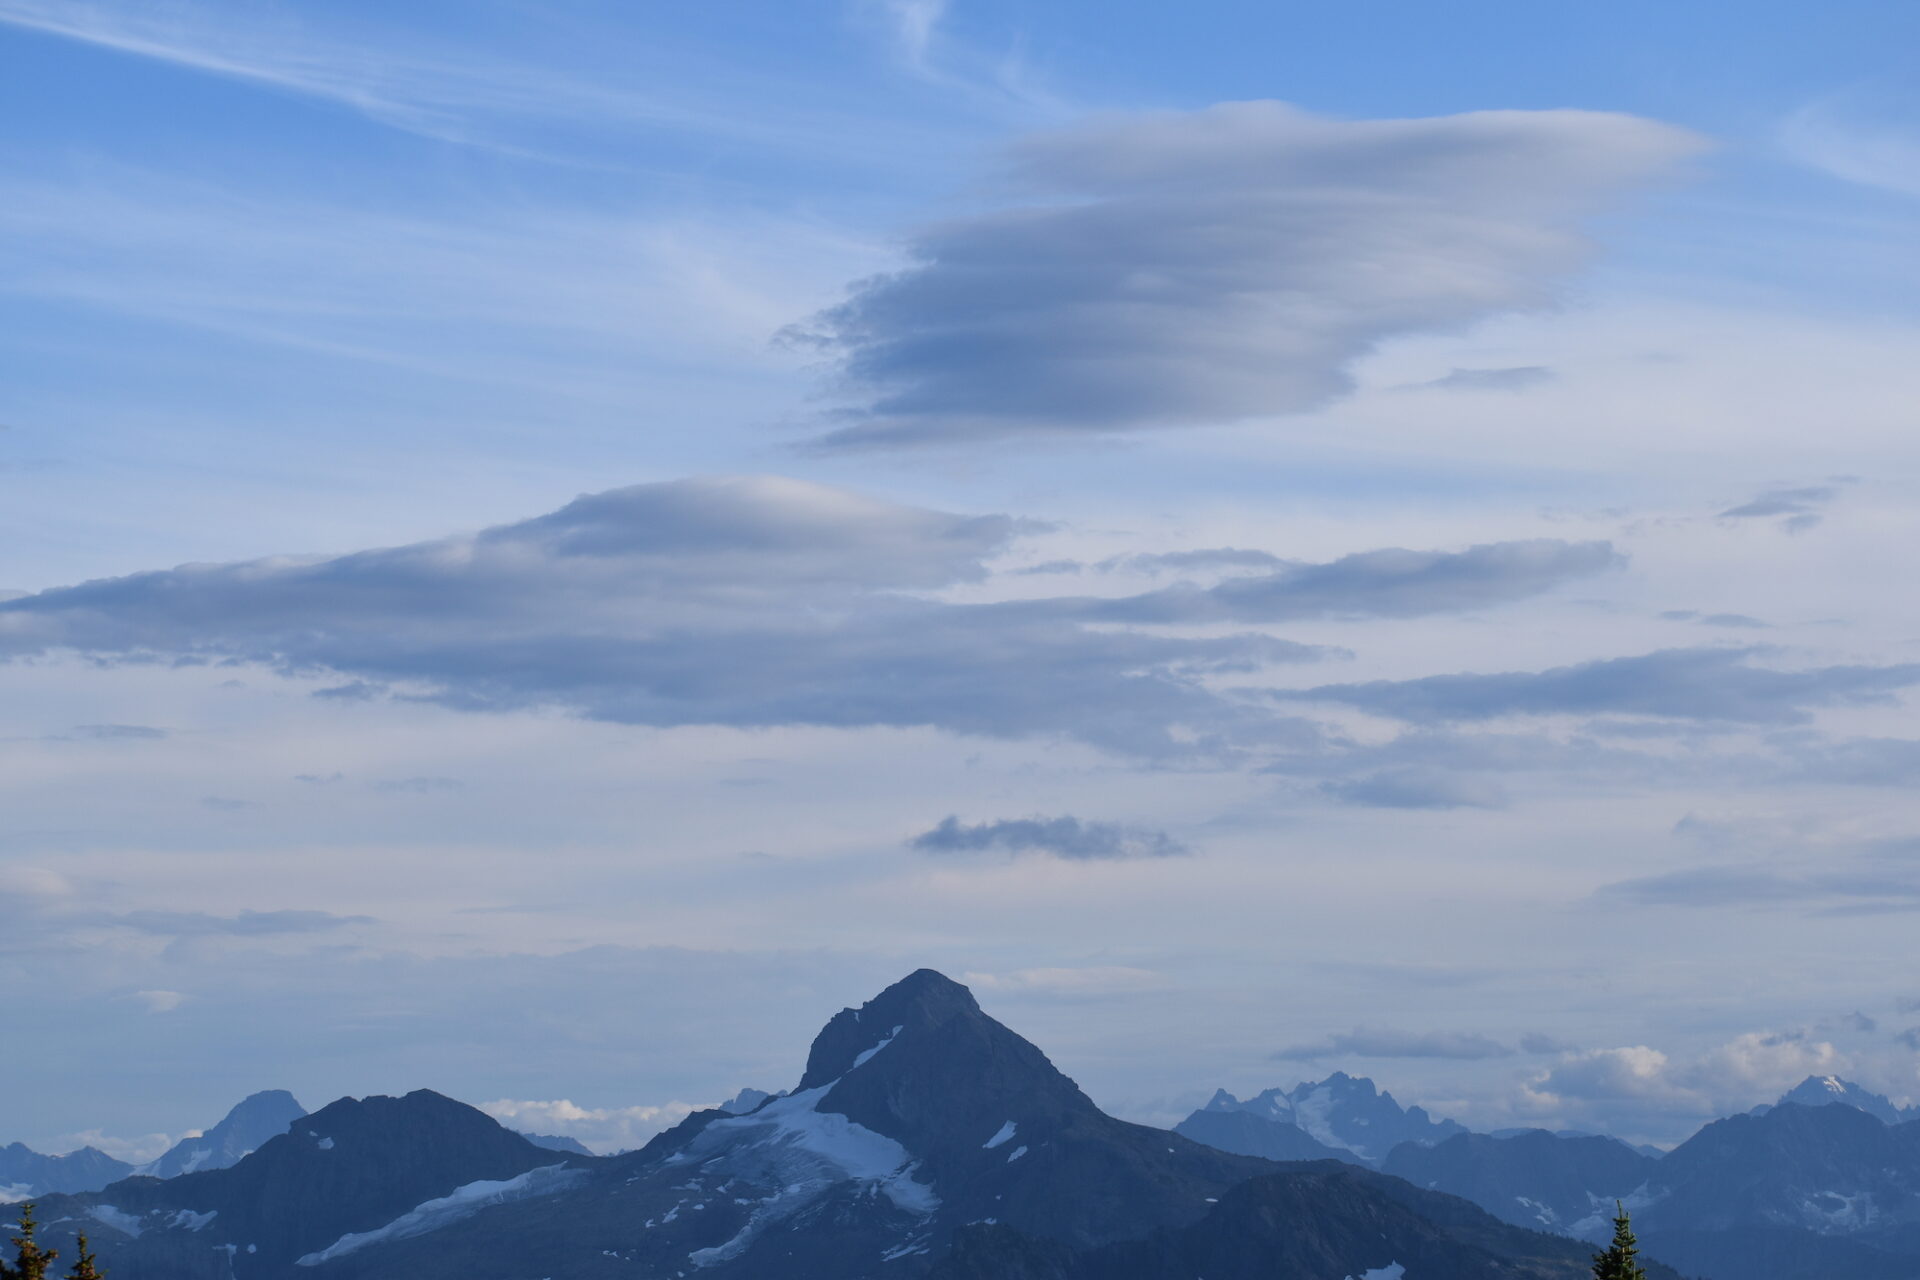
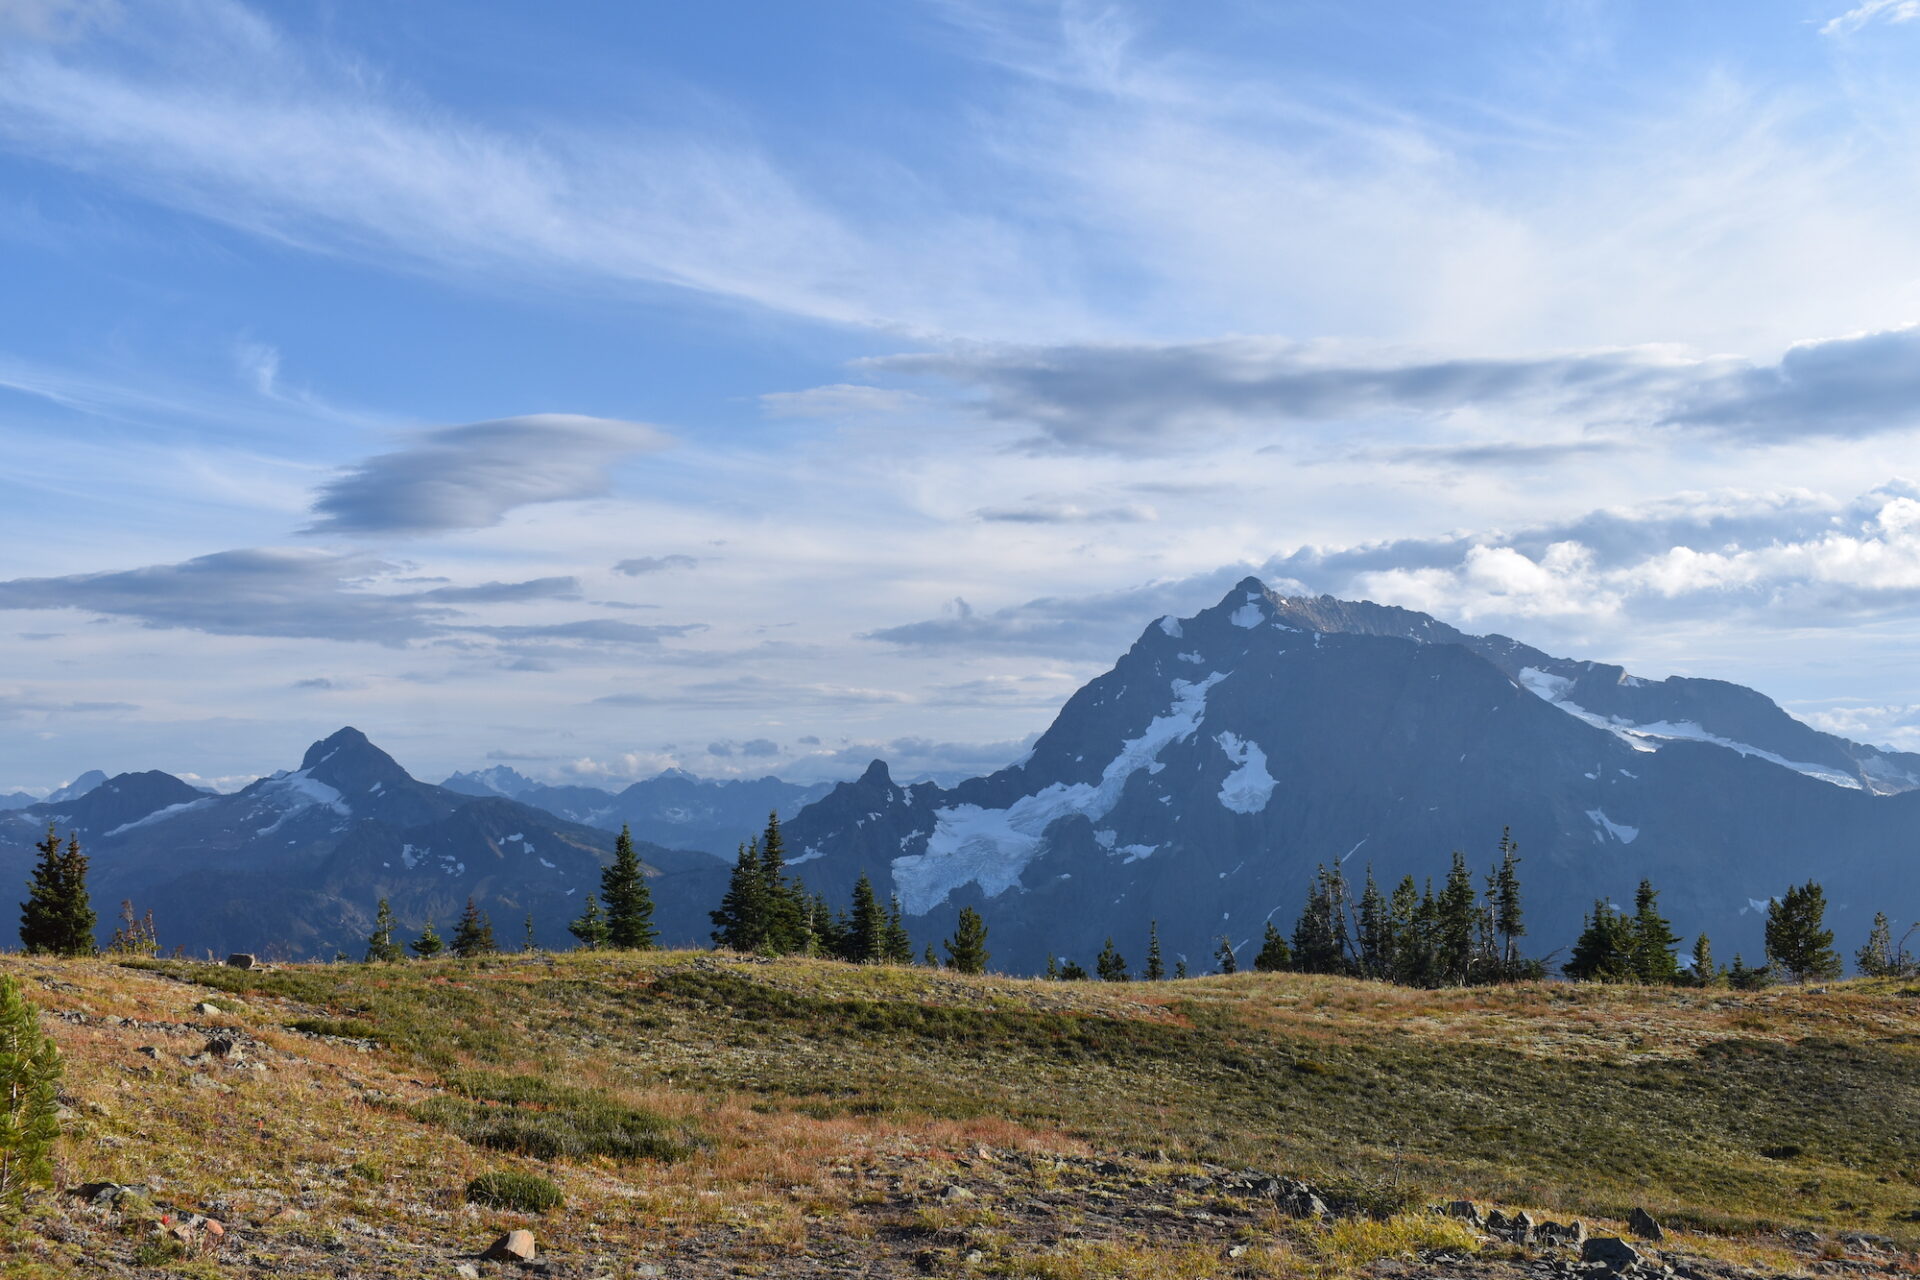
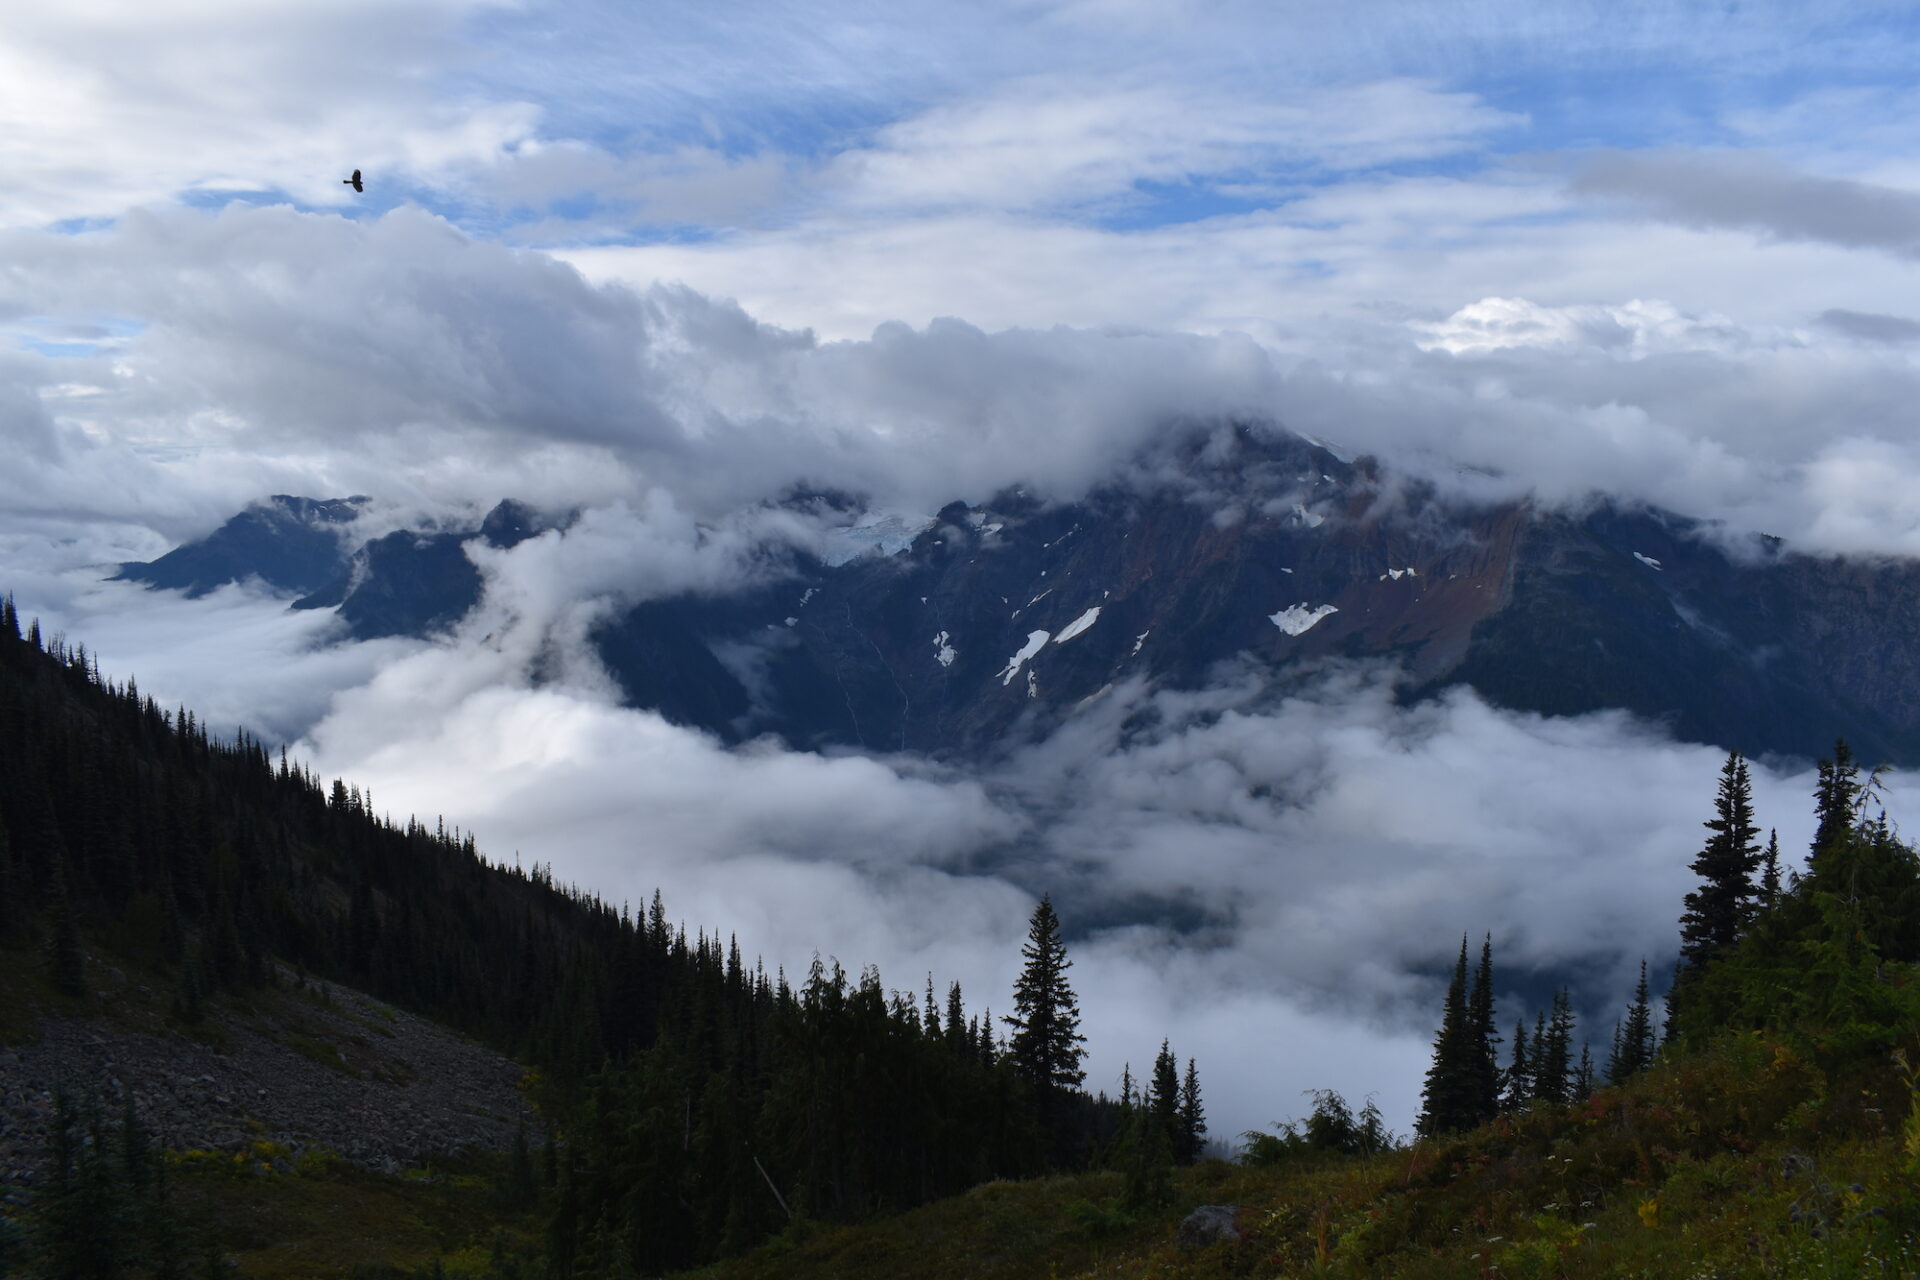
The last climb up to Devils Dome is a doozy after all of the cumulative up and down of the day, but I was distracted by the ever larger views of one of my favorite mountains, Hozomeen. Its double summit loomed large, poking out like cat ears. Or maybe Devil horns? I was on Devils Dome after all!
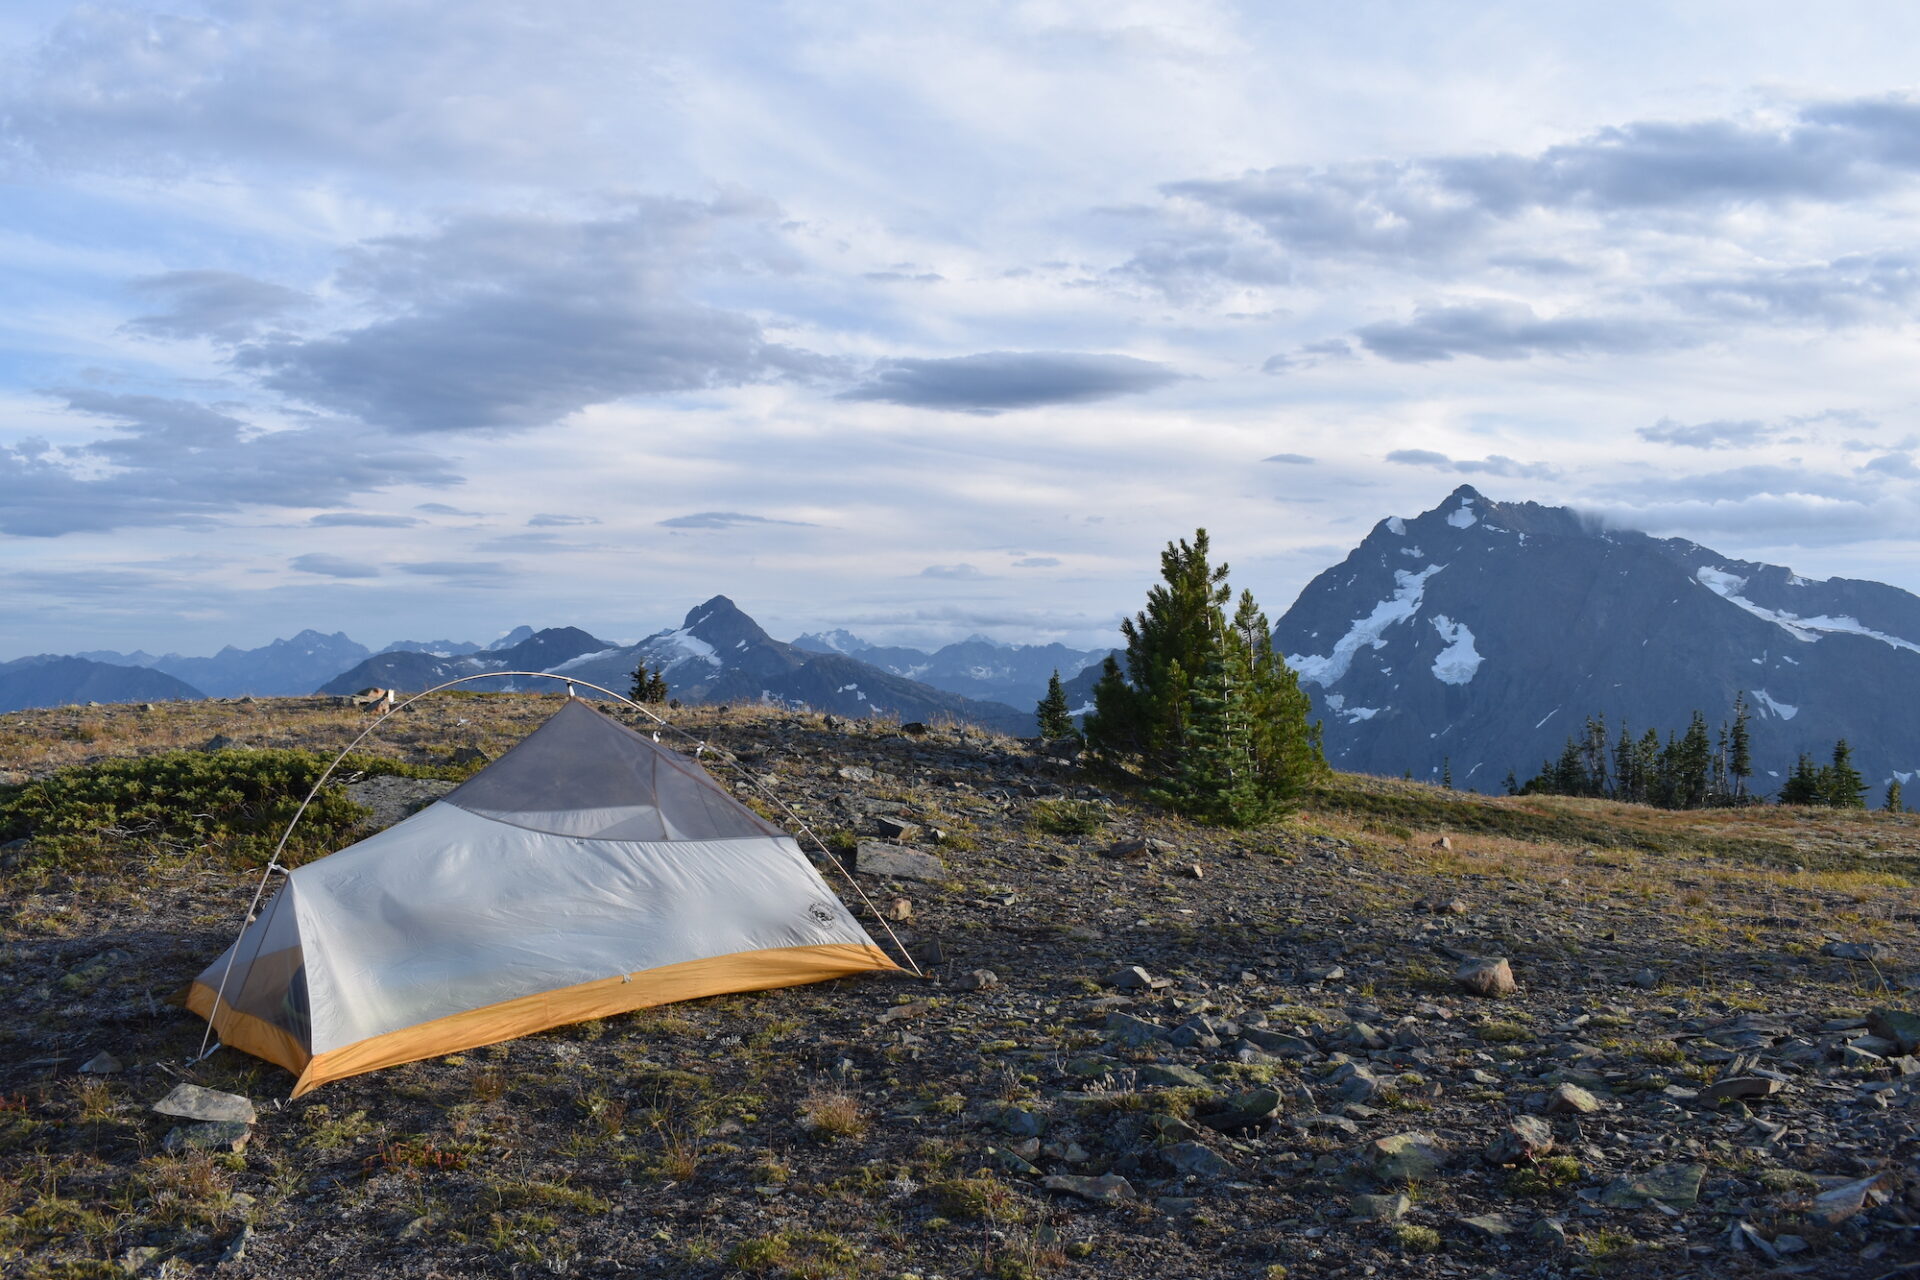
Devils Dome (6,982’) is the highest point of the loop and has a large broad summit that used to be home to an old L-5 fire lookout built in 1933. Just off trail to the east is the primary camping spot, but when I arrived it was already occupied by a party of three, which were the only people I’d seen all day. They didn’t even notice me, so I headed to the west side of the summit and found a flat spot far enough away than I couldn’t even see or hear the other party. I’m not even sure they knew I was there!
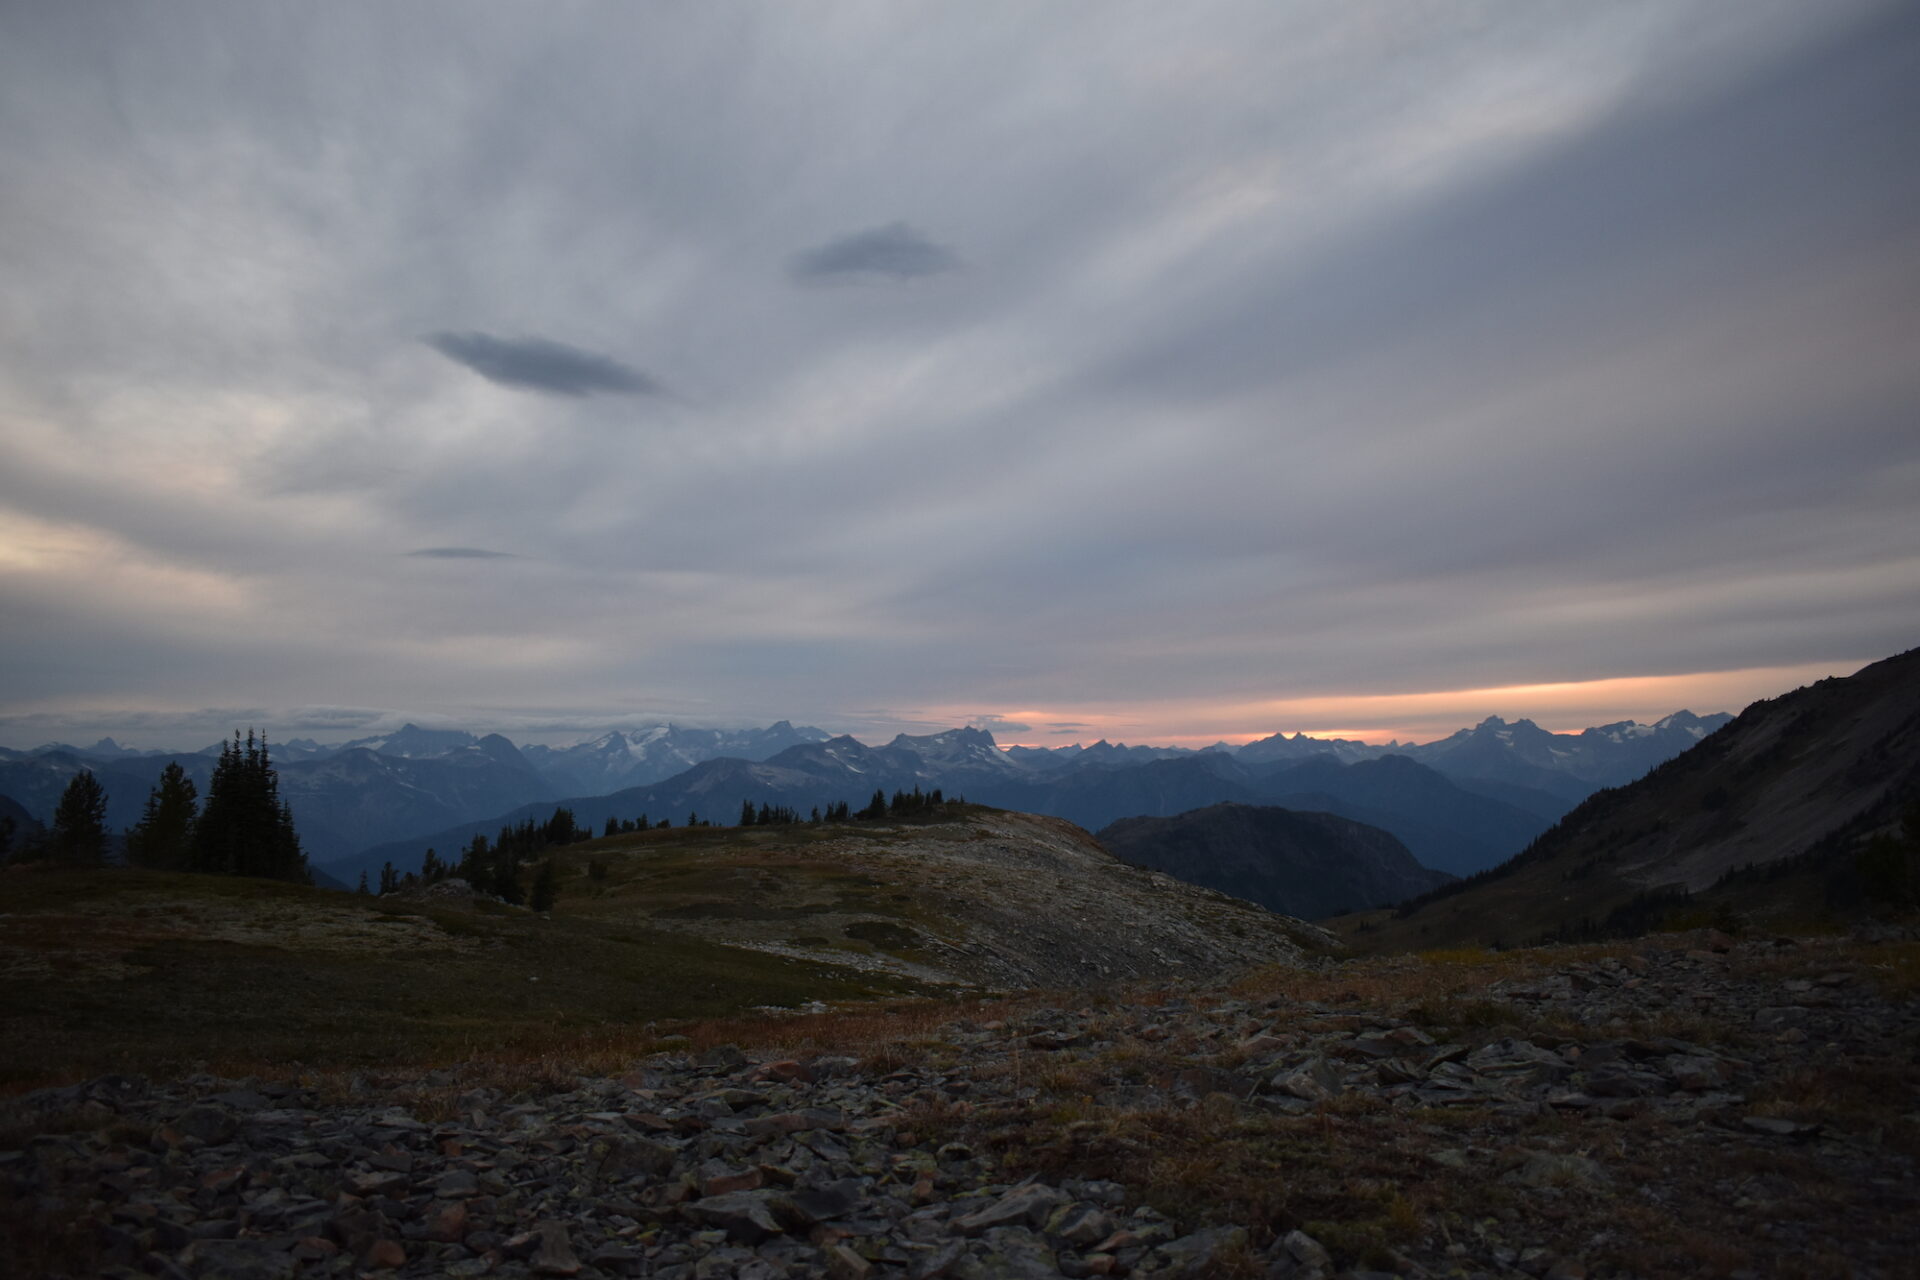
I’m a bit of a self-proclaimed weather geek, having studied some meteorology in college, and I’m highly weather observant. All afternoon I had noticed the sky building with clouds, including some lenticulars, and while I set up camp, it was clear that weather was certainly inbound. Instead of the dead silence of the perfectly calm evening I had before, it was quite windy at the summit.
Though the forecast had called for perfectly sunny skies Wednesday through Friday, I saw a small weather system coming in over the weekend that threatened some scattered showers. For that reason, I had packed some extras, knowing that the North Cascades can be a fickle place when it comes to weather, especially during shoulder seasons. I realized though that the sunny forecast had lulled me into not packing a rain jacket or pants, a very rookie move.
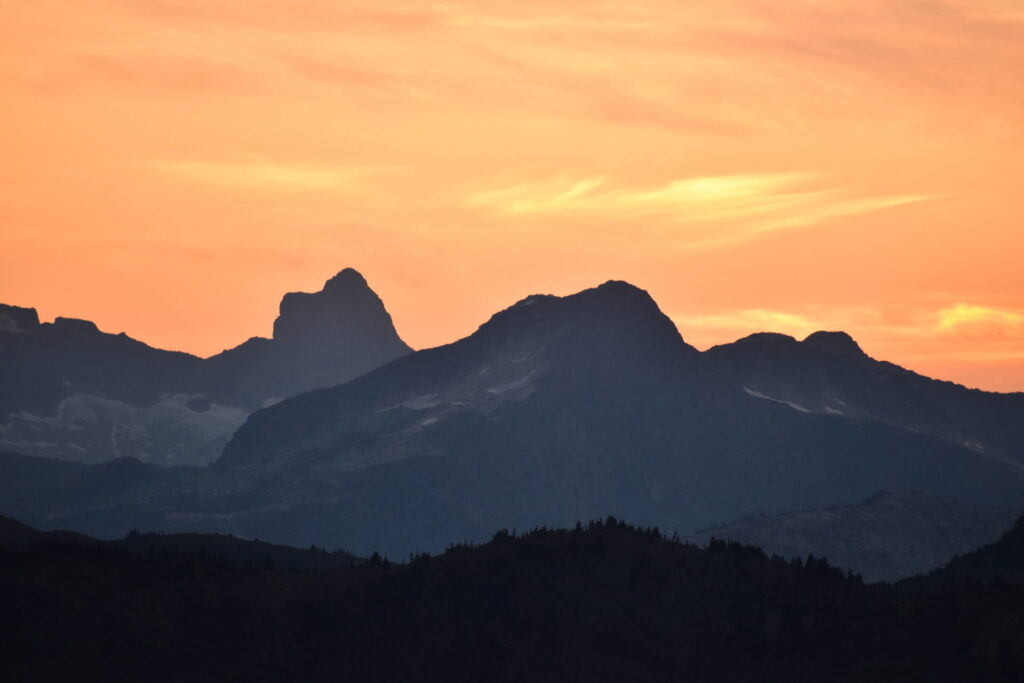
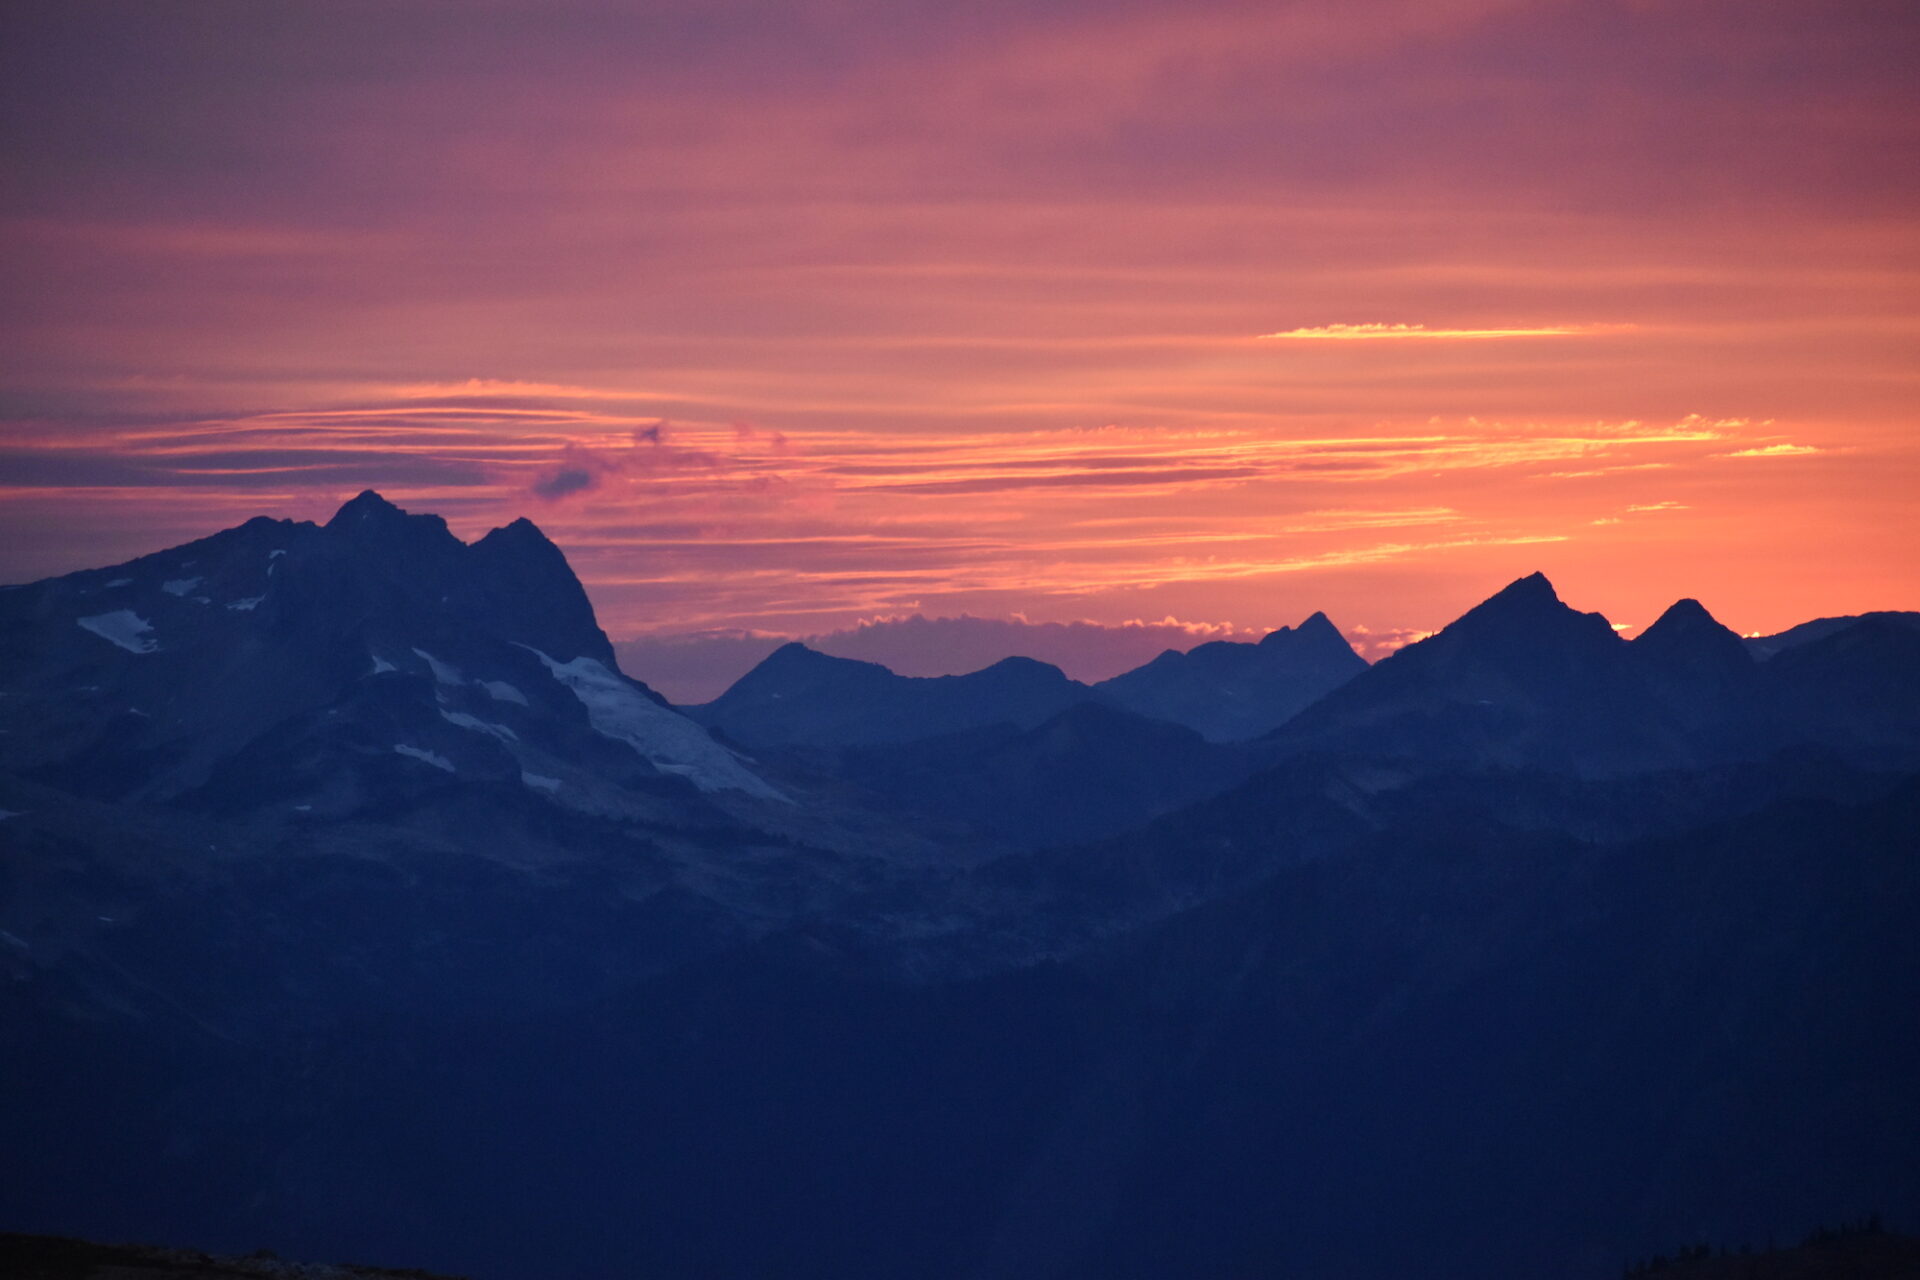
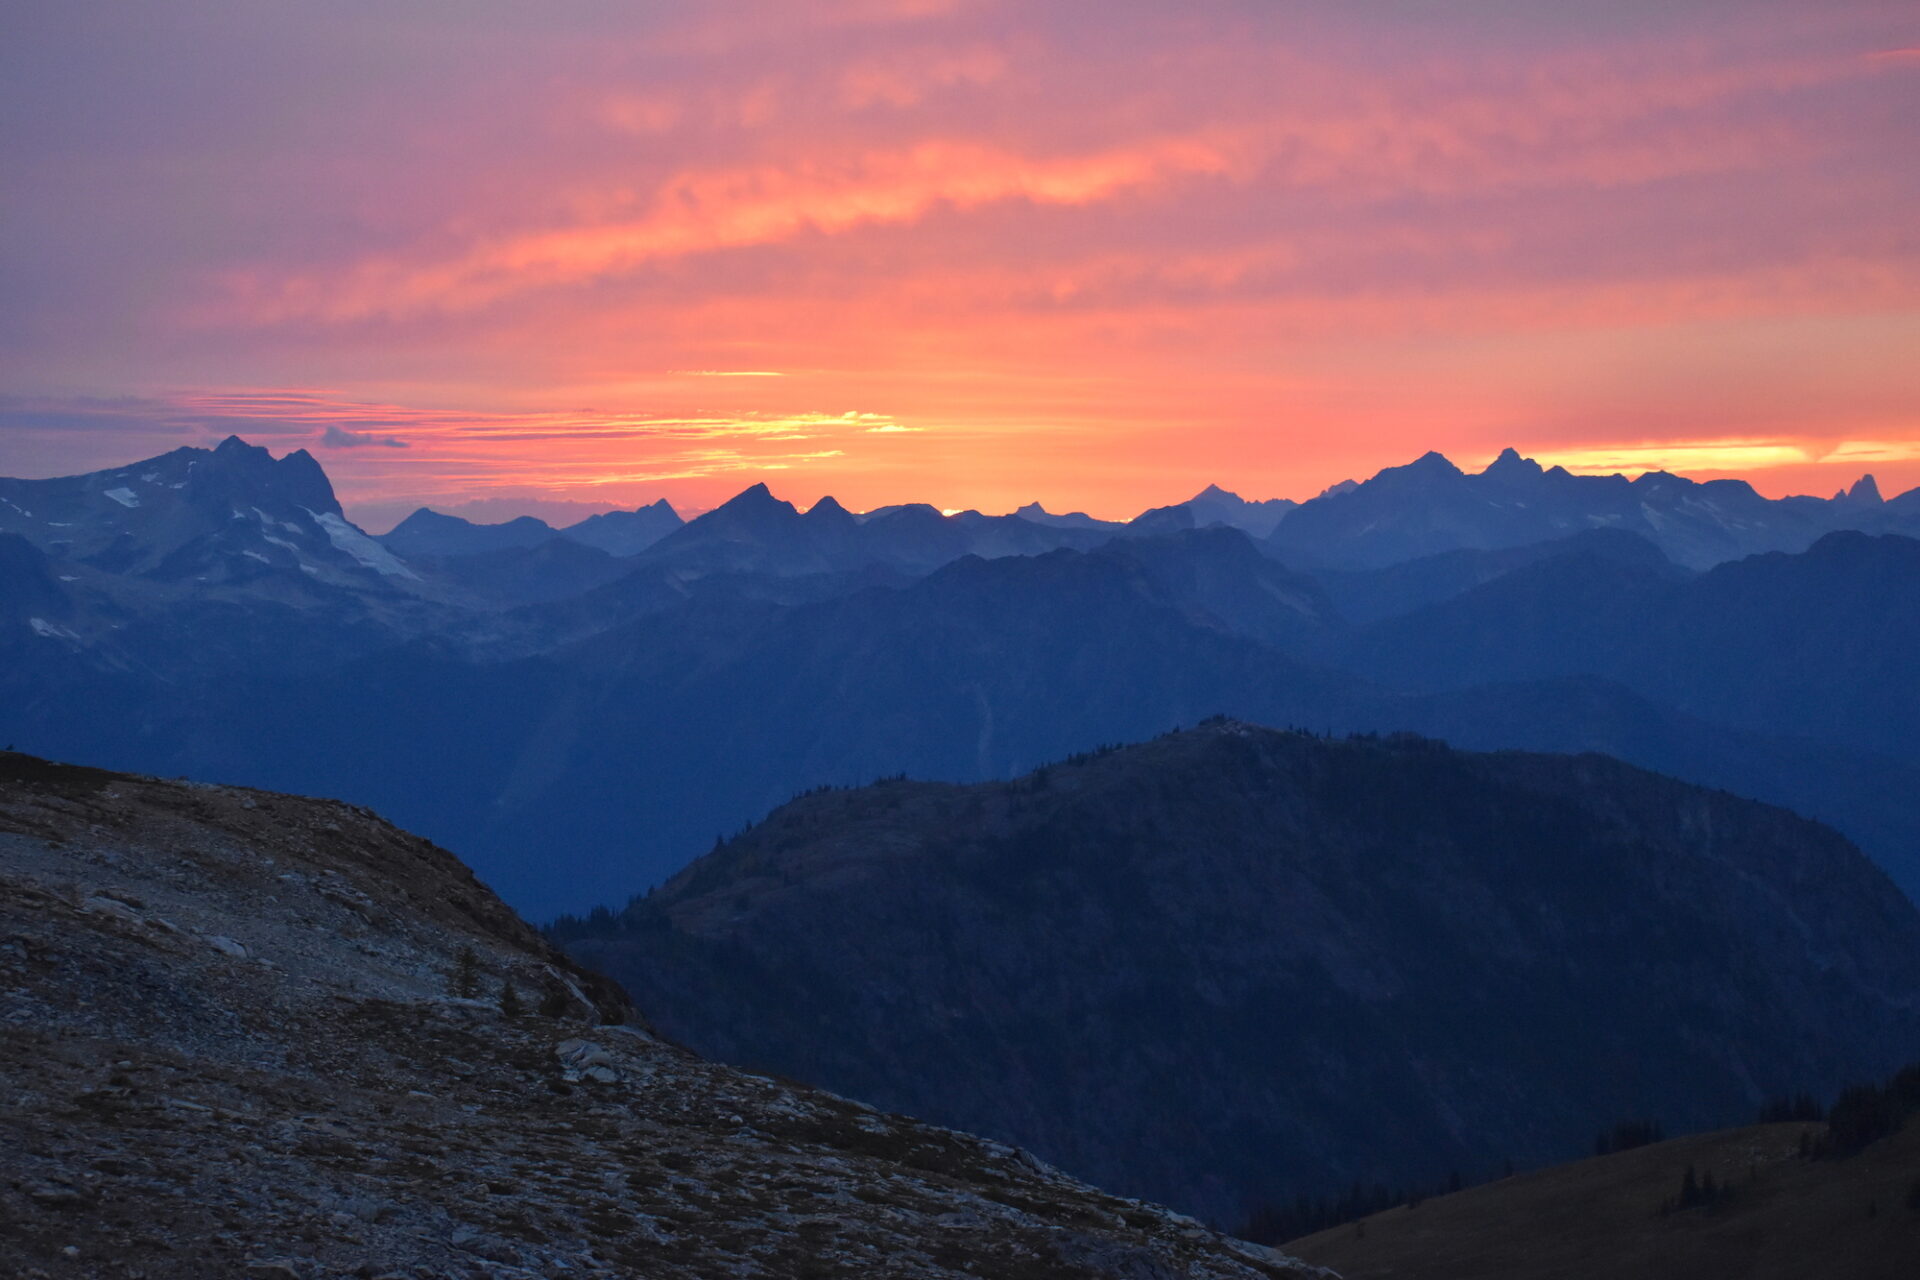
That evening I explored the summit of Devils Dome, reveling in a spectacularly crimson sunset that never seemed to end. I tell ya, not much in life tops sitting high atop a broad summit, especially when it’s a former fire lookout without spectacular panoramas. That evening I watched a beautiful sun set over the craggy peaks of the North Cascades. It had been a spectacular two days and I’d seen almost no one on the trail.

I detest using a rain fly so I went to bed without it, keeping it handy in the event I needed it. Sometime around 2am I remember having a dream in which someone was flicking water in my face. “How rude!” I kept yelling at them, until I woke up and realized it was sprinkling rain through my tent. Yep, the heavens were flicking water in my face.
I got up and fastened down my rain fly, moved my gear, and brought my pack inside my tent. Not a few minutes later the skies opened up and though it wasn’t a hard rain, the rain and wind continued steadily until I again drifted off to sleep.
Day 3: Devils Dome to East Bank TH
Distance: 18 miles | Elevation Gain: 1,320’
Every time I head out on adventures, I always have a plan, but it sometimes goes nothing like reality.
My “plan” for my last day on the Devils Dome loop seemed pretty perfect when I made it. I would hit the trail early around 6am, giving myself plenty of time to cover the long, but relatively easy, 18 miles back to the East Bank TH. I’d arrive mid-afternoon, then meet a friend later that evening in Mazama, about an hour away, for dinner and a mountain film festival before we’d embark the next day on another 45 mile backpacking loop further east in the Pasayten.
90 miles in 6 days with a film in between! It seemed like a great plan!
Yeah, I’m sure you know where this is going….
Although I had outlined my itinerary to my emergency contacts, provided a link to my SPOT tracker, and planned for contingencies, I had failed to give my friend any instruction for what to do in the event I didn’t come off the trail and meet her in Mazama as planned.
So, back to that rain…
I awoke at 5:45am, when I was hoping to get up, pack camp, and start my long descent. It was still raining steadily with gusty winds. I peeked out from under my rain fly and the summit was enveloped in a thick fog.
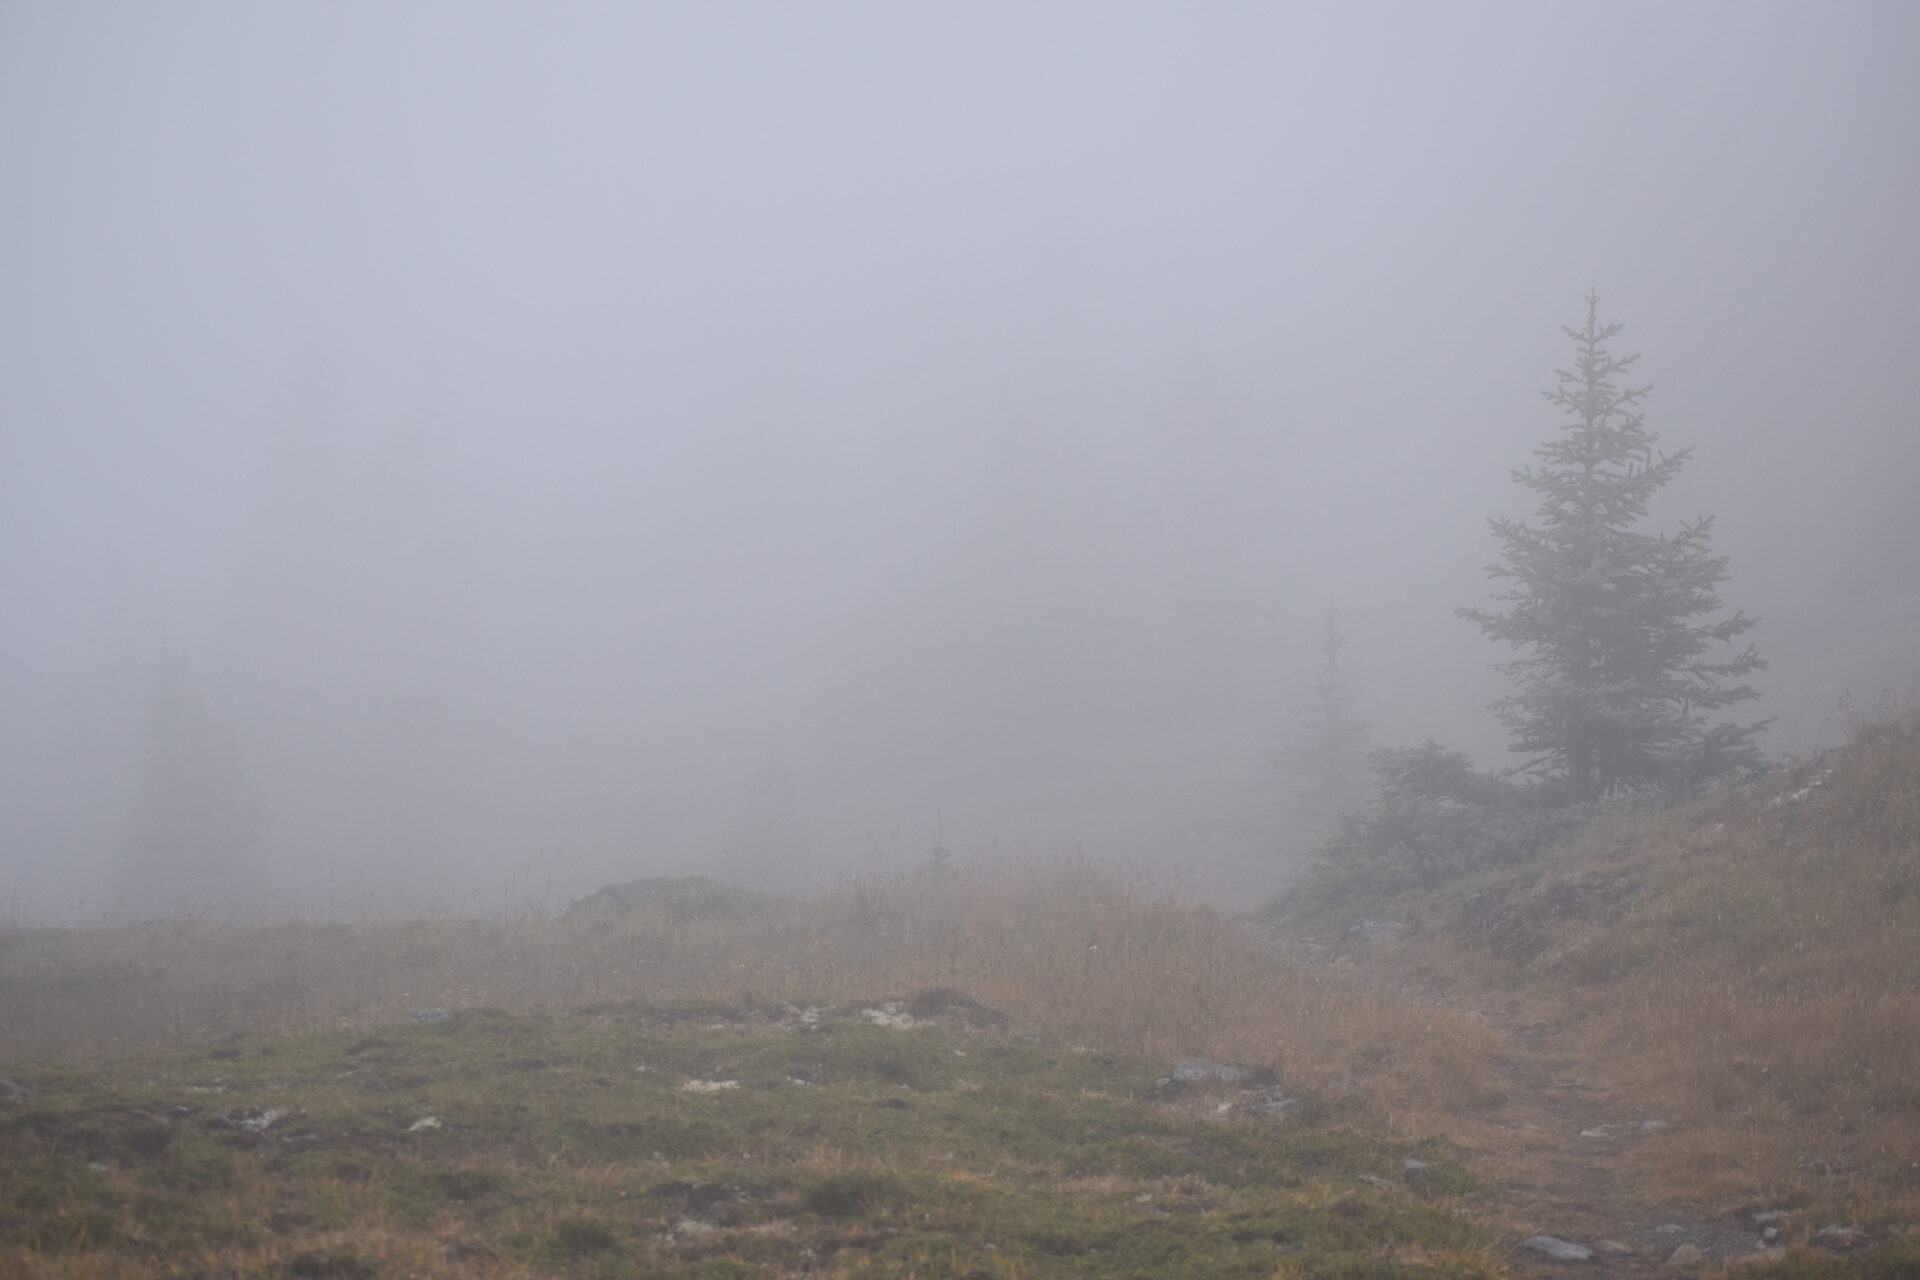
Being around too many search and rescue folks, I’m quite aware of how quickly situations turn bad when people get wet. Without rain gear, I had no choice but to wait out the weather. In my tent I was sheltered, protected, warm, and dry. There was no reason to challenge Mother Nature.
Honestly? I had no complaints. I rather enjoyed the rain! Temperatures were warm and the weather would certainly clear, so the situation wasn’t dire, only an inconvenient delay and a reminder that I should have packed a rain jacket. I only worried about not being able to contact my friend if I was running really late.
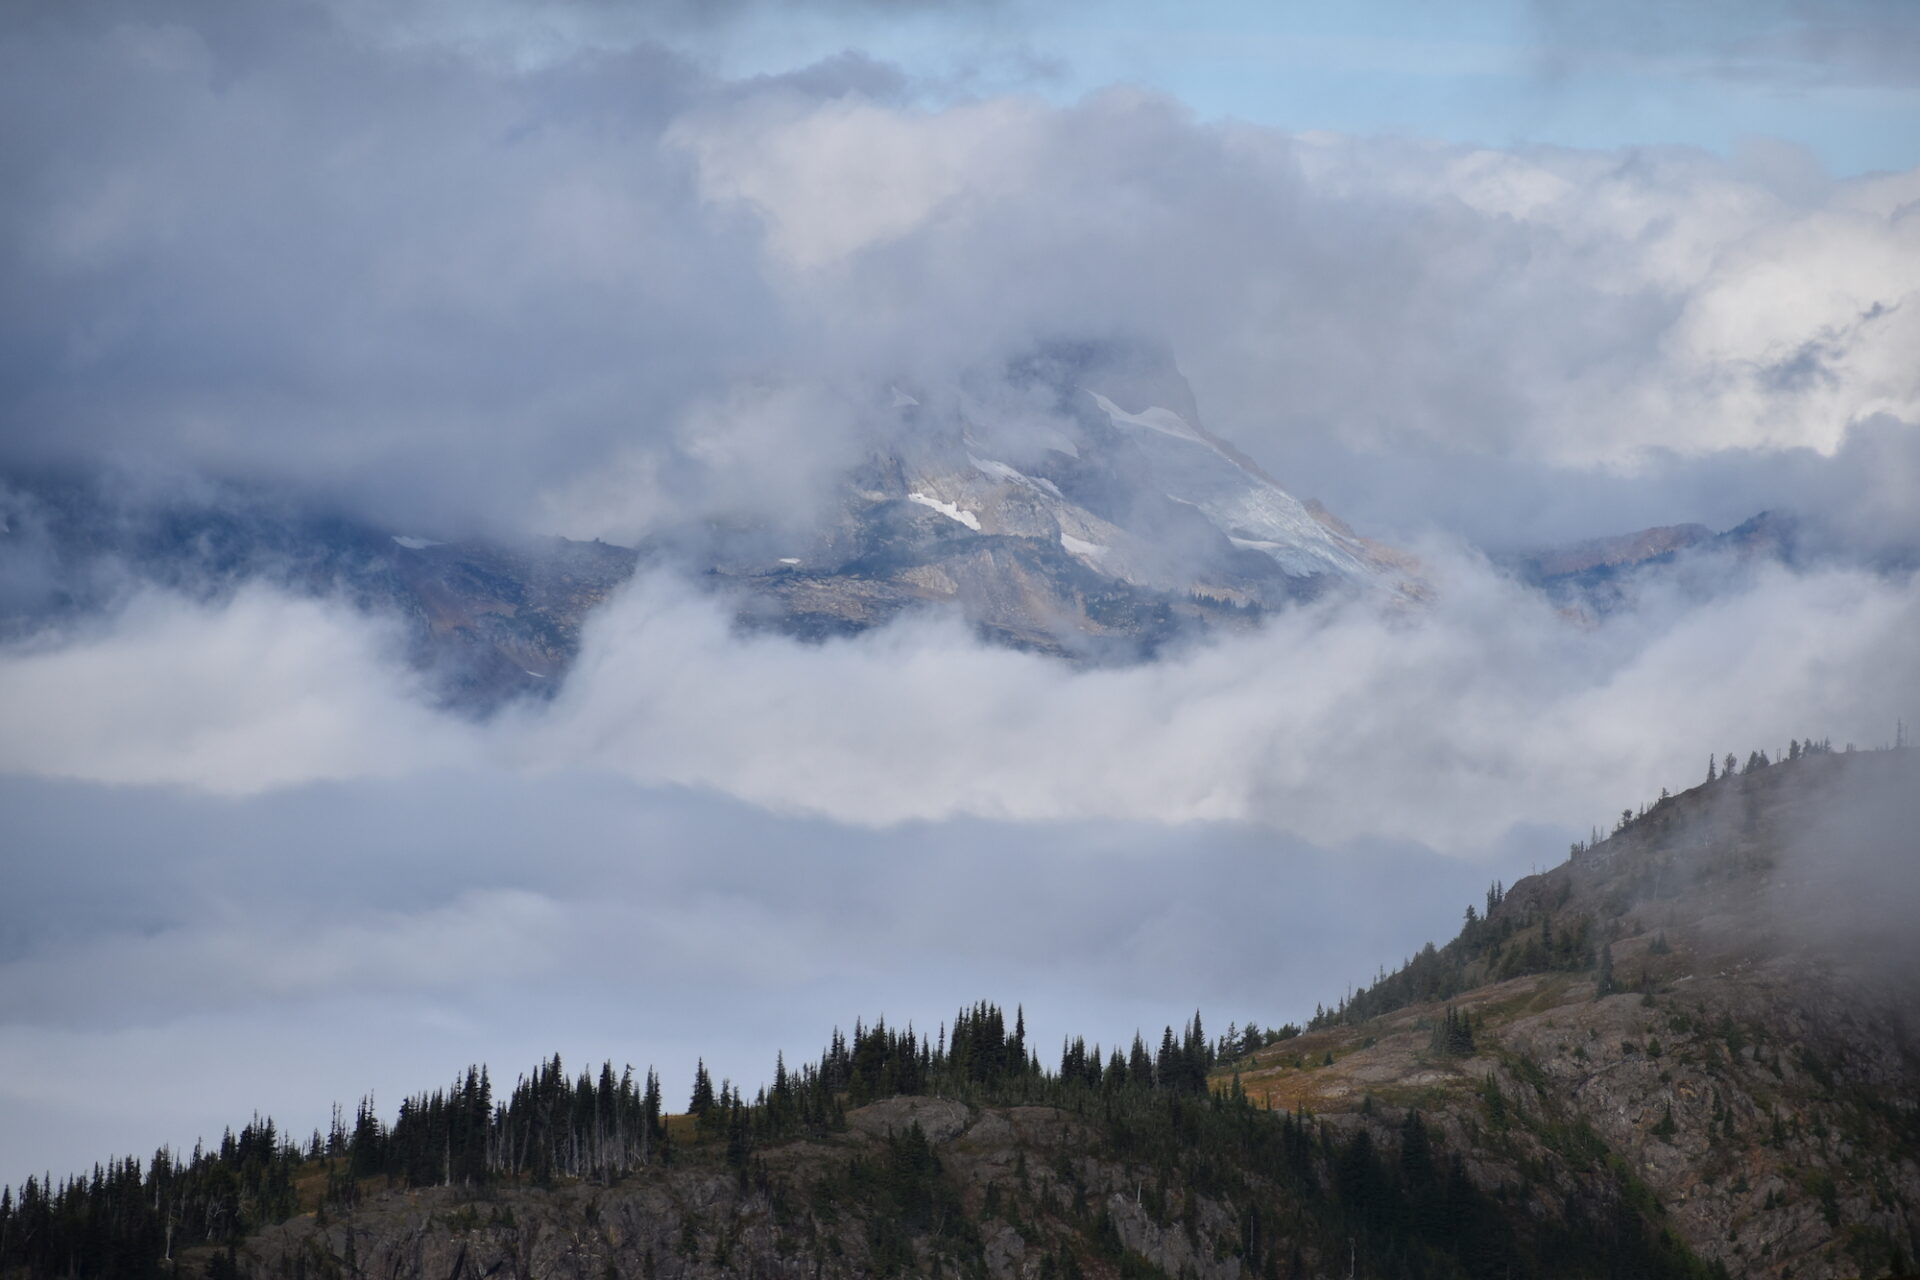
The rain continued until after 8am before the sky finally brightened and weather began to clear. It would be nearly 9 before I’d finally hit the trail. I skipped breakfast, choosing instead to eat a granola bar and get moving. A few hundred feet below the Devils Dome summit, the weather was obviously clearing and I was dazzled by a spectacular mountain and cloud display. What a morning!
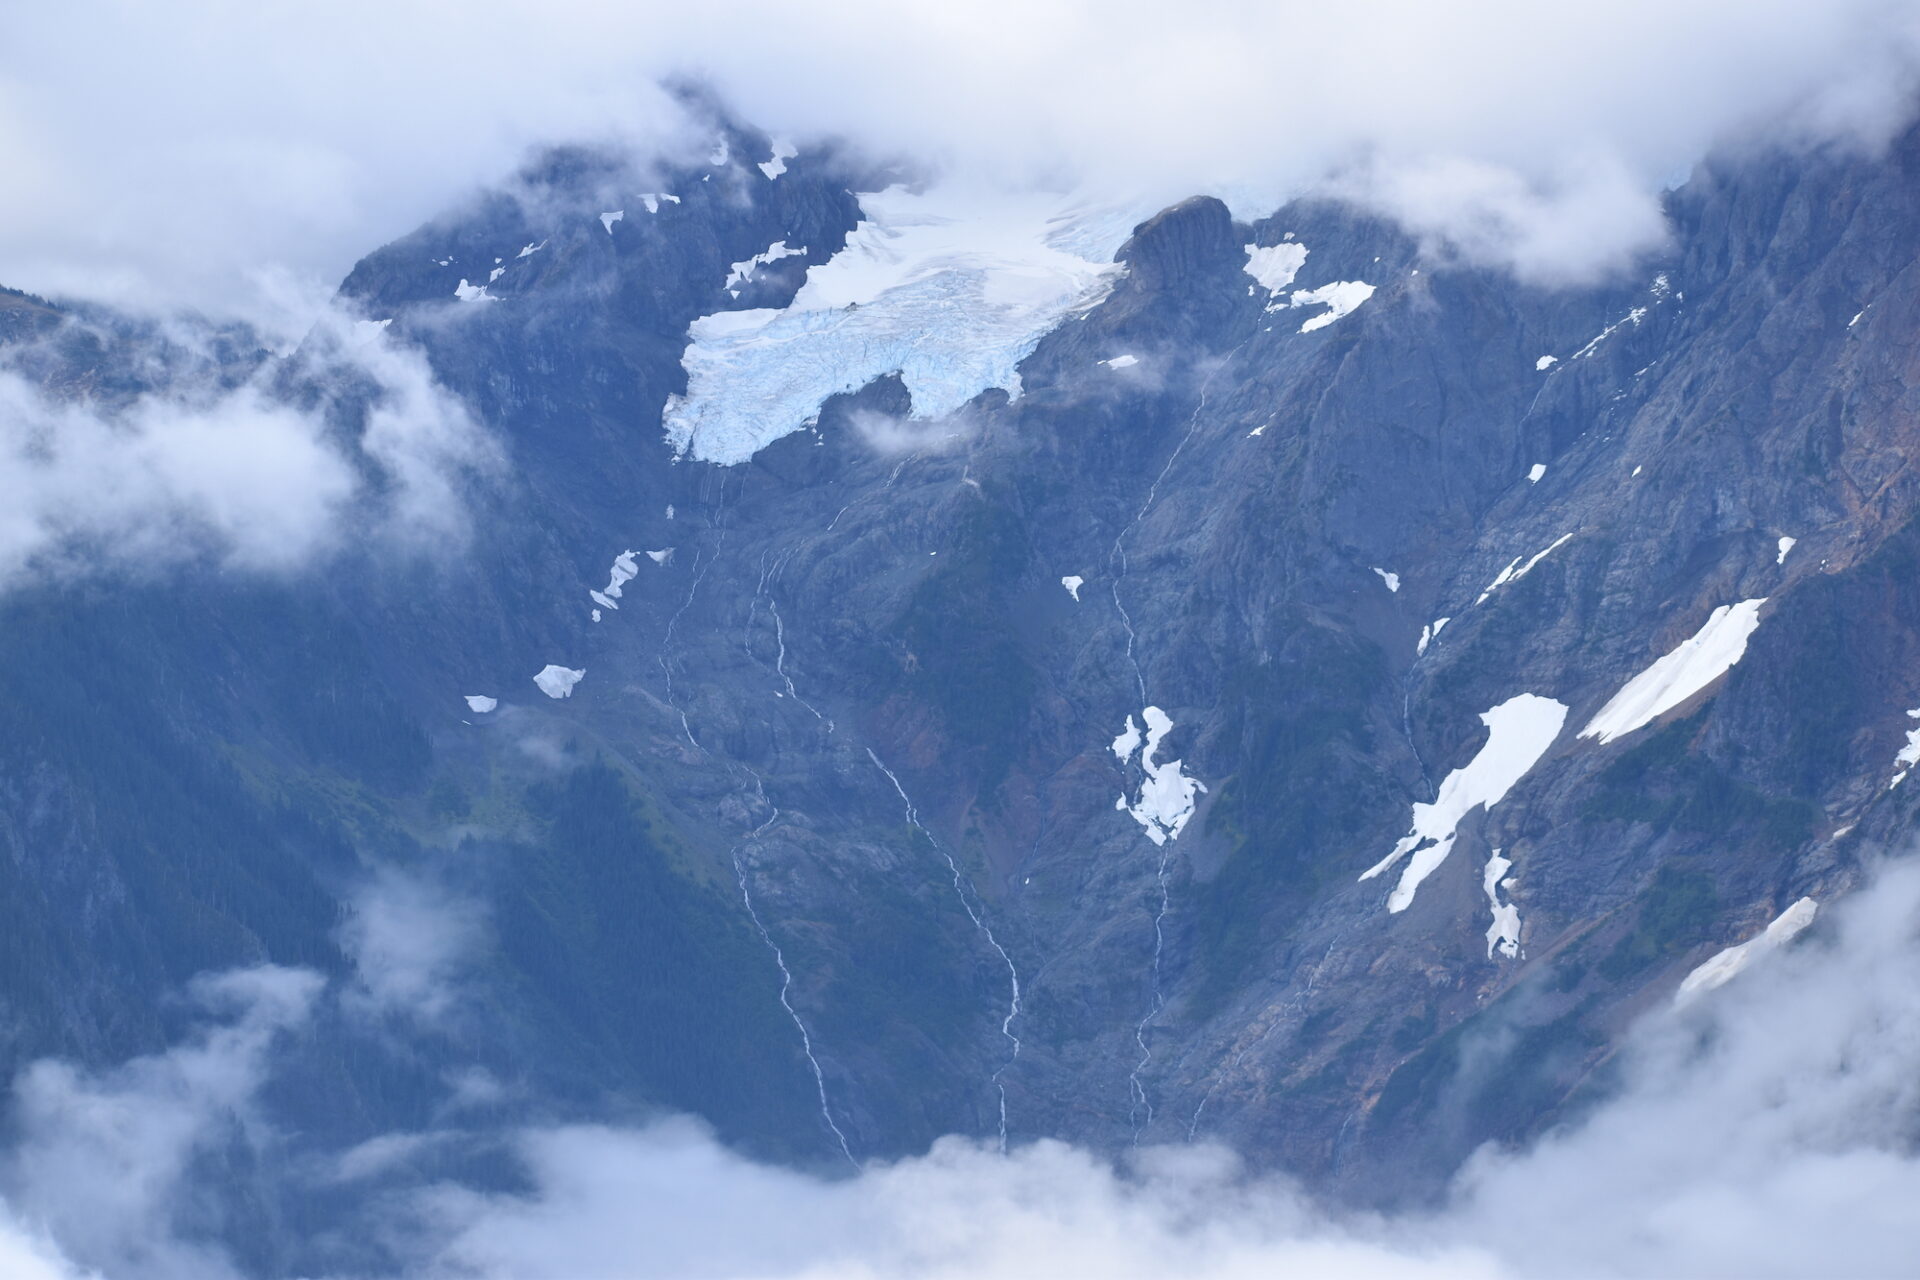
I continued my descent, stopping every few feet to admire the incredible views and ever changing clouds. As the high alpine views slowly disappeared and I waved goodbye to Jack Mountain, I was met with a new challenge: a slightly brushy, overgrown, and very wet trail. In no time my shoes were sloshing and I was soaked to the bone. Luckily the air temperature was warm, but my feet struggle when wet, so stopped every mile to wring out my socks, hang them on my pack, and put on another pair.
From Devils Dome, the trail descends a knee jarring 5,000’ over the next 6 miles, all the way to the Devils Creek camp on Ross Lake. Between wringing out my socks and dealing with my grumpy swollen grapefruit knees, who had finally had enough of this descent, I was moving much slower than I had hoped.
I thought about stopping at Devils Camp for a breakfast and coffee break, but the junction to camp turned downhill and my knees were so done with going down that I chose instead to keep moving on the flat East Bank trail. A short time later I found a great spot overlooking Ross Lake to sit in the sun and enjoy a coffee break.
Sitting there in the sun, I tried not to think that I still had 10 miles left to reach the trailhead and it was clear I was running hours behind schedule. What I thought would be a fast hike out was turning out to be slower than expected. My swollen knees simply weren’t allowing me to average much more than 2mph, so I listened to my body and took it easy.
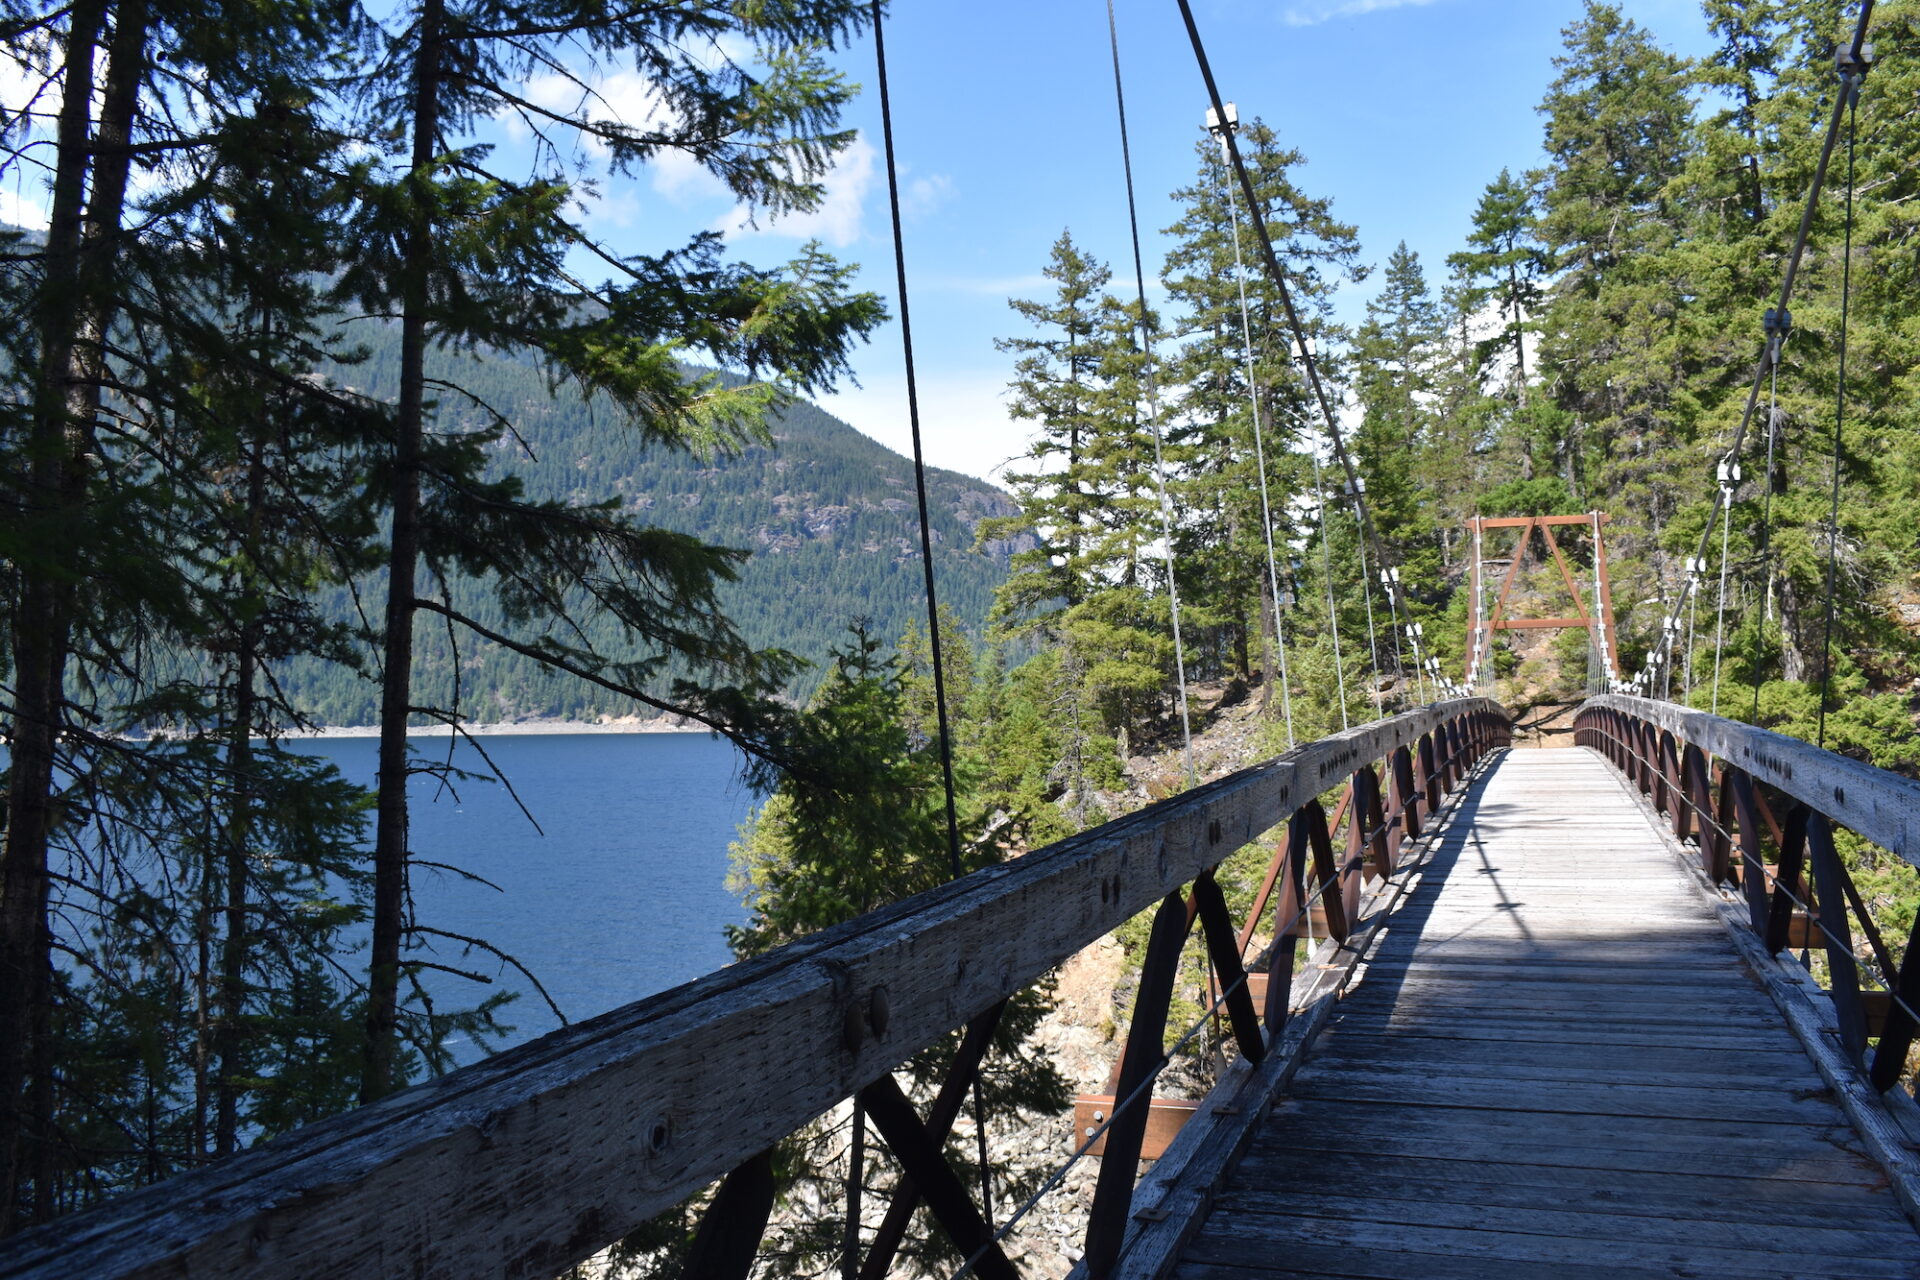
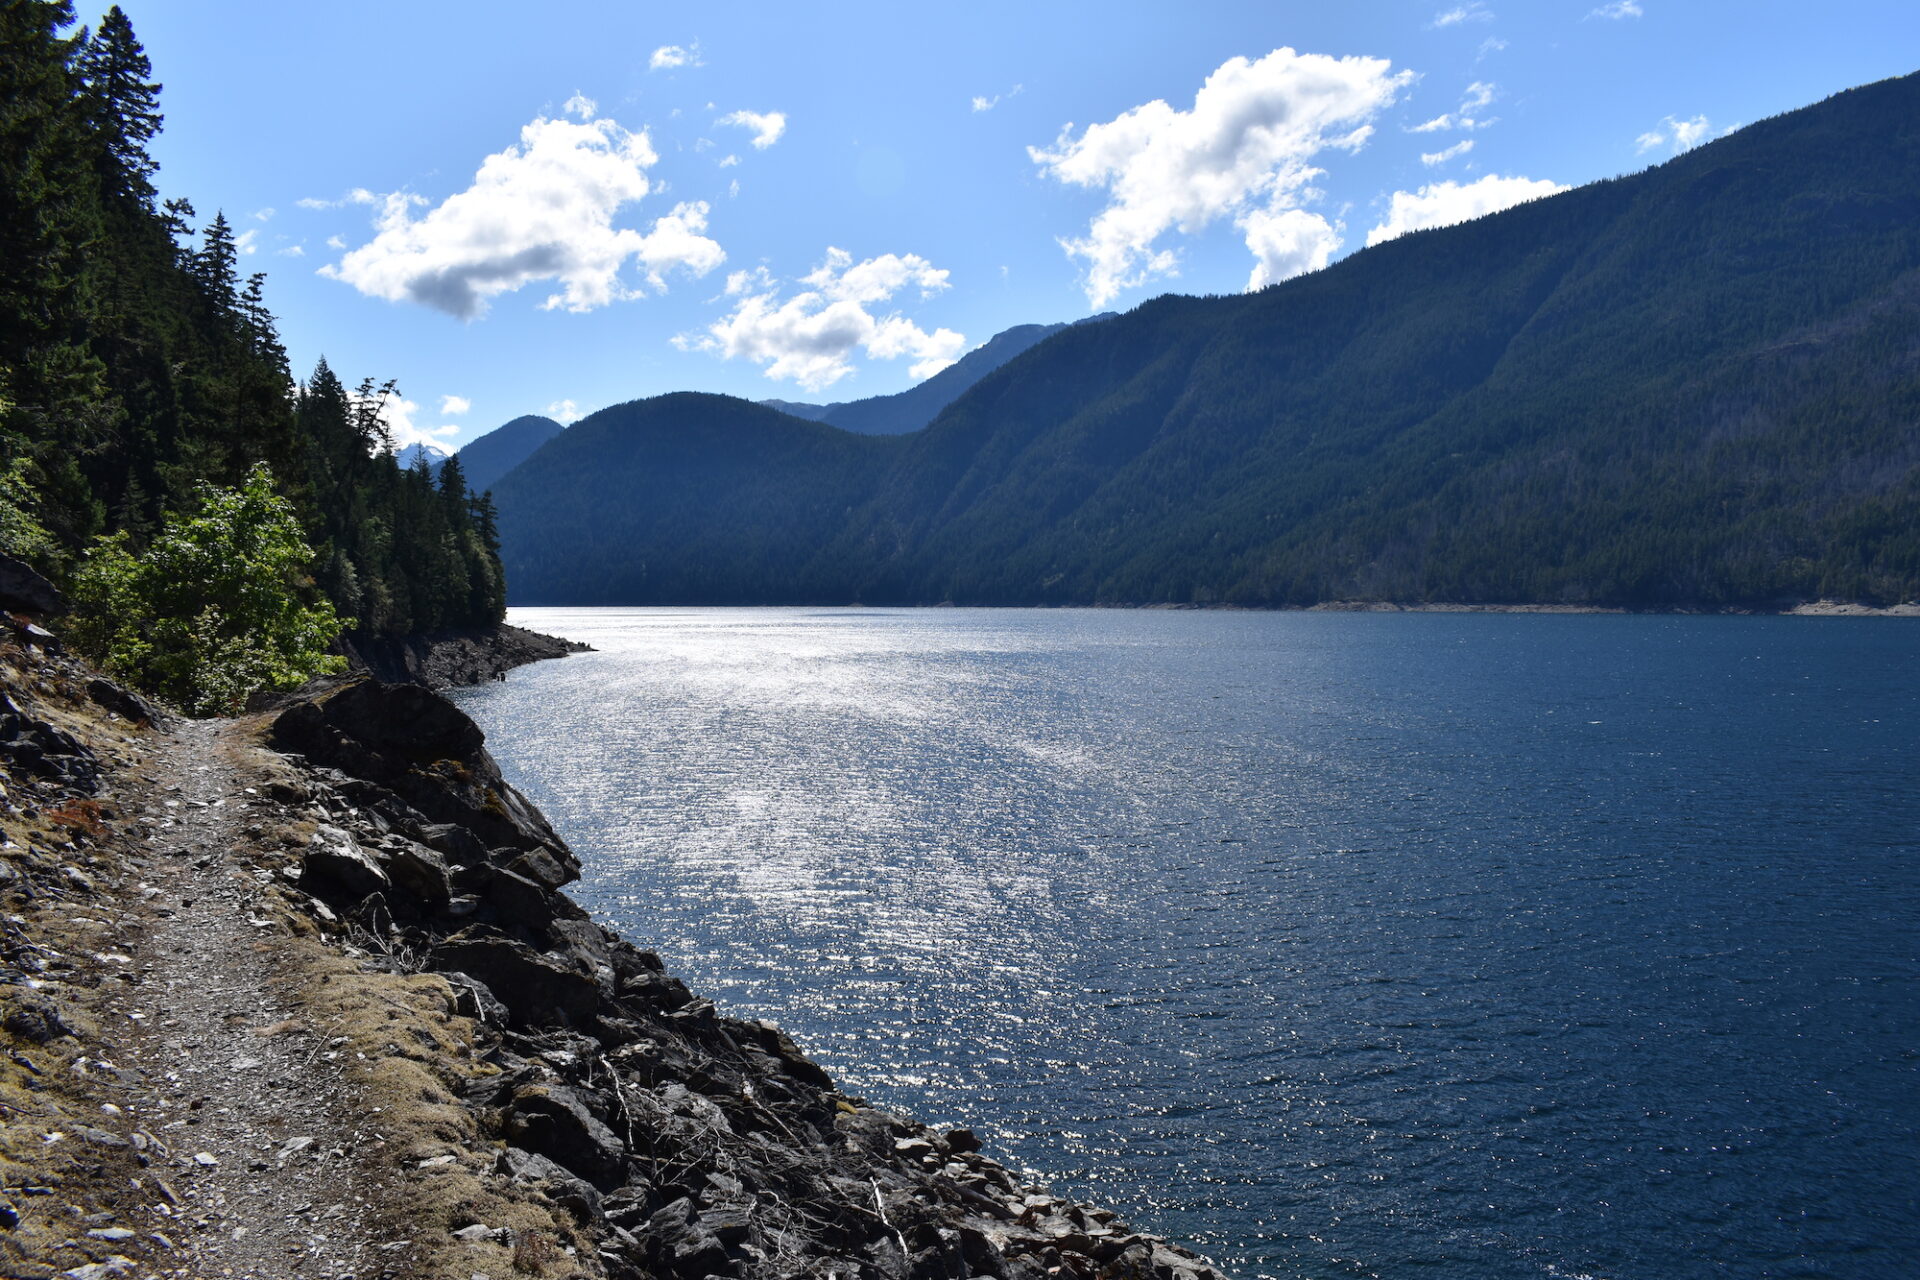
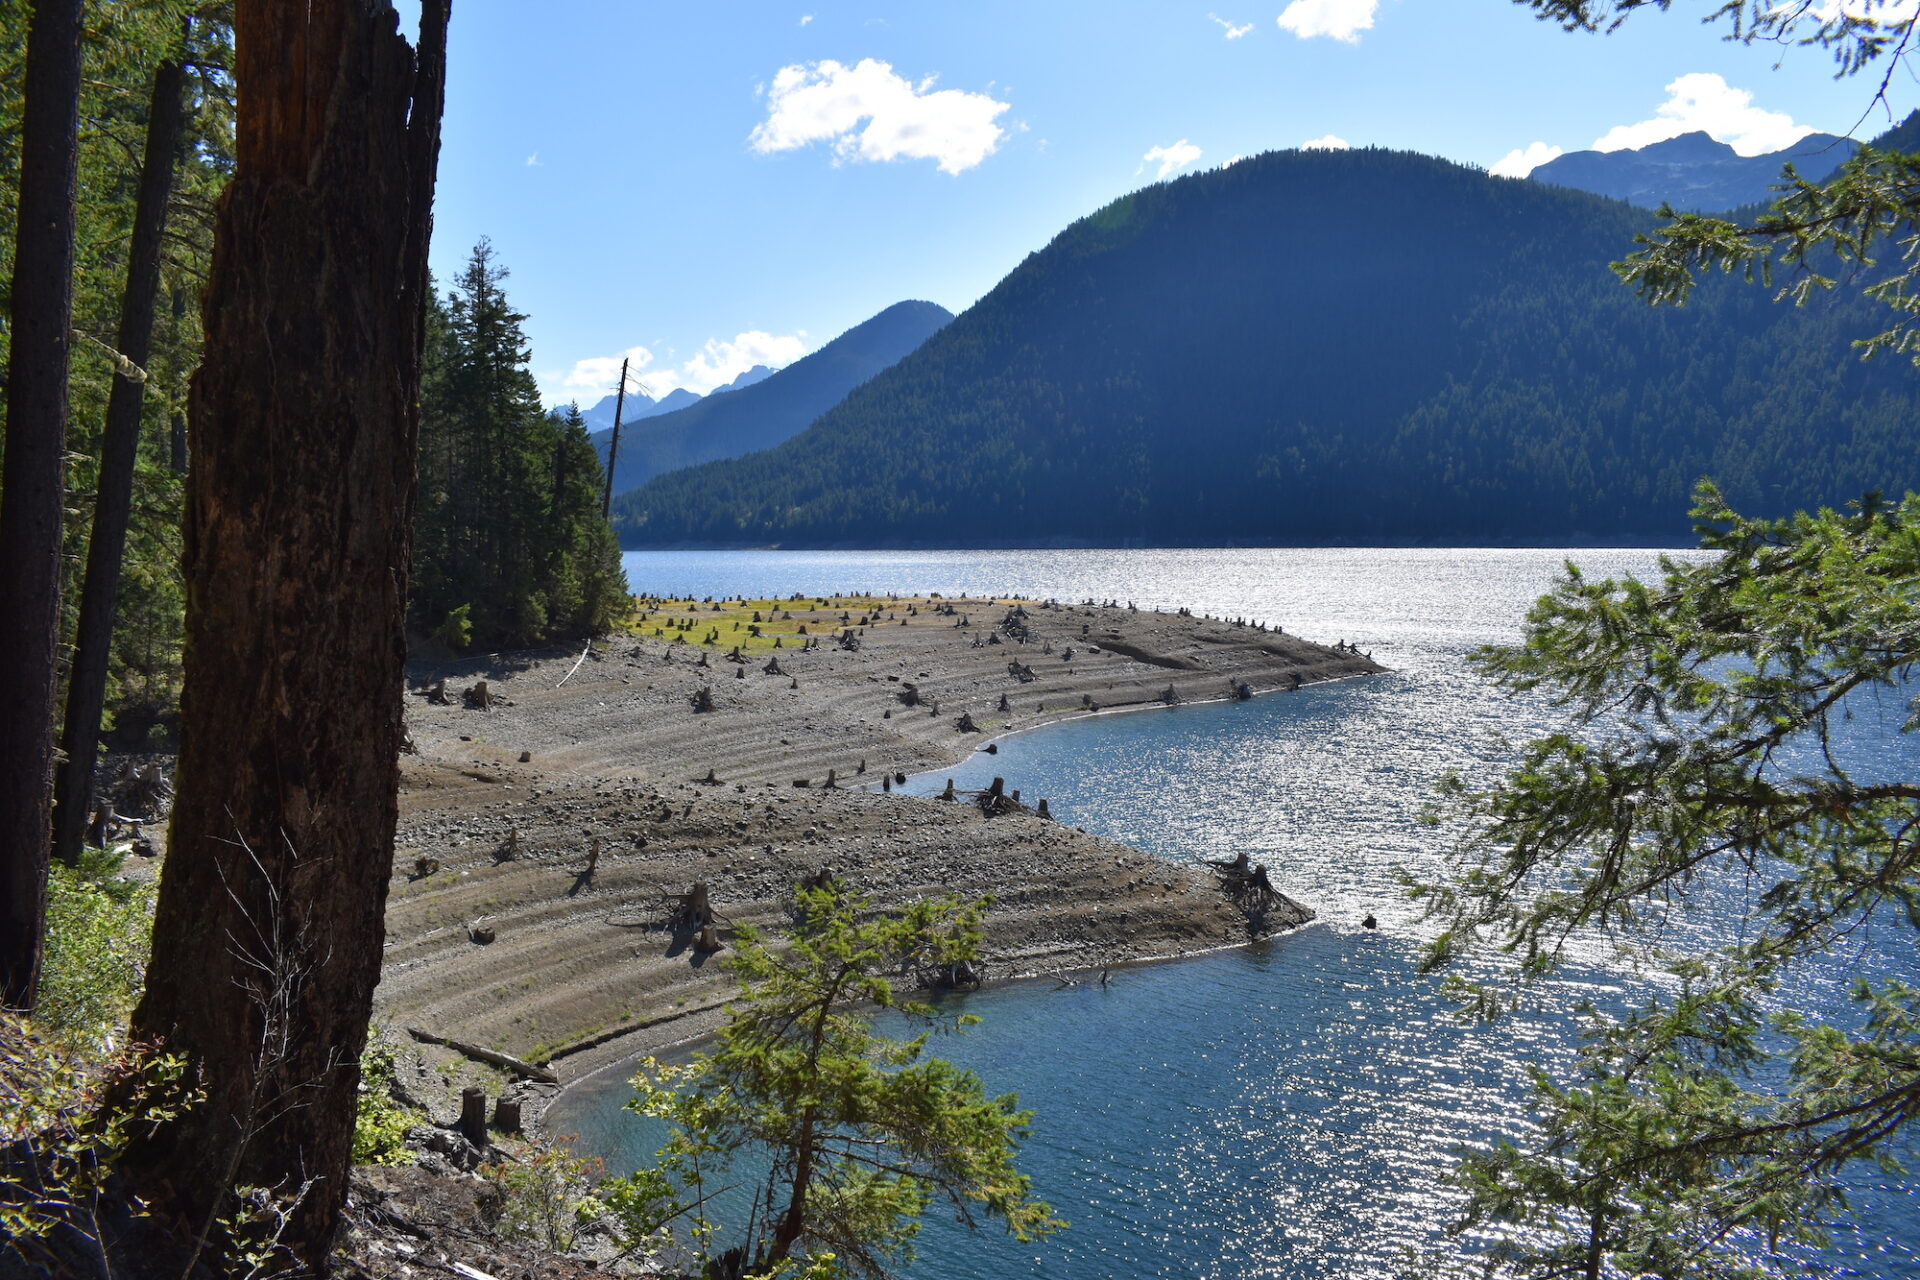
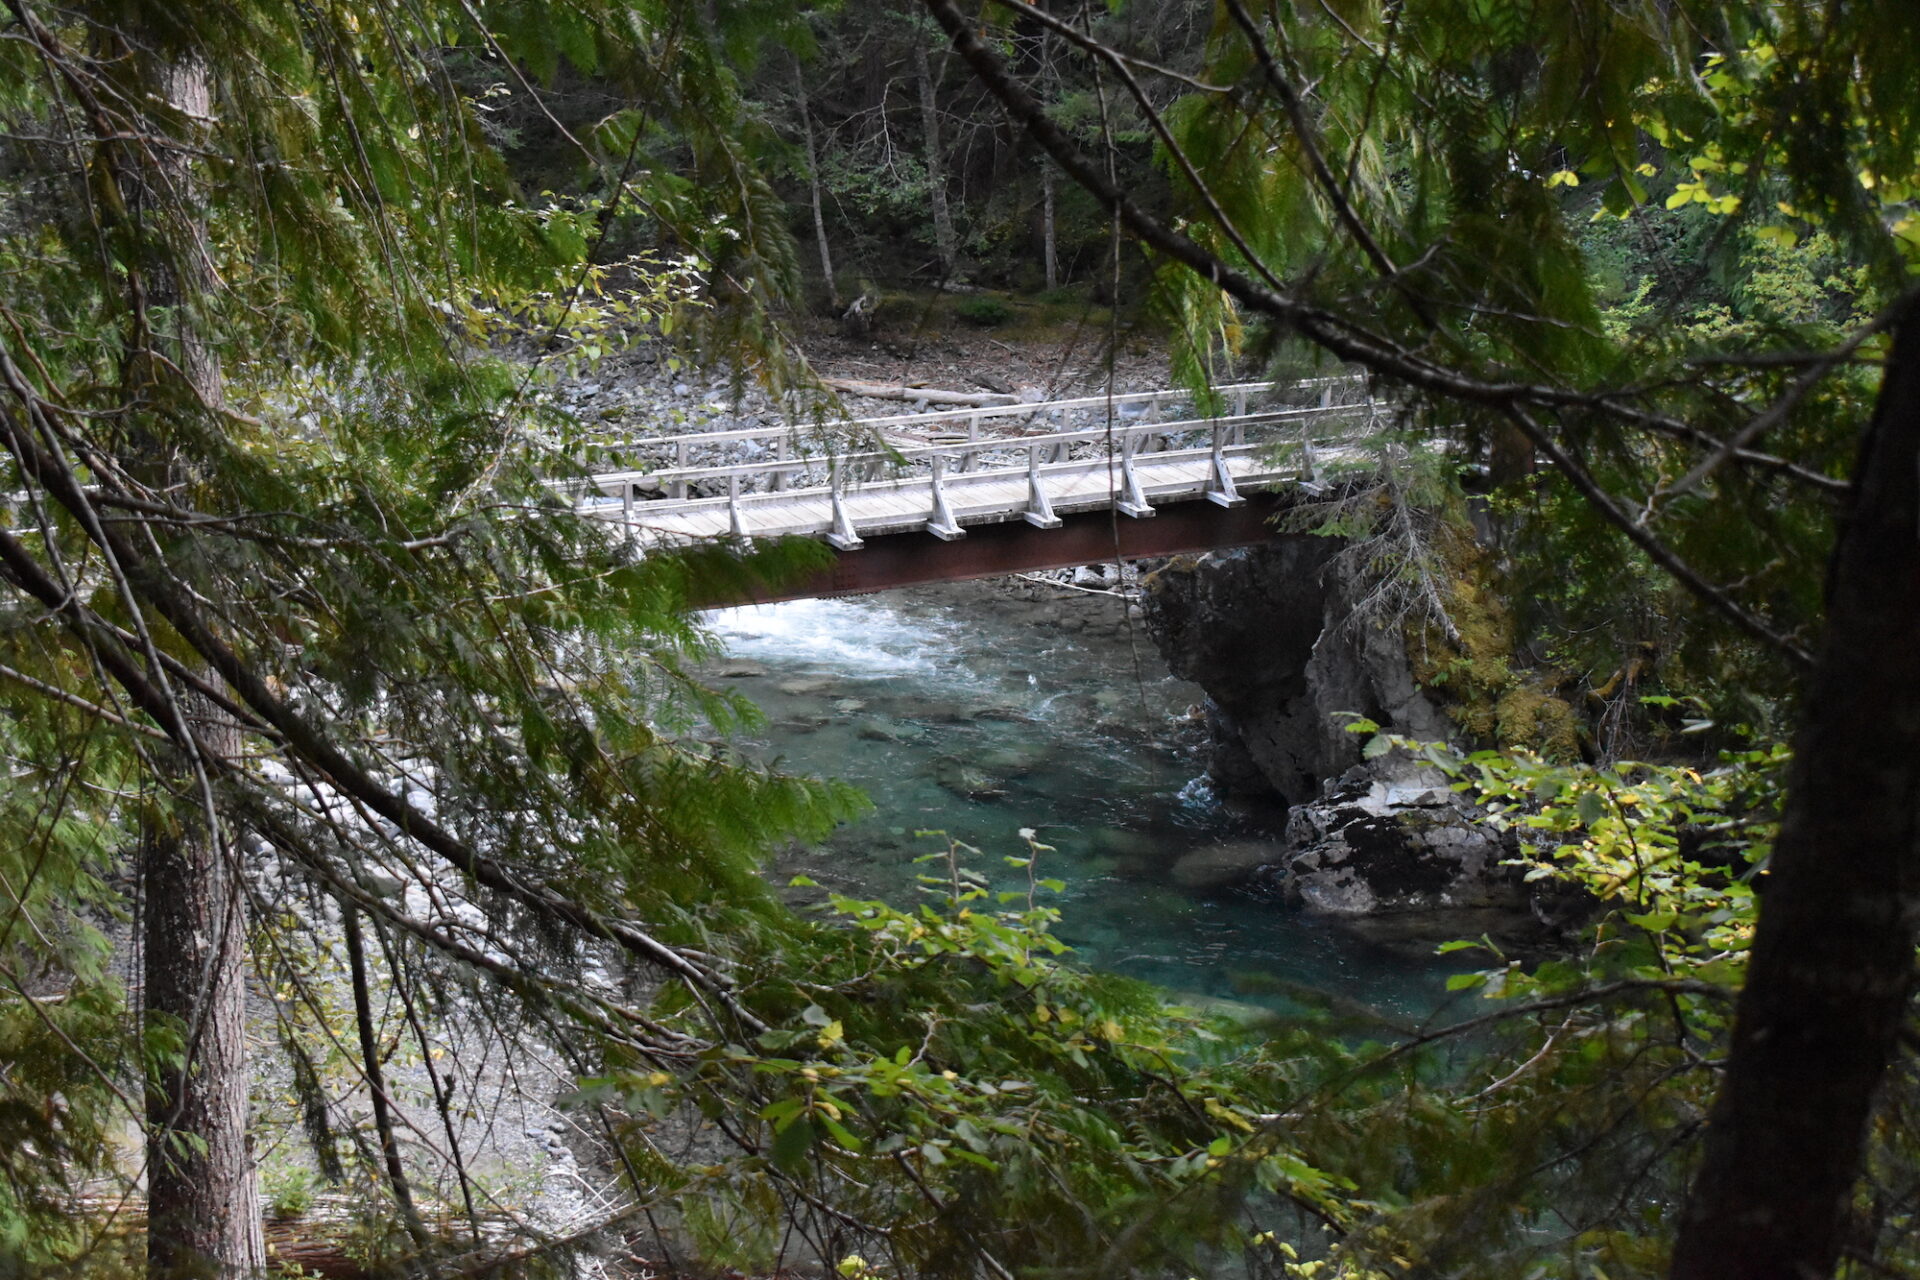
About a mile and a half after Devils Camp, the trail runs along the banks of Ross Lake and across a beautiful suspension bridge at the Devils Creek gorge. Water levels on Ross Lake are incredibly low right now and most boat-in camps are closed, so it wasn’t possible to easily hike down to the lake. The upside? Very little boat traffic and camps were empty. I only passed 4 people heading in, a couple hiking to Desolation Peak and another pair of hikers starting the loop clockwise. It was a surprisingly low number of users for the start of a holiday weekend.
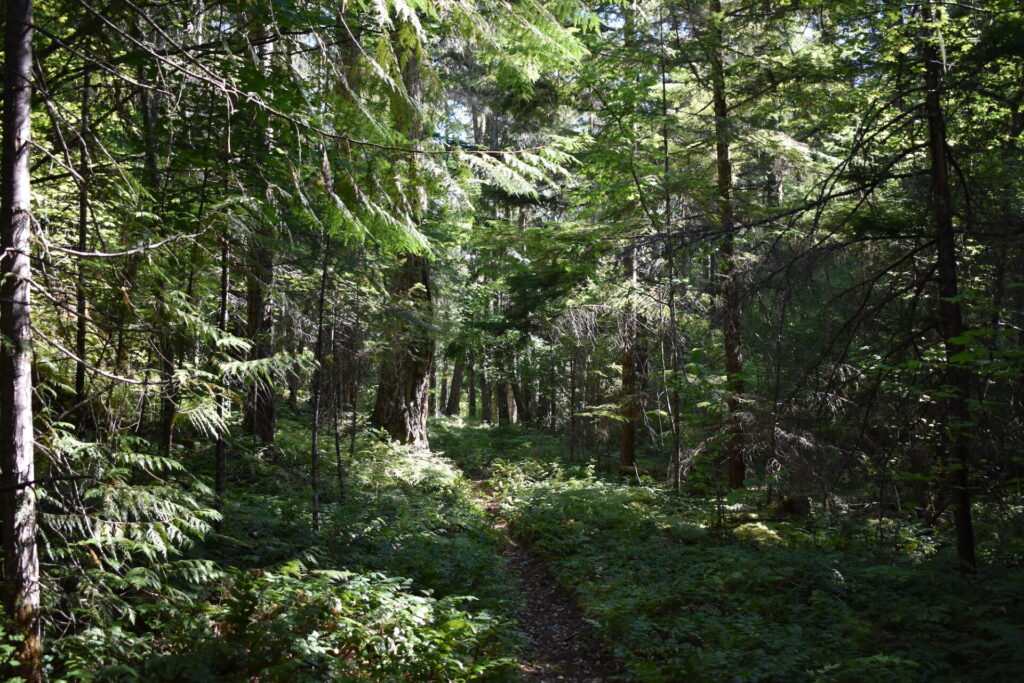
After the Devils Creek bridge, the trail turns away from Ross Lake and much of the remaining miles are through forest. While I can understand why some folks cut out these miles, they’re beautiful in a completely different way and the loop just wouldn’t be the same experience without them.
There’s a small climb near Hidden Hand Pass and afterwards, the trail turns eastward and the distant hum of Highway 20 traffic returns, both a welcome and unwelcome sound. After 3 days in beautiful wilderness, I always find it tough to be back to civilization, but there was also some excitement in knowing my journey was almost complete. My arthritic knees and hips were giving me plenty of feedback that they were ready to be done and it had been a long, long day.

The last stretch of trail is mostly flat, but does have some maddening but very short rollers up and down drainages along the way. Of course, once you finally do reach the Ruby Creek bridge at East Bank, like any good devilish trail, Devils Dome dumps you 100’ below the parking lot, which feels more like 1,000’. As I dug my way up the final climb with my trekking poles, in seemingly slow motion, my hips and knees screaming, two forest service officers passed me heading down. “Coming off the loop?” they asked. I must have looked good!
When I finally landed back at my Jeep at 7:30pm, I crawled in the back, never so thankful to prop up my feet and bust into a can of Pringles. What an amazing 3 days it had been!
I finally got a message to my friend around 8:30pm. As a search and rescue volunteer, she was trying to be eagerly optimistic that I was only slightly delayed and happy to hear I wasn’t in any real trouble. Though I didn’t make the movie I had planned to see, I did make it to town in time for a burrito and margarita before promptly passing out in my Jeep for the night.
With my gear wet from Friday morning’s early rainstorm on Devils Dome, my friend and I changed our plans to head out first thing Saturday morning and instead, dried my gear at the nearby state park and made a new plan: a 35 mile out and back to the Hidden Lakes of the central Pasayten.
Devils Dome was a beastly devil, that’s for sure, but an incredible loop that I won’t soon forget. I recently saw a trip report calling Devils Dome this late in the year a ridiculously hot, dry, brutal, sufferfest of hell. Yep, it is indeed hot, dry, and brutal, but scoring spectacular high camps all to myself, enjoying sunsets and solitude, the gorgeous mountains of the North Cascades, and the wild beauty of the Pasayten? Pure magic! Devils Dome has been by far one of my favorite and most memorable adventures. And a good reminder to pack my rain jacket!
Oh and as far as the brand new La Sportiva Ultra Raptors? They performed flawlessly and kept my feet happy the whole way! Granted, they finished the trip a little less blue 🙂
Total: 41.2 miles | 10,870′ gain
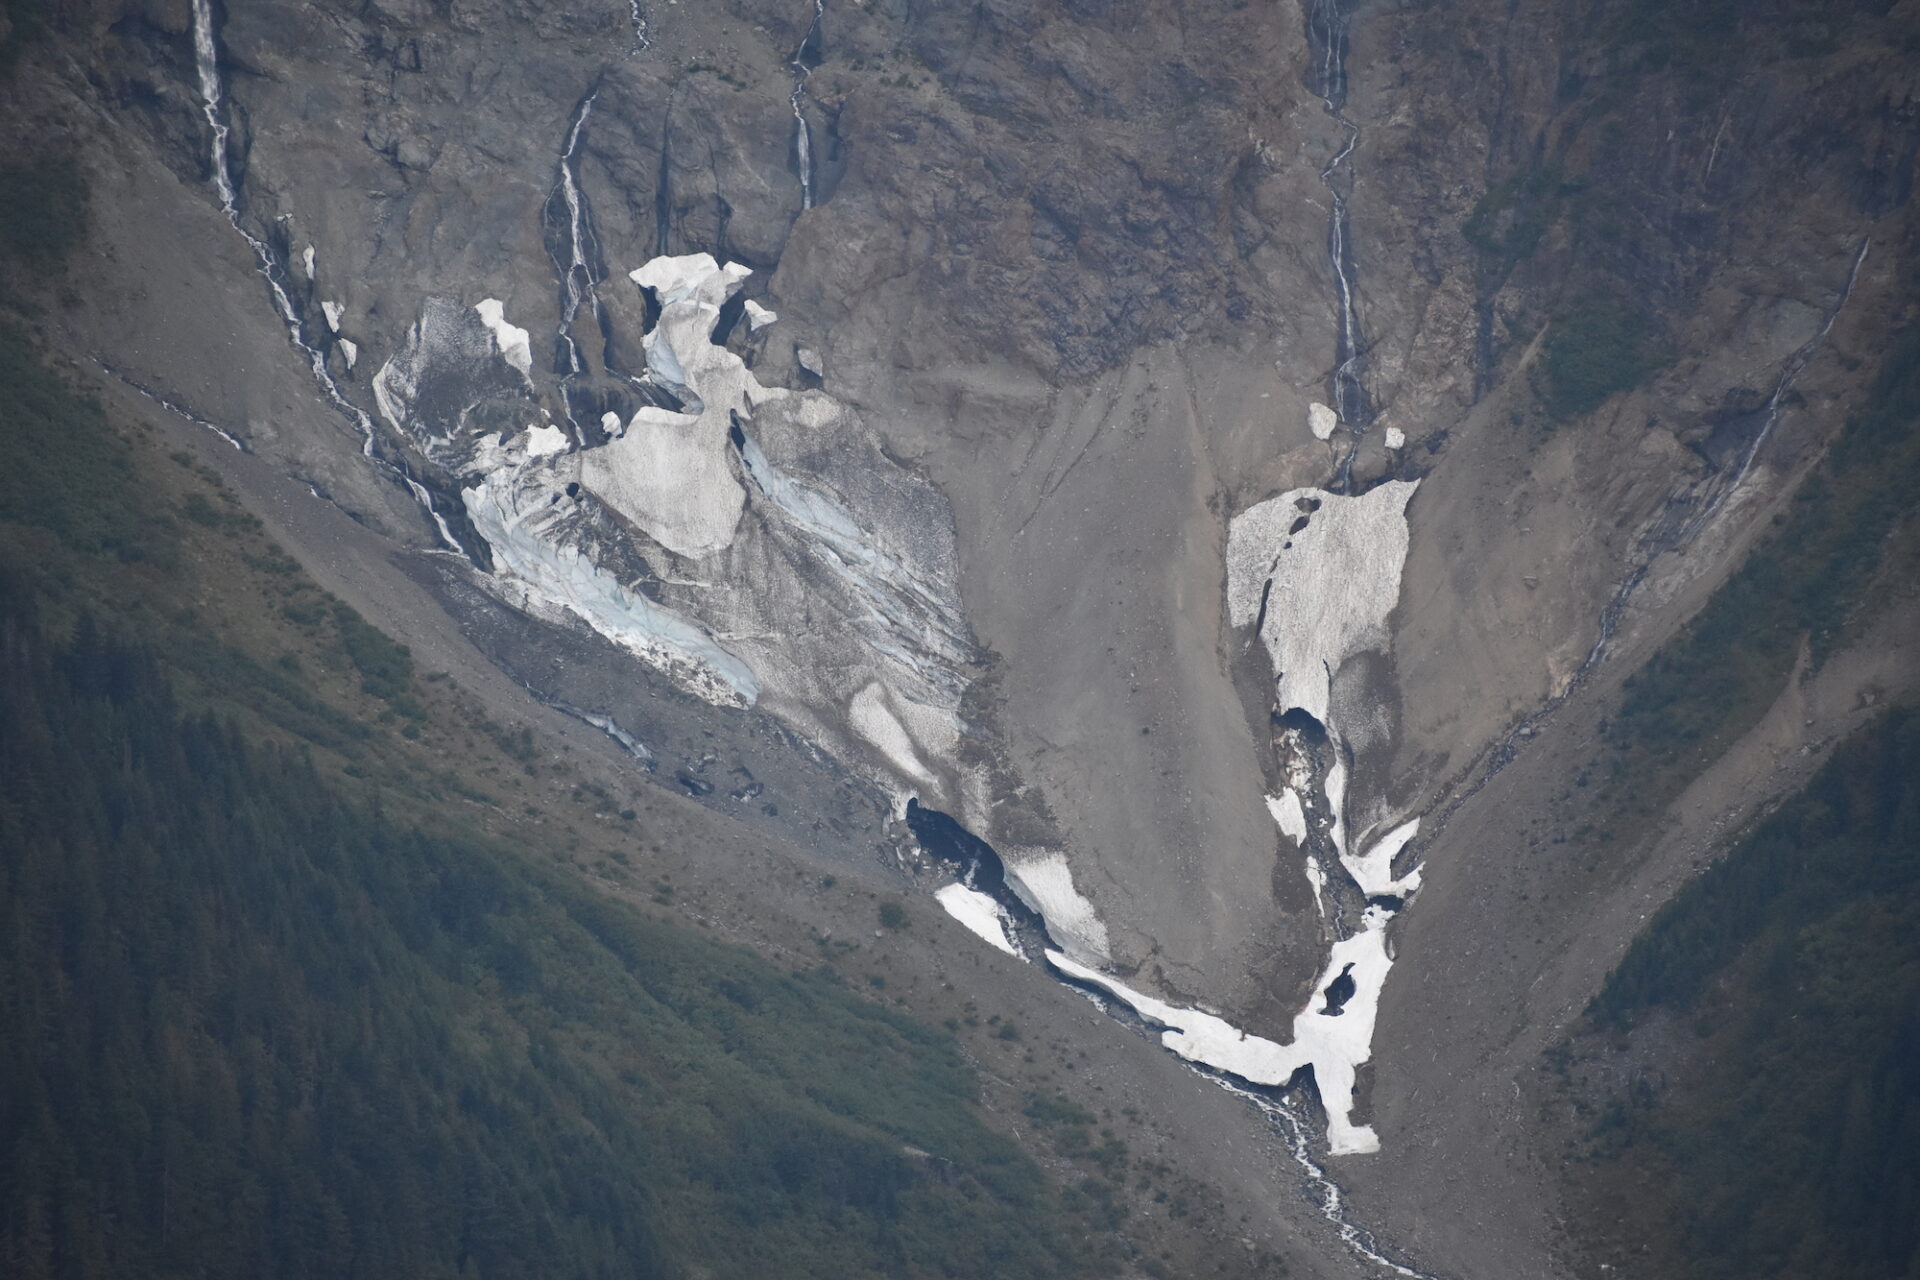
Note: If you backpack Devils Dome late in the season, bring extra containers or bladders for water and know you’ll likely be carrying some extra water weight. I found more reliable water sources than I expected, but it does take some awareness. I found water near the Crater Mountain trail junction around 5.5 miles, then at Devils Park around 9 miles, the South Fork of Devils Creek around 12, the North Fork of Devils Creek around 13.5, then none again until well past the 21 mile mark near the junction with the Bear Skull shelter. Once along Ross Lake, there are well spaced out sources. These mileages are counterclockwise from the East Bank. Though these sources do seem to be reasonably reliable, conditions change every year so don’t rely on my experience.
I highly recommend bringing a map, marking possible water locations, and planning ahead.